Thursday, May 31, 2018

Whispers of the Soul Card

Created another card today using Unity’s 12/17 SMAK kit. I’d tried this flower a couple times before with no luck. I decided I couldn’t move onto more creative endeavors till I made a card with this one. I also decided to try to pair it with a discounted paper pad I picked up that has a vintage, and summertime, feel to it - Crate Paper’s Pretty Party.

I started by stamping the image in archival black. I used another gold Tattered Angels Glimmer Mist on the outside edges. I then mixed orange and green watercolors and began painting the image. Once done, I darkened the edges and die cut the paper into a tag format. I added 2 coordinating pieces of washi tape at the top.

I stamped the sentiment on a paper from the pad and die cut that also into a tag. I have these scalloped cards that I want to use up and pieced 3 papers from the pad onto it. I decided to use a doily that I received as a freebie from Unity and, after darkening the edges of it, glued it in the middle. I had already decided I wanted to join the image and sentiment with a brad and found a match. I layered that on top of the doily and added enamel and crystal dots. I also decided I needed a few more embellishments, so I added a flower button and copper leaf.

Okay, I’m done for the day...time to walk my hairy little pups. Have a great day!


Moments Between Moments Card

Today I decided to used this flower vase as I caught sight of a stray scrap of scrap paper with the curate girl on it and I thought I could pair them up. I picked up the flower vase and sentiment from the Unity Swap site, a good source for used and/or new stamps that need a new home (waste not, I say)! The stamps were from UNITY’s 9/16 KOTM. I also used the Vintage ledger stamp.

To begin, I sprayed the sides of watercolor paper with 2 Tattered Angels Glimmer Mist (I recently snagged another set of 5 of these at Tuesday AM for only $10!); a light and dark peach which matched the scrap paper perfectly! I dried the paper and then mixed a yellow and reddish/brown paint. I stamped the image with my Misti in Watercan Archival paint, and started painting, periodically drying between applying colors. I added some green to the leaves, did some touch up and used a back pen to darken some areas. I decided to use Peeled Paint Distress ink to stamp the ledger to match the paper more closely. I removed with a wet brush any lines impacting the image and called it done.

I used Kraft cardstock as the base and layered on a dingy pink scrap and the patterned paper scrap after cutting to size. I attacked pink fabric ribbon (with a sticky back) on the plain side. I wrapped a fancy ribbon on the bottom of the image and attached it to the card. I finished up by adding enamel dots and a slightly cut down butterfly. I really like how this one turned out and hope you do too! Now, on to the next card..., but before I go, here’s the pics!


Tuesday, May 29, 2018

2nd Set of May ATCs

The first ATC was created using Unity’s Bitty Backgrounds and the Time to Laugh Flowers and my Misti. I colored a complete sheet of Canson Watercolor paper with Oxide ink and Brea Reese Yellow ink and then cut it down to 10 cards. Very sparkly! I then used the plaid stamp to create a background using Fired Brick distress ink. I stamped the flower stamp using black archival ink on regular cardstock and colored in the flowers with Brea Reese inks. I fussy cut that out. I embossed the sentiment in a red ink. To assemble the card, I added Washi tape to the bottom and glued the flowers on. I then added some sequins.

The second ATC was created with a stamp from a Love Beyond Measure kit and sentiment from the So Very Grateful kit. I used regular cardstock with this one. I stamped portions of stamp with Archival navy ink and embossed it. I then cleaned the stamp on my Misti and used a red ink on the flower portions of the stamp. I then used my Misti to emboss the sentiment as well. I added the sparkly Brea Reese Red ink to the flowers to make them pop. I also used a Navy colored pen. A simple ATC, but I think this was my favorite this month. Somehow, the blue and red colors also seemed in line with Memorial Day.


Monday, May 28, 2018

A Girl and her Adventures Card

Okay, I really should have been done exercising by now and instead I created this card....oh, the guilt! (Right...!? 🙄🤣) I had stamped out this girl from the 12/16 SMAK kit a week ago and hadn’t found the right ephemera and papers to use on her. With my recent purchase of A Girl and her Adventures kit from Unity (I love this kit), and a baggage ephemera piece I picked up, I found the inspiration I needed to use it. I also used a sentiment from the 6/17 SMAK kit, and the Eiffel Tower from the 12/12 KOTM kit.

I think I had stamped the girl using Vintage Photo on a pink sheet. I found a nice Prima paper that could be used for the tower. I stamped the Tower using Tattered Rose and Espresso on the edges (I didn’t want the Tower to overpower the girl, but to blend in. The base paper for the card came from a scrapbook set and has French words on it. I decided, because the color matched and I wanted a little variation to stamp the suitcase on it. I them used pencil to color in the flower centers.

I colored the girl using my Prismacolors and gel pens in a few places. I decided to frame her head with the flowered paper I got from another pad and added 2 different Prima Washi tape pieces. I also wrapped a fancy string around her. By the way, I gave her a French manicure 😊!

I used a few pieces of ephemera, including the luggage piece which I also added color to. I stamped the 2 sentiments I wanted, The first on the pink word paper and other on plain scrap paper, then die cut the first and fussy cut the other. I added coloring to the edges of both. I pulled the card together and added white pearls to match her jewelry, and voila, I was done! My coloring wasn’t the greatest on this one as my guilt was pushing me to rush to complete this one! But I’m still happy with the look of this one! Hope you like it!


Sunday, May 27, 2018

May ATC Set 1

Had inspiration for these 2 ATC’s from fellow crafter’s!

The first, Cherish Your Dreams, was inspired by Annie Sterner’s following suggestions: purple, teal, butterfly and flower. I used the stamps from Unity’s Cherish Your Dreams and the 6/13 KOTM. This time, I used Memento Ckalk inks in blue, lilac, and blush for the background. I dipped my paper into each color and dried after dip. To stamp each image, I used a combo of colors, purple and black for the sentiment and butterfly and teal and black for the flower in various vendor archival inks. I touched up the butterfly with Brea Reese Violet ink to make it glitter and a purple pen for image clarity. I colored the flower with the Memento Chalk ink, a little distress ink for shadow, Brea Reese blue and green combined to make teal. I also used a pen on this one as well as a Posca pen. I also used a blush glitter pen on both images. I added a purple and teal sequin. I know this sparkly card met the criteria, for sure!

The second card, Where I Belong, was inspired by Shannon Edward’s criteria: polka dot, shimmer and gray. I decided to use Unity’s Progress Not Perfection kit for the image, dotted background stamp from the May 2018 SMAK kit and an Art Anthology dotted stencil. I first sprayed an entire 8.5x11 piece of watercolor paper with a white Tattered Angels Shimmer Mist. I then cut the pieces and stamped and embossed the image using Watercan Archival ink. I used blue glitter pen on the flower. I then used a Memento blue ink to add tiny blue dots with the background stamp and Hickory Smoke ink with the stencil to surround the image. I used an oval die cut that was slightly too big for the ATC, so I cut the sides to make it fit. On each cut blue/gray polka dot patterned ATC sized paper, I added a grey frame with a pen and mounted the image. I added 2 clear crystals and 1 silver dot. I think this fit the criteria as.

These were fun to do as the inspiration made me change things up a little. Hope you like these little cards!


Saturday, May 26, 2018

Grunge Flower Card

Received Unity’s December 2015 SMAK kit in the mail today, and felt the need to color this flower. I had some ephemera lying around I decided to use as the color inspiration, with the hope to combine into the card. Used my tube watercolors today on the image and background, and hickory smoke, peeled paint, spiced marmalade and vintage photo oxide and distress inks with the Tim Holtz stencil.

I started by stamping the image with Watercan Archival ink. I mixed my starting colors and painted around the image first. After drying the background, I began coloring the flower, drying between the different hues applied. Once I was happy, I used the stencil to fill in the background and then applied hickory smoke on the edges and vintage photo inks. I made sure to keep the top left light colored. I used my Misti to stamp the sentiment from another SMAK kit, first in the spiced Marmalade and then, offset, with the Watercan inks.

I pieced the paper onto the base, added ephemera, and distressed the edges. I backed the image with both gray and brown paper. Finally, I added fancy ribbon at the bottom and enamel dots.

First time in a while that I haven’t used shiny inks or mists. Although, I do appear to be on a flower kick. I’ll think I need to change that up next card! Well, till next time, happy crafting!


Friday, May 25, 2018

Too much of a Good Thing Card

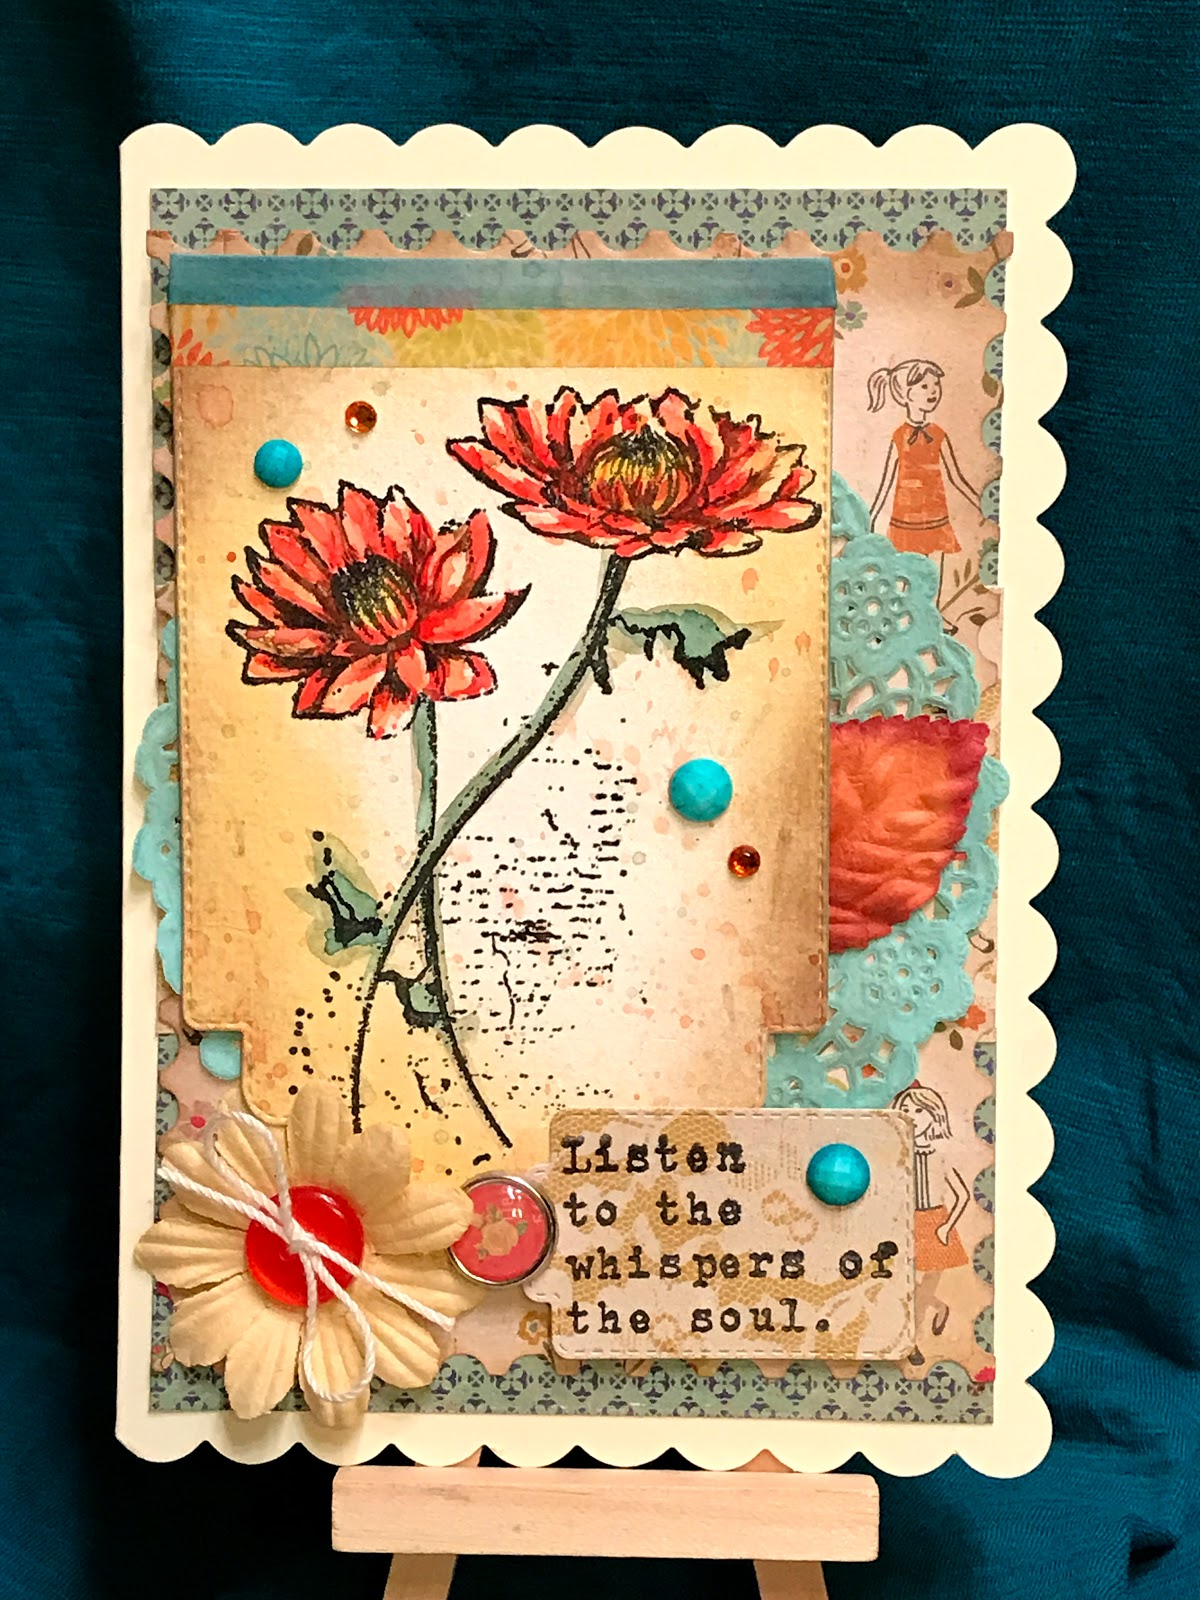
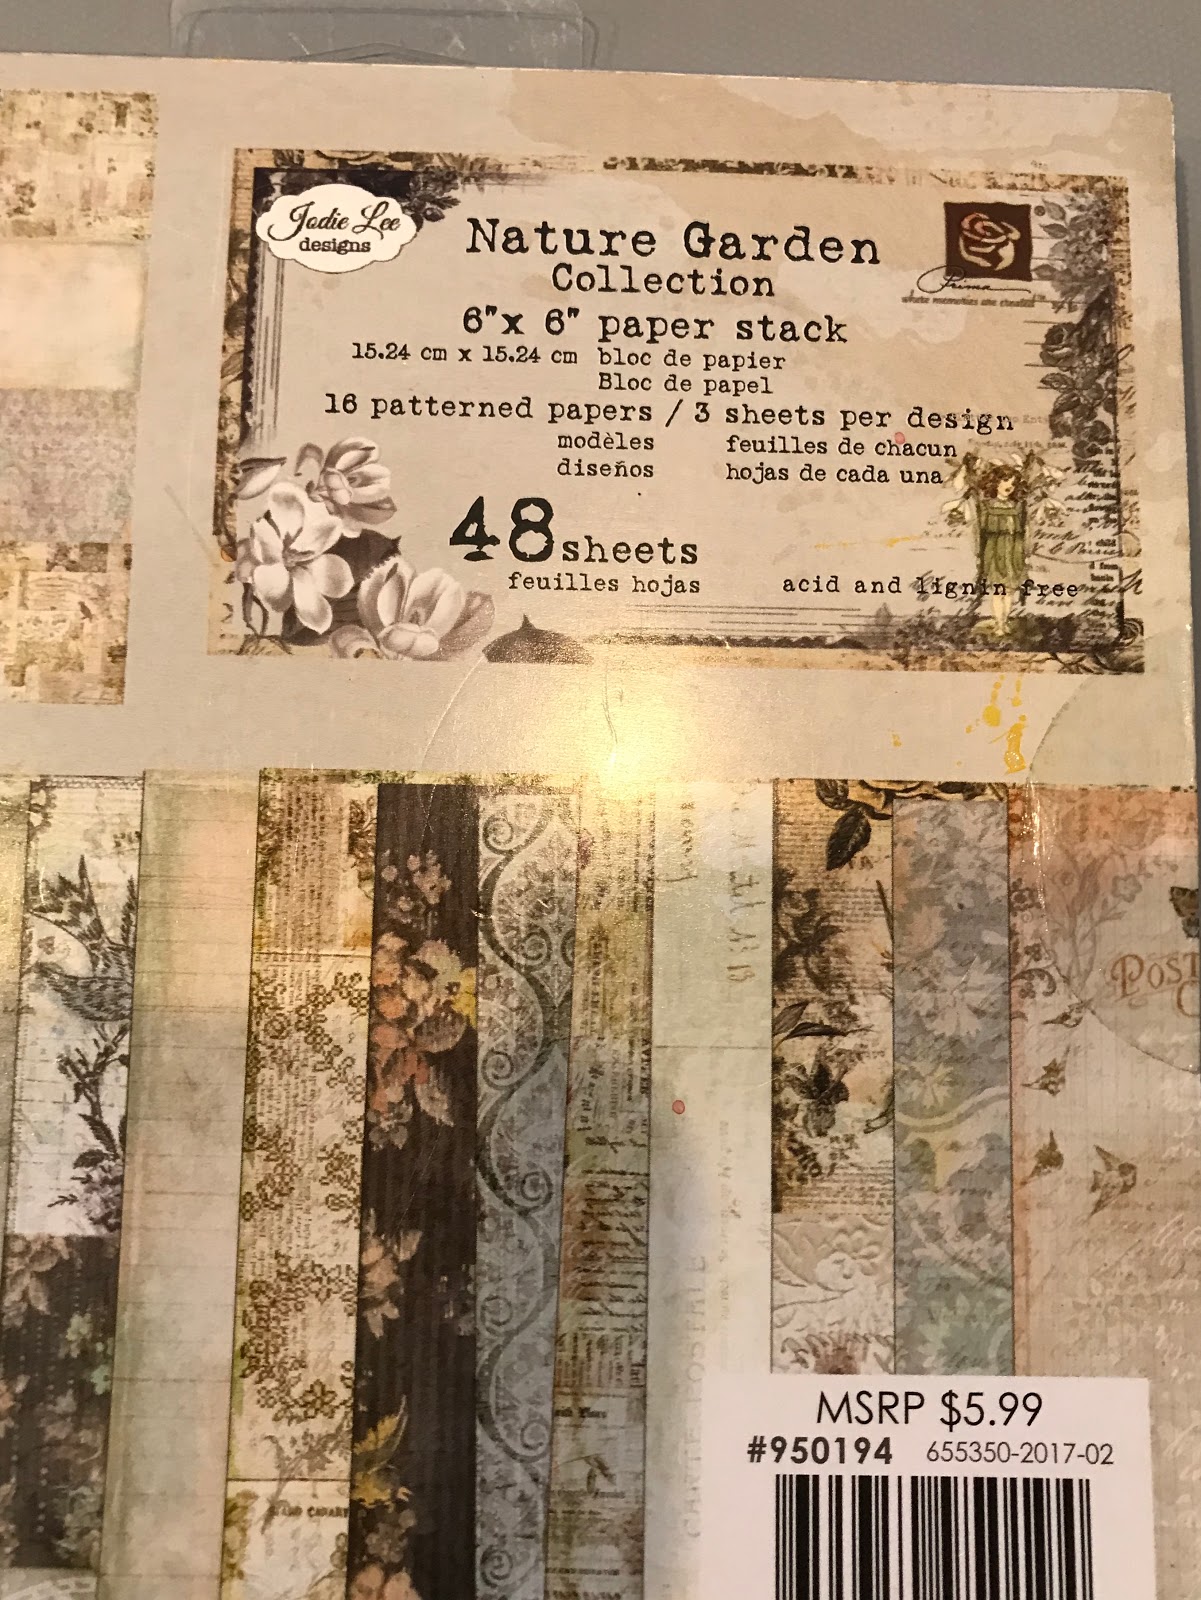
Ever be in the process of going to bed and just wanted to stamp something? Well, an hour and a half later, at 11, I had almost completed this mishmash card. I used Unity’s much of a good thing kit - love the flower in this one and the 9/15 SMAK kit for the leaves. Also, pulled in a TCW stencil and a Bo Bunny paste I picked up cheap. I used the paper in the pic below for the color inspiration.

I began by stamping the flower, with my Misti using archival inks, in pink, and the stem in coffee. I mixed my paint and began coloring the flower and the stem. Kept adding colors to enrich the flower. I then decided to add leaves and stamped portions of the leaves in the bottom using peeled paint distress ink. I blended the green color of the leaves out. I then started added diluted color to the background. I ended up spraying a darker pink at the top, using a pink Glimmer Mist and adding splatters of paint.

At this point, I decided to add the sentiment. Once done, I wanted to add a background stamp, but that would have been too busy. I happened to glance at this Bo Bunny gold paste and pulled out a stencil. I quickly added a corner embellishment and a mesh design. Since it was getting late, I was a little sloppy, but the lighter color, thank goodness, is forgiving! I tried using the gold paste with water on the flower and then used a little glimmer pen, so the flower is sparkly in spots.

At this point, I wanted to deepen the flower outlines and generously used a black pen on the images. I also spotted a wooden butterfly to add as an embellishment. I colored the butterfly with a gold chalk writer and then used a combo of mediums to add color and dimension. I wanted the butterfly to blend in. At this point, I decided I needed to go to bed as I had no idea if I had created a mess or not.

This morning, liking the look, I pulled out my Derwent pencils and added color to the leaves, around the gold embellishments, and the edges and decided I was done messing around. I mounted the paper on Kraft cardstock and added crystals.

This card was definitely created organically! I just let it flow. I had fun trying out the gold paste, which was a trifle runny, but dried beautifully. Given, I was flying by the seat of my pants and put this together very quickly and haphazardly, I think it turned out okay! Hope you enjoyed the write up and it serves as inspiration to be artistic sometimes and not methodical in your endeavors! It is fun to just let go... happy crafting!


Thursday, May 24, 2018

Alcohol Ink Poppy Card

I have been meaning to try this technique after watching a video sponsored by Unity Stamp Company. Here’s Echo Noble’s original video - https://youtu.be/Q6Fg-g2zdSI. I used the following Unity sets to create this card: Donna Peony kit, 5/18 SMAK kit, 3/18 SMAK kit, Time to be Happy Again kit, and much of a good thing kit.

To start I loaded up my Misti with Yupo paper and the inside flower stamp. I had already pulled out my Ranger alcohol inks in a yellow, orange and red color. I had my rubbing alcohol ready to clean the stamp, a clean distressing pad, and my alcohol blending solution ready. I pretty much followed the video instructions. I then filled in the rest of the paper with an ocean blue color using the same technique. I stamped some red and blue splotches onto the blue part.  I then used the same technique to stamp the outline of the flower using orange and then teal blue Stazon inks (which shows up as green). I filled in white spots with alcohol markers and and outlined the flower in first black, then white pens. I used the teal ink again to create a border around the flower.

To create the rest of the card, I took Kraft paper and created a background on it using 2 different stamps. I stamped the sentiment and added color to the lines by first using a background stamp to add light orange dots and then colored the edges with peacock feathers and vintage photo distress oxide inks.

I pulled the card together with orange striped paper, ribbon, sequins and enamel dots. This card joined some of the other cards in being more focused on technique rather than style. The colors are certainly vibrant, the card turned out okay and the stamps cleaned up fine. Was very fun to try a new approach today. I will definitely try to create some more cards with this beautiful Unity Donna Downey stamp!


Sunday, May 20, 2018

Don’t Overthink It Card

Unity has a new challenge going on - Unity Girl Card Challenge. So, of course, I felt the urge today to do another card using a stamp from Unity’s March 2018 SMAK Kit. She’s a little tough to use as she can look scary, so I was challenged to soften her expression and angles. I used a few other Unity kits I’ll mention as I go on.

To start I pulled an Authentique paper pad out to use as the color inspiration. I began by stamping the girl using black archival ink with my Misti. I then pulled out my watercolors and added color to the flowers, dress and background, ensuring the darkest yellows surround her head. I then pulled out a background stamp from the 12/17 SMAK kit, hickory smoke ink and added texture to the image. I finished by adding some spatters.

I then took the image and used my Prismacolors to work on her face and brooch, and add shadows to her dress and the flowers. Once I was satisfied, I added the sentiment from the 12/17 SMAK kit using my Misti. I then die cut the paper using a postage die and backed it with dotted paper.

Next, I tried to find paper for the card and being unsuccessful, decided to make my own using oxide inks. I did use the Authentique paper to create a horizontal strip, a vertical strip, a die cut key (colored) and a doily (using a Bo Bunny die cut). I pulled a Kraft paper out and used the following stamps to decorate the paper: blots and right side background stamps from the happy kit, and the circles and receipt from March 2018 SMAK.

Finally, I pulled the card together with string, a Prima flower and, lo and behold, Unity’s brand new Aurora sequin kit, which, surprisingly, matched! Had fun on this one using new stamps and was challenged to make the girl interesting and to create a background paper. I think it all turned out okay. Thanks for stopping by!


Thursday, May 17, 2018

Graduation Card

Update at the bottom...2nd card!

Was inspired today by an Echo Noble video to use a couple background stamps to create a card on top of a pretty created paper. I, in no way, came close to her card, nor did I use the same mediums, stamps or technique. But, at least, it inspired me to do something different. Again, I had to play with my shiny new things, in this case, a white/pink/gold shimmer mist from Tattered Angels and the Delicata Rose Gold ink. I pulled out some leftover My Mind’s Eye Blush paper which has shiny Rose Gold accents throughout the pad, and for this reason, went with navy and pink as a second color.

To start, I sprayed watercolor paper with the mist and dried it. I then took the large stamp from Unity’s 6/17 SMAK kit, my Misti and clear embossing powder and embossed the doilies (?) image in several areas. I then took Chipped Sapphire Oxide (which I wish I hadn’t used as it creates a dull, chalky finish) and stamped the butterflies from the 3/16 SMAK kit in a couple spots. I then tried to add pink to the paper (Worn Lipstick), first, by adding color to the butterflies, and then adding pink and blue spatter. Another reason not to use oxide as the blue bled a little. To darken the pink I used a little pink Brea Reese glitter ink.

Once dried, I embossed the sentiment from the same 6/17 SMAK Kit using Memento Paris Dusk ink. To darken the navy lines, I used a dark navy Sharpie. I don’t think it’s advisable to emboss on top of already embossed images. It works but is slightly choppy. I added a rose gold net ribbon with a narrower navy ribbon and bow on one side. I added pink, navy and rose gold dots.

I used Unity’s Special Wishes sentiment kit for the inside, added a little Rose Gold color and added blush colored sticky strips. Finally, I stamped my new “Created by” stamp on the back of the card (from Magnuson Stamps)! The dog stamp reminds me of my little Havanese pups, so it seemed appropriate for me! The card is pretty and sparkly in person and I learned a few things from this card - need to improve placement of secondary stamp, use non-water based paints for images and don’t double emboss! Hope you enjoy this one and have a great day!

Update: redid card quickly with following changes: 1) non-waterbased inks 2) better placement of butterflies 3) added 2 more background stamps from 1 5/18 SMAK kit, LOL JoJa kit, and sentiment from 7/17 KOTM, 3) no embossing! 4) Spectrum Noir Glitter pens and 5) different ribbon and plain navy paper backing! Like it better, for sure! See originals below the new card!


Wednesday, May 16, 2018

Loved This Day Card

This card will actually be an anniversary card for my husband (now that I see it completed)! It is soooo sparkly and layered, oh my! I used a lot of products on this one, feeling I needed to spruce up the stamp a little. The flower stamp and sentiment are part of Unity’s 9/15 SMAK kit...a great kit by the way (other cards I made using this kit are in this blog)! I used another sentiment from the kit as background writing. I also used the dotted background stamps from the current Unity 5/18 SMAK kit and a long skinny floral stamp from the 12/16 SMAK kit. I used a TCW stencil to add some numbers and other graphics to add white and texture.

To start, I pulled a special handmade thick textured watercolor paper I received from Simon Says. I spritzed the paper with a new Pink Tattered Angels Glimmer Mist I just picked up and then dried the paper. I then used my Misti to stamp the flower with archival ink, recording where I placed the paper and just cleaning and leaving the stamp in place so I could restamp once I finished coloring the flower. I started coloring the flower with metallic paints, but they were too light. So, I moved on to my Brea Reese Glitter inks. Since I have a limited selection, I just mix colors to get darker tones. I did add Peeled Paint to the leaves to darken them. I didn’t have a color scheme in mind except to support the new Tattered Angels background color. I restamped the flower to bring out the black.

Next, I added a background to the flower using the stamps I listed above in Black Soot Oxide and Candied Apple Distress inks. I also took out an opaque texture paste and added some white objects. Finally, I painted around the flowers to make them pop a little and inked the edges of the paper and added Posca drops.

I used a variety of papers, including a freebie I received from Unity. On one of the papers I stamped the floral using my new Delicata Rose Gold ink (and it is beautifully shimmery - just gorgeous! Had to try it of course!). I also had to use my new Prima washi tape that matched perfectly! Lots of layers on this one! I stamped the sentiment using a dark archival ink and the Candied Apple ink (to lighten the color a little).  I backed it with the paper scraps.

To finish the card, I added a sparkly rose gold net ribbon and rose gold dots. I wasn’t sure I was going to like this card, as it is a mishmash of things. But, I think it turned out okay in the end. If nothing else, it let me play with new and different products! Thanks for stopping by and happy crafting!


Tuesday, May 15, 2018

Beach Girl Card

After mailing off 18 ATCs this afternoon, I needed a painting fix! My neighbor has been redoing their pool, the weather has been lovely and I’ve been pondering a ride on the coastline. All getting me in the mood for a water fix! So, the next best thing, for today, was to try to create an ocean view! This card was created using Unity’s Beach Girl, Layers of Life JoJa kit, and Inspired Minds kit and the Art Anthology Take Flight stencil. I also wanted to use a Bo Bunny Teal Dotted paper I thought would serve as the color goal and the clothes on the beach girl.

To begin, I took watercolor paper and placed it in my Misti. I then took the curlicue (or flourish) stamp and inked the top curves and stamped several time in a couple spots. I did this several times using different distress and oxide inks...in Mermaid Lagoon, Evergreen Bough and Peacock Feathers. I then used those same colors and a wet brush to carry the colors down. I dried that and then found a great ink splotch that makes the best spray if turned on it’s side in the Inspired Minds kit. I inked that up with a mixture of colors including Chipped Sapphire to get a darker effect.

To create the stones, I used Hickory Smoke and Walnut Stain inks and 1 of the lines from the kit. I also colored in with some gathered twigs.

To create the background and sea level I painted a line using the blues and added yellow toward the center. For the sky, I carried the yellow up the sheet with the darkest color at sea level. I also spayed some Tattered Angel yellow again mostly at the sea level. I also added the birds using hickory smoke and a makeup sponge and white Posca drops.

I stamped the girl on other paper and the Bo Bunny paper. I colored her in with Prismacolor pencils and fussy cut out her patterned paper clothing and added it to the sheet. I then fussy cut her out. I found a wood patterned paper and stamped the sentiment on that and added borders and pencil colors to the wood to distress it and cut it out.

It was easy to finally pull the card together with sequins and some crystal dots. This was my first attempt at creating an ocean scene and I’m rather pleased with how it turned out, given the non-water based stamps I used! Anywho, hope you enjoyed this card! Happy crafting till next time!


Thursday, May 10, 2018

Grateful Butterfly Card

Yes, I created a card for a grateful butterfly today 😂 - just looking at how I named this post! Am slap happy after creating 20 ATC’s for swaps the last 2 days! Needed a card break AND my Unity May 2018 SMAK kit arrived today! Woo hoo!

My eye landed on a lot of stamps in this kit but I picked out the butterfly to start with. I also pulled out my Prima Cherry Blossom pad and picked a marble sheet to stamp on. Luckily, this paper is rather heavy and can stand up to a little watercolor. I stamped the butterfly using Gathered Twigs Oxide ink using my Misti. I also darkened the butterfly to make it stand out by restamping just that part using Black Soot Oxide ink. I then took my tube paints and mixed up a brown and cool pink and painted the butterfly and stamp images. I also spatter a little paint. To get a darker brown on the wings, I pulled out my Kuretake set. After painting and drying the image, I colored the stamp with clear Spectrum Glitter ink, added Posca dots, and used a brown pen to darken some edges.

To add a little more color, I pulled out my Picked Raspberries and the Twigs and spattered the background, even using a background stamp to get large dots. I had already picked out background paper and I added both colors to the edges. I also found a dark pink scrap paper I could use to frame the image. 

To complete the card I added fancy twine, sticky butterflies, and gold crystals. I colored the “grateful” word, I received as a freebie in the kit, with a copper/brown color using a Chalk Writer, and added that. This card came together very quickly! Hope you like it! 


Tuesday, May 8, 2018

Love is Eternal Card

Colored a little too vigorously, this flower from the Layers of Life Eternal kit from Unity. I received a Violet Brea Reese Glitter ink today that I wanted to try (shiny new thing syndrome)! I started by adding lilac, violet and pink colors to the watercolor paper and dried it in between. I stamped the flower onto a masking sheet and fussy cut it out. I stamped the watercolor paper with London Fog Memento ink. After masking that flower, I stamped it a couple more times.

I began by coloring the centers and then the tips of the flowers. I wanted some depth to the flower, so I started shading in some of the flowers. I used a combo of Memento chalk ink and distress and oxide inks. I used the Brea Reese dark violet in the flower centers. After coloring the flowers, I moved on to the leaves and then filled in the flower background with a combo of colors including the Brea Reese. I lightly stamped the background grid image using a green color. I then spattered colors around the paper.

After the paper was dried, I used a white pen to lighten spots and then stamped the sentiment using archival ink. I used my Misti for all the stamping. 

To create the card, I covered the white cardstock with a violet dotted paper. I used an oval die on the watercolor paper. I diecut a pink paper into a rectangle and decided I wanted to try a Tim Holtz die on the corners. I backed that paper with a lighter pink and, finally, after mounting everything, added crystal butterflies.

I think next time I will try a lighter hand coloring the flowers. I grew too bored and impatient coloring each flower! But I discovered I really like the dark rich color the Brea Reese violet ink produced! Well, enough on this okay card! Happy crafting!


Monday, May 7, 2018

Blue SMAK Flower Card

Used the flower, 2 background stamps and the sentiment from the Unity 12/16 SMAK kit to create this card. I was originally channeling a patterned paper to create the background. To complete the look, I also used the background stamp from the Layers of Life Eternal kit.

I began by dipping the watercolor paper in yellow, forest and hickory smoke oxides and dried the paper. Using a Misti tool, I then stamped the diamond pattern background stamp across the top in hickory smoke. I stamped the left side flower background stamp in blue and green oxides. The bottom background stamp was done in hickory smoke again. Following this I stamped the flower in a combo of medium and dark blue oxides and the stem and leaves in the smoke and forest green oxides. After this, I started spattering white, orange and red colors using the Posca pen, oxides and Brea Reese ink.

To color the flower, I used a combo of blue inks (oxides, distress and Brea Reese). I also added some white ink. On the stems and leaves, I used the forest green and added silver glitter pen (again channeling the patterned paper),

At this point, I decided I wanted more of a contrast around the flower and added a messy wash of orange. I probably could have skipped this step, but I didn’t! So, it is what it is! I stamped the sentiment, added blue ribbon on the side, dark enamel blue dots and mounted it all on Kraft cardstock. As usual, I am experimenting on creating interesting, supportive background paper that complements the edginess of the mixed media type images. I think this turned out okay, but Ned to continue practicing this style (I love doing this freestyle stuff...good story and I’m sticking to it!)


Bee Cards

Stared making a bee card yesterday and ended up making 2 when things weren’t working right. I used the bee, honeycomb and sentiment from Unity’s April 2018 KOTM on the first card finished and used the bee, honeycomb and both stamps from All Hail the QUEEN Bee kit on the second card.

On the first card, the honeycomb was double stamped which produced a reddish brown color. This caused a problem later in color matching so I added a black pen and grey Faber Castelle Artist pen in silver in corners. I used a yellow Glimmer mist as well as yellow and orange Brea Reese Glitter ink and yellow distress ink to fill in the honeycombs, bee and bee background. I also added white Posca dots. I wanted to try using my Memory Box honeycomb die, so I used it on the corners of the watercolor paper. I backed that with black paper scraps and, again, deciding it was too stark, used the silver pen again on the honeycombs. Keeping with the silver theme, I found a silver paper scrap, cut the inside and outside to form a frame for the bee. Then, wanting more from the bland bee, I added vellum wings, with silver pen on the back. To finish the card I rounded the corners on the frame and the honeycomb. I then stamped the sentiment using grey ink on yellow paper and backed an ephemera I found with a grey scrap. To pull the card together, I added a white netting, silver piece behind the sentiment, cream twine and enamel dots. I think I finally found a combo that worked on this one!

The second card components started somewhere in the middle of the first one as I stamped using different inks and trying to match with different papers. So, on this one, I used Brea Reese inks too, but in darker tones, with orange highlights. I also realized I wanted the honeycomb stamped in black. And I finally found the All Hail the QUEEN Bee Kit this morning, so I could use it with this card! (Ey, I looked all over last night for it!) I used a Spectrum Noir Silver Glitter pen on all of the wings this time. I also relied on grey this time as well, with newsprint background, silver washi tape, and the grey background behind bee. I added some non-straight lines by cutting the honeycomb, using a Hero Arts postage stamp and using a Tim Holtz sentiment die. I  used pencils on the sentiment paper. I think this card finally turned out decent as well.

Have to say, I had difficulties with this effort, but I think the cards turned out okay...not great, but okay!


Saturday, May 5, 2018

Feel the Fear Card

I’ve been meaning to stamp this stalk from Unity’s Feel the Fear kit for awhile. I’ve been concerned about whether I could bring it to life. I pulled a Market 49 paper out figuring it would make a nice setting for the stamp.

Pulling my Misti out, I stamped first the stems in Olive Green and Gathered Twigs, masking off the flowers. I then stamped the tops of the flowers with yellow archival ink and then an orange ink. Then I stamped the body with green and gathered twigs. I needed to darken the bases and add more color to the tops, so I used a variety of pencils and pens to give texture and color and topped off the very top with my Posca white pen.

Because I wanted more texture in the background, I used gathered twigs again with a background stamp from the 4/17 SMAK kit. I stamped the sentiment on another paper and inked the edges with gathered twigs again and used my finger to add a little orange.

To pull the card together, I added a rough ribbon, some ephemera from the paper, and crystal topped sequins. Again, this card has a more natural/mixed media feel. I personally like this style, but I’m probably in the minority.

Hope the flower looks okay! Take care and happy crafting!

Sending Love Card

Made an easy card today using 5 different Unity kits: girl from 9/15 SMAK, background swirl from 12/16 SMAK, diamonds from 6/13 KOTM, dotted frame from 11/10 KOTM, sentiment from Antique Butterfly kit. One of these I picked up in a Swap site! Went a little vintage again with soft colors. I used 3 different paper pads, Show in the picture below.

To start with, I stamped the girl on the vintage paper with archival black ink. I then added a little color to cheeks and clothing using Prismacolor pencils and gamsol. You may notice I have a little container with a sponge I put some gamsol in and then just dip in the paper stick to smooth out the pencil lines a little.

I stamped the diamonds to the side of the girl and added similar colors to it and used a black pen for lining the diamonds a bit. I then took a plain mint blue paper and stamped a Tea Rose ink colored swirl background on it. I attached that to another patterned paper with dots to serve as the frame for the girl. I wrapped eyelash(?) ribbon around that combo and tied a bow on the left side.

I stamped the frame for the sentiment using the Tea Rose ink on blue paper. I them stamped the sentiment using black ink. I ran the edges along Gathered Twigs ink.

Finally I added a verse paper to the card stock, layered on the framed girl and sentiment and added crystal dots. I love the soft colors on this one and had fun using other stamps! Thanks for visiting and have a great day.


Thursday, May 3, 2018

Beautiful Card

Wanted to have some fun making a background today. Used Unity’s 9/15 and 6/15 SMAK Kits for this card. I also used a Prima paper pad, Nature Garden as inspiration. I actually feel I got pretty close to recreating the colors in the sheet selected. I used a combination of gathered twigs, fired brick and iced spruce oxide and distress inks.  I also used a stencil at the top.

Once done picking up colors, drying and repeating the process, I took a black archival ink and stamped the sentiment. I then took Red Vermillion archival ink and stamped the flower. I stamped the leaves in olive and coffee archival inks. I then took the gathered twigs and stamped the background words all over. I used my Misti for all of these efforts.

Once the page was dry, I took out my Inktense watercolor pencils and added colors to the flower and the leaves. I also took orange oxide and the white Posco pen to lighten the leaves a little and added a little sparkle with yellow glitter ink. Once done I spattered white ink all over.

To complete the card, I backed the image with plain red paper, added a sequined ribbon at the bottom and the top and added red enamel dots.

Hope you like this card!