Thursday, August 24, 2023

Masculine Birthday - Change And Direction

 So many October birthdays… oh my! Here’s another card I made for the men in my life! I used a variety of items creating this card! First, I stamped on one of my own coffee stained papers that I created a couple weeks ago. Here’s the set I made - 

I intend to do more staining soon! I paired it with a Stamperia paper from the Forest collection for the background.

I pulled out Unity’s Change and Direction kit and started lightly stamping the branches in the kit in coordinating colors. I stamped background dots using Unity’s Bloom in Color kit. I added paint spatters and used the same inks to distress the edges. I also used a Posca paint to add black spatters. I added some ephemera that I had received from a recent Unity order (freebies) that I thought would go - a clear acetate butterfly, black string, and a precut black film strip. I punched out a heart and sentiment from a 49 & Market chipboard to add. I backed the heart and film strip with the Stamperia paper to make them stand out. I also stamped a tiny sentiment from an Altenew set on the coffee paper. To complete the card I added enamel dots, black paper backing and a metal key.

Hope you like this one! 

PS Loving my coffee papers. Can’t wait to use them some more on other cards…. hmmm,  I see a Halloween card in my future! 

Thanks for stopping by and happy crafting!


Sunday, August 20, 2023

Stamperia (et al.) Birthday Card

 Was inspired to create a collage birthday card for my son after glomming on to a bunch of wonderfully creative YouTube videos! Pulled out my Stamperia Alchemy paper collection. I cut down an A7 size paper from the patterned paper, one of the small framed pieces, and a cute cat (since my son has 3 cats)! I then started searching though all my die cuts and ephemera. I found a perfect match with a 7Gypsies puffy world globe that I had! I then searched for more muted (more masculine?) flowers from a couple ephemera books. I found florals and papers I could I fussy cut out, that matched colors I was looking for from Mintay’s first Flora Book and Studio Light’s Jeanine’s Mindful New Awakening Mixed Paper Pad. Both of these contain very pretty images. I used a script Stamperia stamp on one of the papers. I distressed the edges of the papers using Salvaged Patina and Vintage Photo inks. 

To pull the card together, I also added some gold puffy numbers that I distressed with a copper glaze, a coordinating background paper for the cat image from an ArtC collage pack, and a tag with twine that I added a Tim Holtz sentiment to. I had a blast pulling all these pieces together and, better yet, using them! After carefully arranging and gluing (or using foam tape) on all the pieces, I added turquoise crystals to complete the card! I then used a Derwent Inktense pencil to add shading around the elements! I really love the message this sends… at 34, the world is still at your feet to be explored and enjoyed (including those in books)!


Hope this provides you some inspiration to play with your beautiful papers and ephemera! Thanks for stopping by!

Saturday, August 12, 2023

Abstract Balloon Cards

 In July, I participated in a crafting retreat hosted by Lynne Wolfe Bunn. Had to travel to Georgia with a mini supply of my crafting materials that I could push/carry through an airport. Wow… an effort. Stayed at a lovely farm with great crafting and lodging amenities and got to meet 11 very lovely crafty ladies for the first time in person! What a very special experience once in a lifetime experience! Even visited a craft store while there (all mine have closed down)! I even got to check off a tornado from my personally experienced natural disasters list which already includes: blizzard, ice storm, earthquake, fire, and hurricane :-)! So, even though we were without power the last 3 days we still got to share our varied techniques with each other! Here’s the items I created there - 

Toward the end, Lynne pulled out a stack of cards from this box of ideas and told everyone our homework was to create something from our 2 cards.

I pulled out these 2 - 


So, after relaxing when I got home, I started in on my assignment. Since I’ve been loving and sharing with  this group Denise Love’s abstract art videos, I immediately went there. I took out a leftover half sheet of watercolor paper, taped it up and started playing with acrylic and gold paints, inks, gold, black and white Posca pens, Stabilo pencil, stencils, and paste, and created this sheet. I even used a Prima stamp to add some script. I had purposely used my brush and then shading, after playing, to create and embellish the appearance of balloons.

Must admit this was so fun! I then cut the paper into 2 pieces to form cards. In the first card I had to hand cut and paint a balloon for the Technique Tuesday sentiment. For the balloon, I added a black thread and backed with gold paper. I backed the sheet with black paper and mounted that on red paper.


For the next card, I used a Studio Katia die frame and platinum embossed a Picket Fence’s It’s Peopley Out There sentiment. I added sequins to complete this card!

I love how they both turned out so different! Such a fun exercise - check out the Stampers Swap Shop/Buy/Sell/ISO/Share/Swap group for the rest of the group’s challenges and creations!

Hope these inspired you to create something new and different. Must admit I have no balloon stamps… so that was my challenge! Till next time, happy crafting!

Sunday, August 6, 2023

Watercolored Pre-Printed Card

 So, saw this paper on my work table this morning and had to try my hand at watercoloring a flower. It was gifted to me at a recent Stamp Camp week by the lovely hostess, Lynne Wolfe Bunn. It is watercolor paper, but not the best quality. It leaves the watercolors a little muted. So, after laying down the first and second layer, I added some penciling in to darken the colors and tones a bit. Here’s the start of my efforts:

Liking how it turned out, I decided to continue painting a second flower. They really are gorgeous flowers. I added white Posca pen and black pen to the flower centers and to deeply shaded areas. I fussy cut the flowers out, found a complementary patterned paper and added a sentiment strip using a Unity stamp. To complete the card, I added some enamel dots and twine.

Really love the look of these flowers… thank you, Lynne! Well, thanks for stopping by… till next time, happy crafting!

Saturday, August 5, 2023

Color Challenge - Abstract Art - Unity July 2022 kit

 Thanks to Ginger Pelfrey, I was sucked into this beautiful color scheme and abstract art challenge. I’ve recently been engrossed watching Denise Love’s YouTube Abstract Art videos and shared my love of them with a group over on the Stamper’s Swap Shop/Buy/ISO/Share/Swap FB group. I think it’s a fun way to create background paper for cards! Here’s the color scheme:

So, to match up the colors, I pulled out a Ranger acrylic paint, several Gansai Tambi paints, a red graphite pencil, and a gold Daler Rowney acrylic ink. I used a small piece of watercolor paper, taped the edges and began scribbling with pencil. I then randomly added the paints and gold ink. After drying with a hairdryer, I added some red marker marks, pink paint circles with a stencil and white swirls with a stencil and embossing paste. Here’s the result with a piece of corrugated cardboard attached.


I decided I wanted to pair up my abstract art paper with a seashell image and create a shaker card! I also used a matching corrugated paper and scrap paper. I used my Prismacolor pencils in matching colors to color in the seashells from Unity’s Fresh Air and Sunshine kit. I fussy cut out the image and adhered on top of the acetate. I cut out a frame in matching patterned paper and adhered that to the acetate. I added corrugated paper to the bottom of the abstract art and added sequins and stars in coordinating colors. I then used thin foam tape to secure the framed acetate onto the abstract art. 

I used a blue paper for the base, added a gold embossed sentiment and sequins and shells for embellishment. Turned out to be a busy card, but a fun one to create!


Thanks for stopping by and check out Denise’s YouTube videos for a fun look at creating backgrounds. Till next time, happy crafting!


Thursday, August 3, 2023

Unity’s Naturally Beautiful Kit

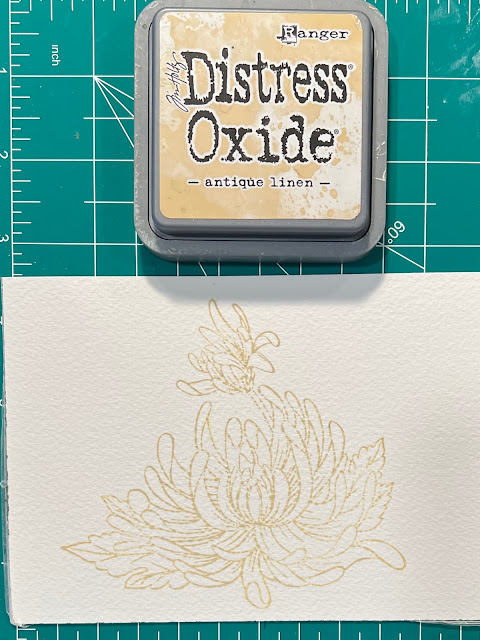
 Watercolored the image from Unity’s Naturally Beautiful kit after stamping it with Antique Linen Oxide ink. I had promised to create a demo video for the wonderful ladies who I met on my Georgia Stamp Camp 2023 trip from a few weeks ago. I decided to capture my efforts on this image as a first step. While my watercoloring skills still need work, and this is certainly not my best, at least my videoing skills are improving… as I captured most of my efforts within view! ;-) —- Low bar, I know! Here it is:


I used Arches Watercolor Cold Pressed 140 lb. paper and Daniel Smith watercolors. I cut down the paper and found 2 scraps to back it with. I added and embossed a sentiment from the kit using both an orange and a green oxide ink. To complete the card, I added crystals and an orange ribbon bow.

Well, thanks for stopping by and checking out my watercoloring journey to improvement! Happy crafting till next time!


Tuesday, August 1, 2023

Unity November Chrysanthemum

 Decided to try videoing my no-line watercoloring… only to realize, I hadn’t set up my phone right. So, I’ll need to try it again later. In the meantime, although I have no footage of it, I did get Unity’s November Chrysanthemum image watercolored! I used Arches watercolor paper and Daniel Smith watercolor paints. I stamped the image first with Antique Oxide ink. I used painters tape to create a rectangle for a frame. This is a somewhat complicated image, so I took my time and relaxed working through the details. 

I used this photo as a color reference.

After cutting down the paper, I added a white embossed a sentiment from Unity’s Everything in Between kit, and mounted it on a card base. 

Thanks for stopping by… happy crafting till next time!


{BYSHC} Sketch Challenge #36 - Colorado Craft Snowman and Bunnies

 Welcome to a new Sketch Challenge on the {Build Your Stash Holiday Cardmakers} FB group!

So, this time I turned the sketch on its side, as I was internally compelled to use this background paper for a card (and the bricks in the paper required me to)! I pulled out a stamp set I thought could go with this sketch and paper - Colorado Craft Co.’s Snowmen and Bunnies kit. After stamping the image on cream colored paper, I ended up using my Prismacolor pencils to color it. I used 2 Washi tapes for edging and added a perfect matching sentiment from SSS’s Snowflake Builder stamp set. To complete the card, I added a few snowflake stamped with Brushed Corduroy, a burlap background and Prima crystals.

What can I say… it’s unique! I love the rustic feel and cream/brown/red color combo for a change!

Thanks for stopping by and till next time…happy crafting!