Sunday, October 28, 2018

October Unity ACT’s

The first ACT was inspired by both the stamp I received in a swap from the 10/14 KOTM and a paper I found in an autumn paper pad. I started by lightly spraying cut down watercolor papers with a gold Tattered Angels Glimmer Mist and a gold Distress spray. I dried and then stamped the image and sentiment included in the swap from the 9/14 KOTM with Archival coffee and potting soil inks. I embossed the sentiment. I also then pulled out Distress and Oxide colors matching the paper, and a yellow and red Brea Reese Glitter inks and painted the leaves and stamp.


I then tied jute string on Ken Oliver metal leaves I picked up at Tuesday morning. I used a wavy embossing folder on the ATC’s, then colored the waves with oxide ink, and added the leaves.


I decided to try using one of the vintage ladies to create a vampire for Halloween. I started by using a blending brush on the cut down card stock. I had pulled out gold, red and purple oxide inks. I added the colors diagonally light to dark. I then stamped and embossed with black embossing powder, on a gray paper, the lady from 6/17 SMAK kit. I fussy cut her out and added vampire details with pens -fangs, necklace, blood, and angry brows. I also added a purple blush and kept her face gray. I then stamped the chandelier from the same kit and used both silver and black embossing powder to give shadows and a metallic feel to it. Finally, I added a spider, a crystal to the necklace, and various embellishments from a Tim Holtz Halloween remnants rub on Kit, that, I, again, picked up discounted at Tuesday Morning. I had fun creating this ATC.


Hope you enjoyed these - stop back and visit again.


Friday, October 26, 2018

Spooky Girl Card

Wanted to make at least 1 Halloween card for the Season. So, after pulling out Unity’s Spooky Girl, I also grabbed Pink Paislee’s Spellcast paper pad. I also pulled out an Oct. 31 stamp, from That’s Creepy Kit, that I received in a grab bag. I originally thought I’d paper piece the girl, but instead ended up using the image I stamped on the gold flecked paper and used my Prismacolors directly on her. I stamped and black embossed the October stamp on an orange sheet. I then decided to use Tim Holtz Idealogy Halloween Remnant Rubs to add some fun details. I pulled another sheet to use as the base, stamped a script stamp from Make Today kit. I fussy cut some hexagons from the same paper and used a non-Unity kit to add a bottle and fly. I stamped and embossed the sentiment on another scrap. I inked up all the paper edges in black, added web and spider embellishments, Trick or Treat washi tape, sequins and black and white twine. 


Not how I envisioned the card, but you have to give your creativity free reign...no matter where it leads! Wishing you a Happy Halloween and happy crafting!

Tuesday, October 23, 2018

Moose Christmas Card

Oh my gosh, I had to ink up my Unity holiday SMAK kits after the last card! Getting back to my comfort zone, I had wanted to try creating an animal with a background of trees, and using both SMAK kits, October 2017 and 2018, offered me a perfect solution. 

I started by pulling out medium brown Kraft paper and stamping the birches in a combo of black and brown. I then used a combo of Prismacolor pencils, a white, 2 yellows, a tan, 2 browns and 3 blues to color in the background. I stamped the moose directly on this paper. I decided to go with the moose as I thought I’d have more room for a sentiment (which I didn’t end up using). I pulled out a lighter color Kraft paper and stamped the moose and fussy cut the moose out. I then used a die and colored in the remaining pieces of the moose on the tree paper. 

I then decided to make my own background paper. So I first took the lighter color Kraft paper and Unity’s Dinged Dots background stamp and used yellow and blue oxide inks on the stamp. I had to stamp several times to cover the area I wanted. I then took the background stamp from the 2018 kit and used brown oxide, again stamping all over. Finally, I pulled out the snowflakes and stamped them around the perimeter and used Stampendous’ glittery blue embossing powder to add sparkle. I love how the background paper turned out! 


Loving the glittery snowflakes, I decided I needed to add a few to the tree paper. So I randomly pulled out smaller snowflakes from other Unity kits and used the same blue ink and embossing powder to add a few highlights to the birch background.

After playing with the pieces I decided to use a white Posca pen to add snow, so even though the sky has some sun peeking through, it’s still flaking out. Also added snow to moose! I added foam between all the layers so it looks like a decoupage card. I stopped there after debating and quizzing instagram on adding a sentiment.


I really like how this turned out and hope you do too! Thanks for stopping by and have a great day!

‘Twas the Night Card

This card ended up being my 3rd attempt using Unity’s ‘Twas the Night kit and still had issues. The first attempts were plagued by stamping issues and wrong papers and inks. Just one of those days, I guess. After trying other paper, I decided to use watercolor paper. I pulled out Candied Apple Distress ink and stamped on my new Tim Holtz Glass Media Mat, spritzed with water and dipped my paper into it. This is where I noticed the change from my craft mat. Seems a lot more water gets picked up and the color ended up deeper, leaving the paper more saturated and darker than I wanted. I also added some green at the bottom, which ended up looking more brown because the complementary colors ended up mixing a little (because they were Distress inks) and the green ended up too high. I then stamped the tree, bear and dog in black ink. I stamped the ornaments in black and red ink. I stopped there because I wasn’t happy with the look of the background.

The next day, I started again by watercoloring the images using distress inks and adding red glitter ink on the ornaments, collar and bird. I moved to Oxide inks for better coverage over the red background color. I painted the floor green, and then used a long stamp from the 4/11 KOTM kit to stamp a better matching green in the same area and then used clear embossing ink and an Itty Bitty background stamp to add Snowflake Tinsel embossing powder. I was happier with that look. I then took an embossing pen and added dots on the tree and added more snowflake tinsel embossing powder. (Not too happy with this powder as the tinsel part doesn’t stick well, leaving white blotches. It did leave a glimmer on the leaves though.) I pulled out white acrylic paint to lighten background areas that were too dark. This worked very well. I used pens in a few spots to darkened lines and colors and add shadows on the ornaments.

I embossed the sentiment, found coordinating background papers, put together all the die cut papers, added fussy cut candy canes and sequins and called the card done.

I think I salvaged all the fails on this one. I must admit this stamp kit is so far out of my style that half the problem is operator error ;)! I don’t recommend my techniques other than as lessons of what not to do. But the kit is adorable and I’ll have to try it again!


Saturday, October 20, 2018

Our House to Yours Card

Made an easy-to-make Christmas card today using Unity’s Our House to Yours Kit. I took a watercolor scrap paper and sprayed very lightly with snowflake, blue and pink Tattered Angels Glimmer mist (drying in between). I then also dipped the paper very lightly in some distress evergreen Bough ink. After drying I stamped the snowglobe in Gina K. Amalgam ink.


I then looked for patterned paper I could match colors with, and pulled out Distress inks I thought could be used to watercolor the snowglobe. I also used a silver Glimmer ink and some pens. After coloring it in, I fussy cut it out. I then looked through the paper and found a background sheet and what I thought might make a good foreground sheet. I die cut them out. I added the sentiment in an old Navy Stampin up ink. I finished up with crystal dots, silver embellishments and string.


Leave it to me to try to use patterned paper in my cards! I realized I better get crackin’ on making my cards for this year, so this is just the first. Unlike smarter people, I probably will be making unique cards again versus mass producing, but who knows as the deadline approaches! Well, happy crafting till next time!


Friday, October 19, 2018

Breast Cancer Awareness Month

With a new Pink, Pink, Pink Challenge in Unity, I was inspired to pull out several Unity kits, a KOTM from October 2011 (heart, words, border and plant), the September 2015 SMAK kit (another heart), the April 2017 SMAK kit (woman) and the Teacup Floret (sentiment). My sister is, luckily, a very long time breast cancer survivor and a good friend is now also a long term survivor. With this card, I honor those women and all others who have to fight a tough battle first to win that survivor badge.

I started by pulling out a, new to me, paper pad, Debutante, from Prima. I love the women depicted in this paper and the colors, giving a very vintage feel. So I started by stamping the woman in brown archival ink. I masked off the area around her shoulder and arm and stamped the circle with words, wanting the word “HOPE” to show up, using the brown and a Gina K rose ink. I then stamped the border with the rose ink. I stamped the 2 hearts onto paper from the pack and die cut a few others. I used a Distress ink on one and the rose ink on the other. I used pencils and inks on all the images to enhance effect.

To complete the card, I added a base striped green paper, ribbon, crystal dots, sticky hearts, and Prima flowers. I embossed the sentiment on vellum, and added it to the corner.


I hope this card could give encouragement to some else in their fight. Not sure if it’s too much, but it was put together with the best intentions. Till next time, happy crafting!

Thursday, October 18, 2018

Believe Tag

Yesterday, I decided to try to make a tag for Unity’s Tag Challenge. I started by pulling out October’s SMAK kit and decided to use the snowflakes. I grabbed a tag and sprayed it with Snowflake Tattered Angels Glimmer Mist and then sprayed a little Heidi Swapp blue mist over the tag. I also added a few sprayed drops of Vintage Photo and Hickory Smoke stain.


I stamped and embossed the word believe at an angle using blue archival inks. I then added a silver glitter ink over the top. I stamped the large snowflake and embossed with a stampendous glitter blue embossing powder and used the same glitter ink to add a little more sparkle. I stamped the other snowflakes and used silver and snowflake tinsel embossing powders. I used the background stamp in the kit with hickory smoke oxide ink. I pulled out an Art Anthology dark blue ink and added drops around with its eyedropper and sprayed with water and dried it. This ink is interesting as it has a shimmer glaze to it.

I then pulled out white metallic and silver Brea Reese paste, and and a Mars Black, dark grey, Brea Reese Texture paste. I used a TCW random dots stencil with the white paste and then added the snowflake Tinsel embossing powder over the top. By heating up the paste, the embossing powder adheres to it. I added a few more drops of the navy ink and spritzed again with water, then dried it. I pulled a Tim Holtz sweater pattern stencil and added 2 different strips using both silver pastes. I then took white, silver and navy pens and added more details to the word, snowflakes and strips. I used Distress Picket Spray to lighten up some areas, where needed.

I finished the tag by hot gluing a silver snowflake and adding coordinating ribbons.


My hands ended up a mess, but I ended up with a very shimmering and glittery tag, that I think matches the holiday season well. Hope you like this tag!


Tuesday, October 16, 2018

Colored Sunflower Card

Picked up this cute sunflower stamp from a swap. It’s from Unity’s 9/16 KOTM Kit. The sentiment which, I think, perfect for this time of year, came from the A Good Life Kit. I stamped the image on linen stationary and colored it with Prismacolor pencils. I was inspired by a pencil coloring of a pumpkin I did 2 years ago on an image I got off the Web. (See below.) I then took a stencil, Wild Honey Distress ink and a brush and added a little color to the background.


stamped the sentiment using brown VersaFine Clair ink. I die cut, added fancy ribbon and then backed the image with orange patterned paper and brown paper. I adhered brown patterned paper on cardstock and mounted everything. I added crystals and called the card done.

Thanks for stopping by. If you enjoy my work, feel free to sign up for emails or follow me. If you also have a blog, feel free to leave the name and I’ll reciprocate following you, in the spirit of fellowship in the crafting world!

Thanks for stopping by, till next time, happy crafting!


Monday, October 8, 2018

Remember Card

Took a totally different direction today. Felt a little Andy Warholish! I love this large female stamp from Unity’s September SMAK kit. I just had to do this card!

I started by stamping the girl on a slant on watercolor paper. I love that tilt for some reason. I then took a new stencil and a Mauve Tattered Angels Glimmer Mist and after masking off the girl sprayed through the stencil. I then turned to watercoloring the girl. After I dried her, I then used the button stamp, followed by lace stamp on the design areas. I pulled in a green color to outline the woman and added some green throughout. At this point, I began to think I really could use this with a little more effort. I took pencils to the girl to enhance the hair and eyes.

I then thought perhaps I could marry my wacky background with some papers I received from a friend. I really lucked out finding what I think is an appropriate background. I noticed a script in the patterned paper, and so, I pulled a grey archival ink and a script stamp from a different SMAK kit. I think it helped to marry both backgrounds.


To finish the card, I inked the edges of both papers with Aged Mahogany, and found a complementary solid paper I could use to back the watercolor paper. I stamped the sentiment from the SMAK kit several times and stamped Remember from the new Poppies and Love kit, all in black. I fussy cut and inked the edges. I then adhered the phrases and used a graphite pencil to outline them. I pulled the card together and added color coordinating sequins. Since, the paper has such busy patterns, I stopped there.


Felt good to take a break from other styles today. I needed an “anything goes” day, for a change. Thanks for stopping by!


Sunday, October 7, 2018

Winter Cuddlebug Bunny Card

I recently picked up a pretty set of sequins from Tuesday Morning and a brand new to Unity stamp set, Winter Cuddlebug Bunny, and decided I needed to create a holiday card for a special little boy arriving soon! (Can you tell I’m excited?) I was also inspired by Crystal Minkler’s use of non-traditional Christmas colors in her cards!

I found a perfect holiday paper pack that I picked up too that I thought had the perfect pattern for a newborn and matched the sequins. So, given the color palette, I pulled out some distress and Versa Magic Chalk inks. I began by starting to create the background paper. I stamped the pink inks onto my craft mat and and spritzed on a white glittery Tattered Angel Glimmer mist. I then dipped my watercolor paper lightly into it to create an uneven pattern. I stamped the sentiment in blue. Then, I took the snowflakes from Scarf in Winter and began stamping combinations of Memento Teal and Lilac inks, and periodically embossing with Holographic embossing powder. 


I turned to stamp the bunny next and used grey archival ink. I colored the bunny with inks shown below. I used pens in a few places and added Spectrum Noir Clear glitter ink to the present. Then I positioned the bunny over the pink paper and decided to use a postage stamp type die that would allow a goodly amount of blue base paper to show. I then decided I wanted a little more color in the background and turned to background stamps, random dots with light blue ink from the Never kit, and the wonderful flourish stamp from the new Make Today kit with darker blue. I affixed the bunny and then used the darker pink underneath the bunny and the swirls. I already loved this flourish stamp, but love it even more now using it as snowswirls!

I pulled the card together and added my new sequins and called it done. With the sparkles its certainly  holidayish, and with the blue, I’m hoping, also boyish. Hope you like this one! Thanks for stopping by and have a great day!


Saturday, October 6, 2018

Friends of Unity October Blog Hop

Hello, again, Unity Stamp Co. friends! Friends of Unity are back with another blog hop for October with the inspiration, Leaves. I suggested this theme as this is my favorite season along with my favorite colors... and autumn leaves are truly the epitome of fall. This month several friends are offering giveaways. To WIN leave comments on EACH blog in the hop AND check back on next month’s hop for the WINNERS from this month’s giveaways. Last month, I offered up a giveaway-  so, using a random number generator, the winner is WILMA DEG!!! Please PM with your address within the next 2 weeks and I’ll send out your package! Thanks for playing along with us!

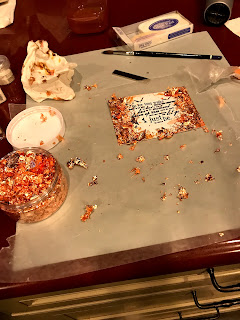
With this first card, I used a sentiment from the Quote Bundle Pack Kit and the tree from the 9/17 KOTM. I decided that this quote needed to be surrounded by a glade of autumn trees and leaves. To create the effect, I stamped the tree at all heights on both sides using Vintage Photo and Rusty Hinge Distress inks. I purposely wanted the images to be indistinguishable from each other and accomplished that by adding more color using a paintbrush. I used a dark brown watercolor to accentuate some branches. Once I was happy with the effect I then stamped the sentiment using brown Versafine Clair ink and clear embossed it. I then pulled out my copper Nuvo Glitter flakes and glue and began painting the leaves with glue. Once the glue set a bit I covered it with the flakes and pressed them down. After a bit, I brushed off the non-glued flakes and put them back in the jar. To tone down the white center, I painted it using Distress tea dye ink. I added more birds as well. I then found matching paper and backed both with a dark brown paper and added sequins.


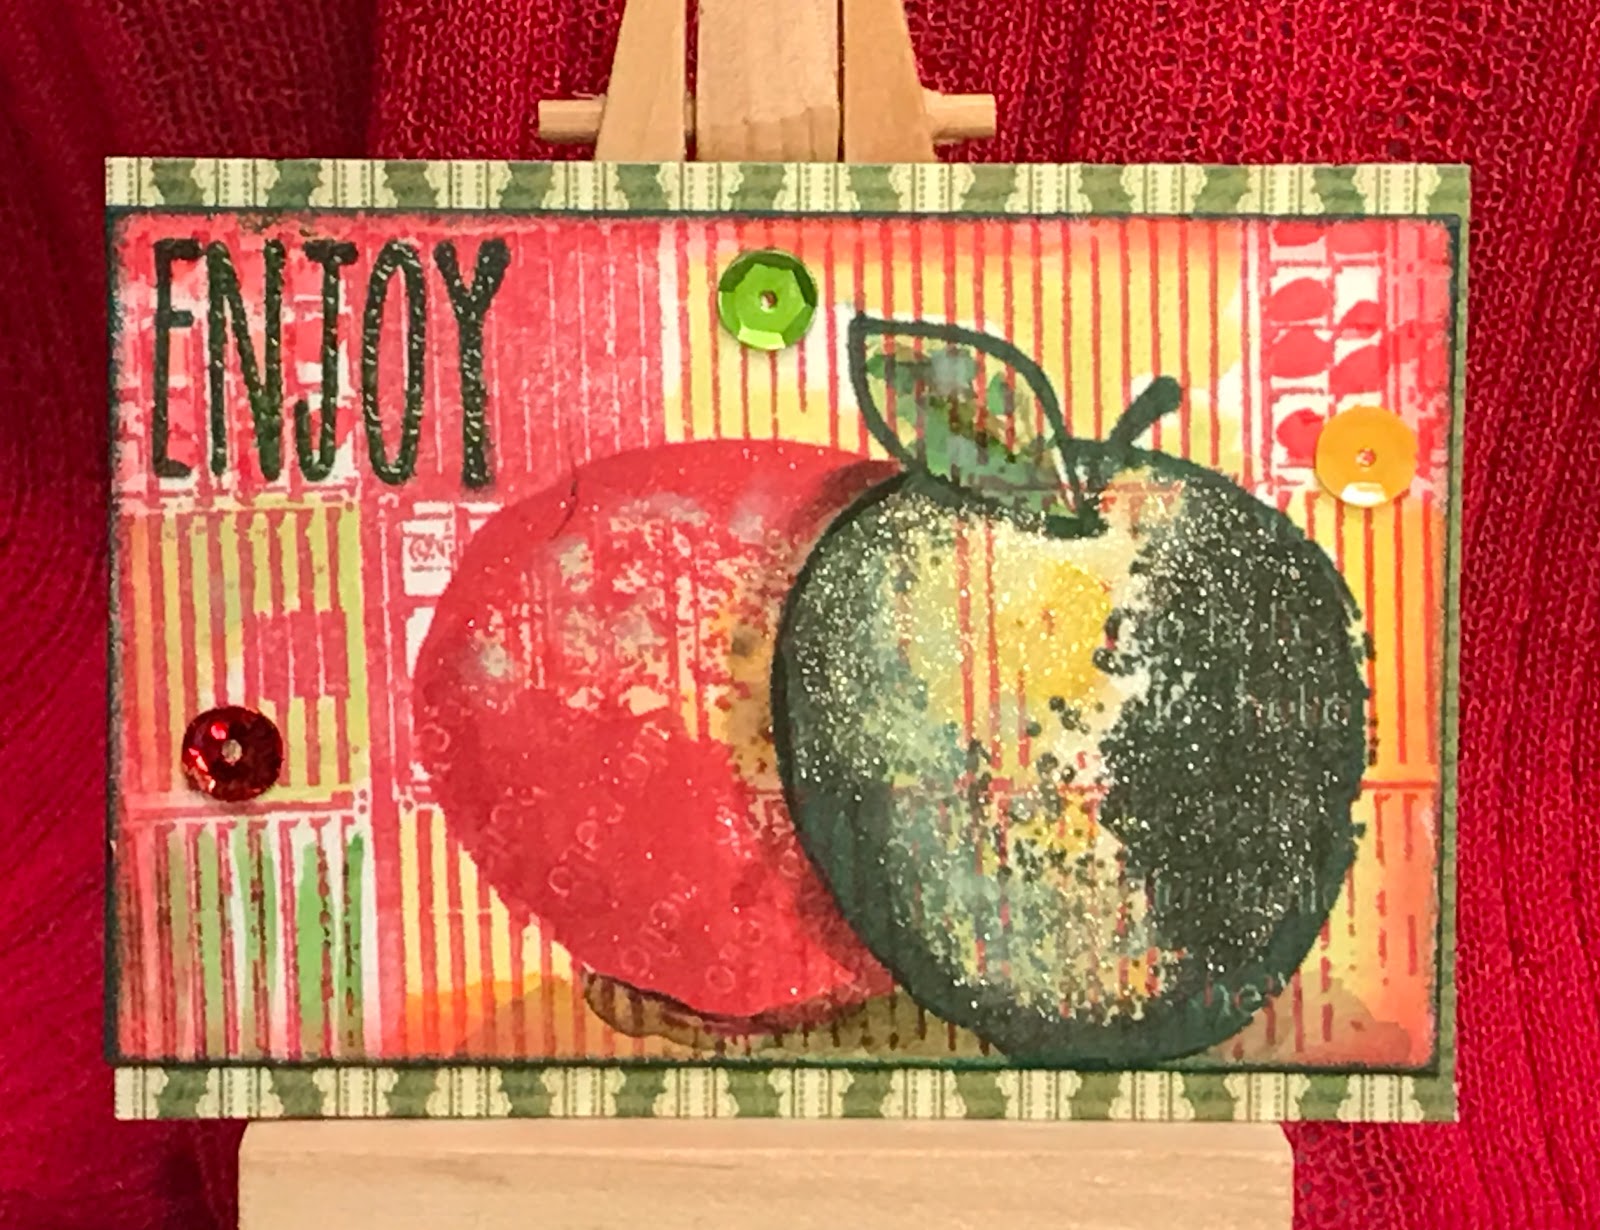
Knowing border backgrounds are hot right now, I wanted to try creating my own. I used the leaf from the Beautiful Change Kit, stamping and embossing it first using copper tones. I then stamped the oak leaf from the 10/15 KOTM and the maple leaves from the 9/14 KOTM using Colorbox Red Pearl ink and clear embossing powder. Finally, I grabbed a plain dotted background stamp (can’t remember which kit) and used brown ink and brown embossing powder. I also stamped the sentiment with the same products. I then paired up complementary Distress inks with Perfect Pearls and painted with the combos (including green, not shown). I then darkened the edges and added splashes of color. I backed that with paper, added copper sticky strips and sequins.


For the last card, I used the Tree of Gratitude Kit and the girl from the 10/15 KOTM. Sometimes, I need to create these wild scenic collage kind of cards. So, I paper pieced the girl, including the dang buttons ;), using a Bo Bunny paper pad and I watercolored the rest of the girl. I did add some ink and pencil to her. I used Distress inks on the tree scene that coordinated with the girl. I added splashes of color, including using a red and yellow Brea Reese glitter ink. I also stamped, embossed and painted the leaves and sentiment using the same glitter ink. I pulled the card together using coordinating paper and added sequins again. 


Hope these cards and the others shared on this blog hop help to stimulate your creative ideas! Remember, if you wish to participate in the giveaways, be sure to comment on every blog entry in this Hop and check back next month. We, on the Friends of Unity design team, are always interested in your feedback! That’s why we use our own stash to offer giveaways.

We are NOT sponsored by Unity Stamp Co., but they approve our hop. We are huge fans of the company, their products, the owners and staff, and the Unity Show and Tell community, which is why this Hop was started. Just wanted to share our theme based designs and some of our favorite stamps.

Friends of Unity blog hop:
Jeanie Hayes
 Dawn Fields
You are here -> Joyce Verdon

Thanks for stopping by! Till next time, happy crafting!

Wednesday, October 3, 2018

Second Set of Unity ATC’s

The first set I designed started with the background stamp from Inspired Minds. I stamped this in an archival red ink. I then used my Misti to stamp two apples, one in green archival ink and the other one, once I masked the first in red ink. I then painted all over using green and red Distress inks. I added the word “Enjoy” from the Poppies and Love kit. To finish up, I colored the red apple in a pale peach colored Spectrum Noir Glitter pen and then the green apple in a clear glitter pen. I also added sequins. Fall is apple season to me... So I thought it perfect for the first month of the autumn.


With the second set I wanted to use a phrase from the Quote Bundle Pack. I used paper from large pads I had picked up at Tuesday Morning. One was pre die cut. I cut the papers down, distressed the die cut one with Vintage Photo and layered them together. I stamped the image on vellum and clear embossed it. I cut out all the pieces down to size, added color to the butterflies and adhered them to the ATC’s with washi tape. I then added red crystals to the flowers.


This month has been a busy month, so I needed easy to make ATC’s and I think these both worked. Can’t wait to make October’s as I have some ghostly ideas for them!

Tuesday, October 2, 2018

Beautiful Change Card

Was inspired yesterday by another crafter’s beautiful card replicating the design of a plate with stamps and watercolor. I decided to try replicating a Prima Autumn Moon paper, at least in colors, subjects and design. I am sure I didn’t achieve my goal in any of those areas, but I’m happy with the attempt and had fun trying!

To begin, I stamped the image from Unity’s Beautiful Change Kit using Simon Says Beige ink and Color Box Willow on the leaves. I stamped and embossed the sentiment in Willow and Clear Embossing Powder. I painted the images with my Kuretake watercolors. I pulled background stamps from Thoughts from the Past Kit, April 2017 KOTM and September 2017 KOTM. I then used Distress inks in Tattered Rose to add vintage postcard, and Shabby Shutters and Vintage Photo to add flowers in the background. I used my Kuretake paints to paint the butterfly.


Overall, I’m pleased with the effect I gained. The only changes I would make are maybe using a larger cardbase to get the details in the background paper, painting during daylight to better match colors and using a watercolor paper versus the Canson Bristol paper.


Well, back to sleep for awhile before I start my next card! Thanks for visiting and have a great day!