Wednesday, January 31, 2018

Rose Avenue Kraft Card

Hello! Today I created a Birthday Kraft card to enter into the Unity card challenge. I really needed to change up colors, so, thinking a soft blue may coordinate well, I chose paper from Kaisercraft called Rose Avenue. I selected several blue and soft white papers and looked to my dies to see how the brown Kraft paper could become part of the card. I covered the Kraft card base with a soft patterned blue paper die cut using the Vibrant Damask die. I trimmed down a flowered blue sheet to fit a little under half the card. I then used a Bo Bunny doily die cut on the soft white paper and trimmed that in half. I found blue and pink washi tape that I used to spilt the card in half. Once I had the general layout of the card designed, I looked to my Unity stash for a rose stamp and decided the rose in Rosey Thoughts would be a perfect complement to all the textures in the die-cuts.

I tried embossing the flower using blue and then white embossing powder, and finally settled on the white being a better match. I also embossed the happy birthday sentiment from Abundant Blessings in white. I used tissue paper to smear on some pink and green Memento Chalk ink to give a tinge of color to the embossed rose. I then constructed the card layout, adding pink and white twine, and embellished with pearl dots, pink Nuvo drops and some Rose Avenue ephemera. This card was fun to put together and I hope you enjoy it. Thanks for reading and have a great day!


Tuesday, January 30, 2018

Vintage Rose Vase Card

I made another vintage card as something new to do with this stamp. I used Unity’s So Very Grateful kit for the vase and sentiment and the Hug kit for the background stamp. I wanted to use the Love Clippings paper pad again but with a focus on the deep rose colors. I stamped the image using archival ink and selected the Prismacolor pencils from the color chart that I finally put together this morning! After coloring the image I stamped it again with the handwriting stamp and distressed the edges. I die cut it with the Penny Black Antique Frame.

This card has been entered into the Card Concept Challenge.


Then it was time to construct the card. As usual when making vintage cards, I use my small Tim Holtz scissors to cut the side edges of the first paper down and tore a bit off the top and side. I paper pieced a coordinating paper under the side hole. I then wanted to have a darker non traditional frame for the colored vase paper. I ended up using a piece of ephemera I had used before that had a deeper rose color and offset the placement. At the top I selected a small piece of paper from Love Clippings that I wrapped with peach and wired rose ribbons and elevated that on the card. I stamped the sentiment and die cut that and found a sticky diecut in the paper pad that I used to back the sentiment. I then used a rose ribbon, a doily, a Bo Bunny chip board piece, Love Clipping ephemera, sequins, Nuvo drops, a little Washi tape and a Melissa Francis metal rose to embellish the card.

As usual, it’s a layered, textured and busy card. I hope you like it. I also hope it’s interesting to see how different products and pieces can be pulled together to make a cohesive card. Thanks for reading my blog and have a great day!


Friday, January 26, 2018

Vintage Dress Card

This card was so fun to make! Was able to use several vintage Unity stamps, Just as You Are and a freebie dress stamp I received in a grab bag. I also used Right Accessories as a background stamp and a sentiment from Indie Girl. I used a Prima paper pad that had a sheet with a sewing machine on it. I paper-pieced the dress and stamped the other dress frame on Kraft paper and distressed both. I embellished the card with sewing notion washi tapes, ribbon, buttons and ephemera from a few different sources. Hope you like it! Depending on the reaction, I may have to change out the background for the sentiment, but I just loved the button ephemera! I think I know why I like these cards, when I worked I seemed to spend more $ on accessories, jewelry and makeup than clothes, must be a style or personality thing!


Thursday, January 25, 2018

Cuddlebug Elephant Kraft Card

Inspired by Unity’s Kraft Birthday card challenge, I wanted to use their Birthday Jubilee set. I then found the perfect Cuddlebug set that would make an ideal card for my DIL. I also had recently purchased the Bo Bunny glitter paste, Ranger ink set and the Distress glitter — all on a great sale! So, then I started looking around for paper and colors that would complement the brown Kraft card, the grey elephant and the new products I bought. I found the glitter paste easier to use than the glitter in coloring in the balloons, but I wanted to use both colors. So, I persisted, but the Distress glitter is not fine grained so was more difficult to use. I wouldn’t say this card was a total success, but felt that it was a good learning experience worthwhile documenting! I embellished the card with sequins and used distress inks

on the edges to mesh colors better. Hope it looks good enough to give someone!

Tuesday, January 23, 2018

Beauty in the Heart Card

I just love the First Edition Love Story paper pad and it’s color schemes. I watercolored a Unity Angie girl from the November 2015 KOTM and stamped the sentiment on patterned paper. The watercolors were chosen to coordinate with the paper pad. I mix colors and usually have 3 tones of colors similar to marker and pencil coloring (usually by diluting with water, adding black, or adding a complementary color to dull a color). I am currently using leftover tubes of ink from a watercolor class I took a year ago. After watercoloring, I used a marker to deepen the lines. I fussy cut the image out. I chose 3 papers from the pack to build the card. 

I happen to love background stamps and you can take a somewhat “plain” patterned paper and Jazz it up a little by using these stamps. I chose the flower corner stamp from Unity’s Cherish Your Dreams and the flower background stamp from the same KOTM from above and used Fired Brick Oxide ink. I used the newly decorated paper as the background for the girl and rounded all corners for the image and the sentiment layers. I used a ribbon I picked up at a flea market. After putting all the pieces together, I added stickles, a flower, a flower cluster, and, a button, twine and knit flower set, I pulled together, as embellishments. This was one of those days where I was getting stickles all over me and had to redo the sentiment! Oh well! Hope you enjoy the card and have a great day!


Monday, January 22, 2018

Simple Craft Birthday Card

I created this very simple birthday card for the Unity Craft Birthday card challenge. I used 2 Unity kits, birthday jubilee for the sentiments and hello beautiful for the heart. I happened to have homemade paper hearts in mint and pink that I used interspersed with the stamped hearts. The pink and grey colored paper appeared to coordinate well with the craft paper and all stamping was done on the patterned paper using either Black Soot Oxide or Tuxedo Black Memento inks. I used a Bo Bunny stencil and Bo Bunny paste to decorate a strip of soft grey patterned paper with hearts. Using the Umbrella tag diecuts, I embellished the craft tags with sentiments, mint ribbon and drops, fussy cut hearts and heart embellishments. Hope you enjoyed the card! Have a great day!


Blush Craft Birthday Card

In response to a craft card challenge, I made this birthday card using the beautiful My Mind’s eye Blush paper pad. Read on to learn How I put this card together.


I first found a soft white paper to emboss the flower from Unity’s Beautiful Birthday Wishes kit using WOW Copper embossing powder. I then used distress inks and a crushed olive distress crayon to color the image very lightly as this wasn’t on watercolor paper, in patterns and colors complementary to the pad, and dried it using a hair dryer! I stamped the sentiment onto another paper using a small StampinUp Navy pad. I used a new Penny Black diecut called Antique Frame to cut the image out and used a smaller die to back the sentiment. I cut and folded craft paper into a 5x7 card size. I used a dusty rose gold shimmer paper to frame the card and the sentiment. I used a flower diecut to embellish the card along with Nuvo drops. Hope you enjoy the card!

Saturday, January 20, 2018

Simple Birth Day Card

Remembered today that my dog groomer was going to have her baby over the holidays. Time for a birth day card!

Today, I created a simple card using Unity’s Stella girl. Staying away from blue and pink, I chose a pale orange/salmon color scheme. Used Prismacolor pencils on the image, fussy cut it out and elevated it onto yellow paper that I had stamped with oxide inks using a flower stamp from the February 2013 KOTM. I framed that with diecut craft paper. I stamped the sentiment on the same yellow paper, decorated it with washi tape and made a shaker out of it using a yellow frame from a set I had picked up at Tuesday AM. I pieced coordinating paper onto a craft card base, fixed the image and sentiment to the card and embellished with Melissa Francis butterflies (colored with Chalk Writers) and sticky salmon colored crystals.

Can’t wait to see my groomer and her baby pics and give her the gift card!


Friday, January 19, 2018

First Unity Kit April 2017 KOTM

Welcome! Recently, a challenge was made to use the first Unity stamp bought in a card! Accepting the challenge, I made an easy card using the flower bundle from the Unity April 2017 Kit of the Month; the first Unity purchase I made. I happened upon this company after watching 10 cards, 1 kit theme videos on YouTube. The Unity kits intrigued me with the volume and size of stamps delivered in a kit and the varied nature of the stamps and sentiments in their kits. It was truly a blessing as I love the stamps in their inventory, the quality is great, and the user community is warm and welcoming!

The flower bundle image was colored with Prismacolor pencils. I found in my stash a Farmhouse American Crafts paper pad that matched the colors used pretty closely. I decided to use scalloped  cardstock that I wish to use up. I stamped the sentiment on patterned paper using Memento Ivy Cottage and punched holes in one side. I “vintaged” the components using distress inks. I used a tag die set to create a background for the colored image. I embellished the card using a brad, a burlap looking doily, part of an ephemera piece that happened to have a bee on it, an off white flower, a chip board bird (colored using Chalk Writer crayons) and some sticky jewels.

Hope you like this simple card.


Some contest wins I thought I’d mention

Today, I found out I’ve received Honorable Mention for the Color Challenge Unity hosted. I’ve posted pics of the card challenge and my winning submission. Below that in another contest win!


I thought I’d also mention I won the No Red. No Green. Holiday Card Challenge Unity hosted in December.


Wednesday, January 17, 2018

Valentine Watercolor Card

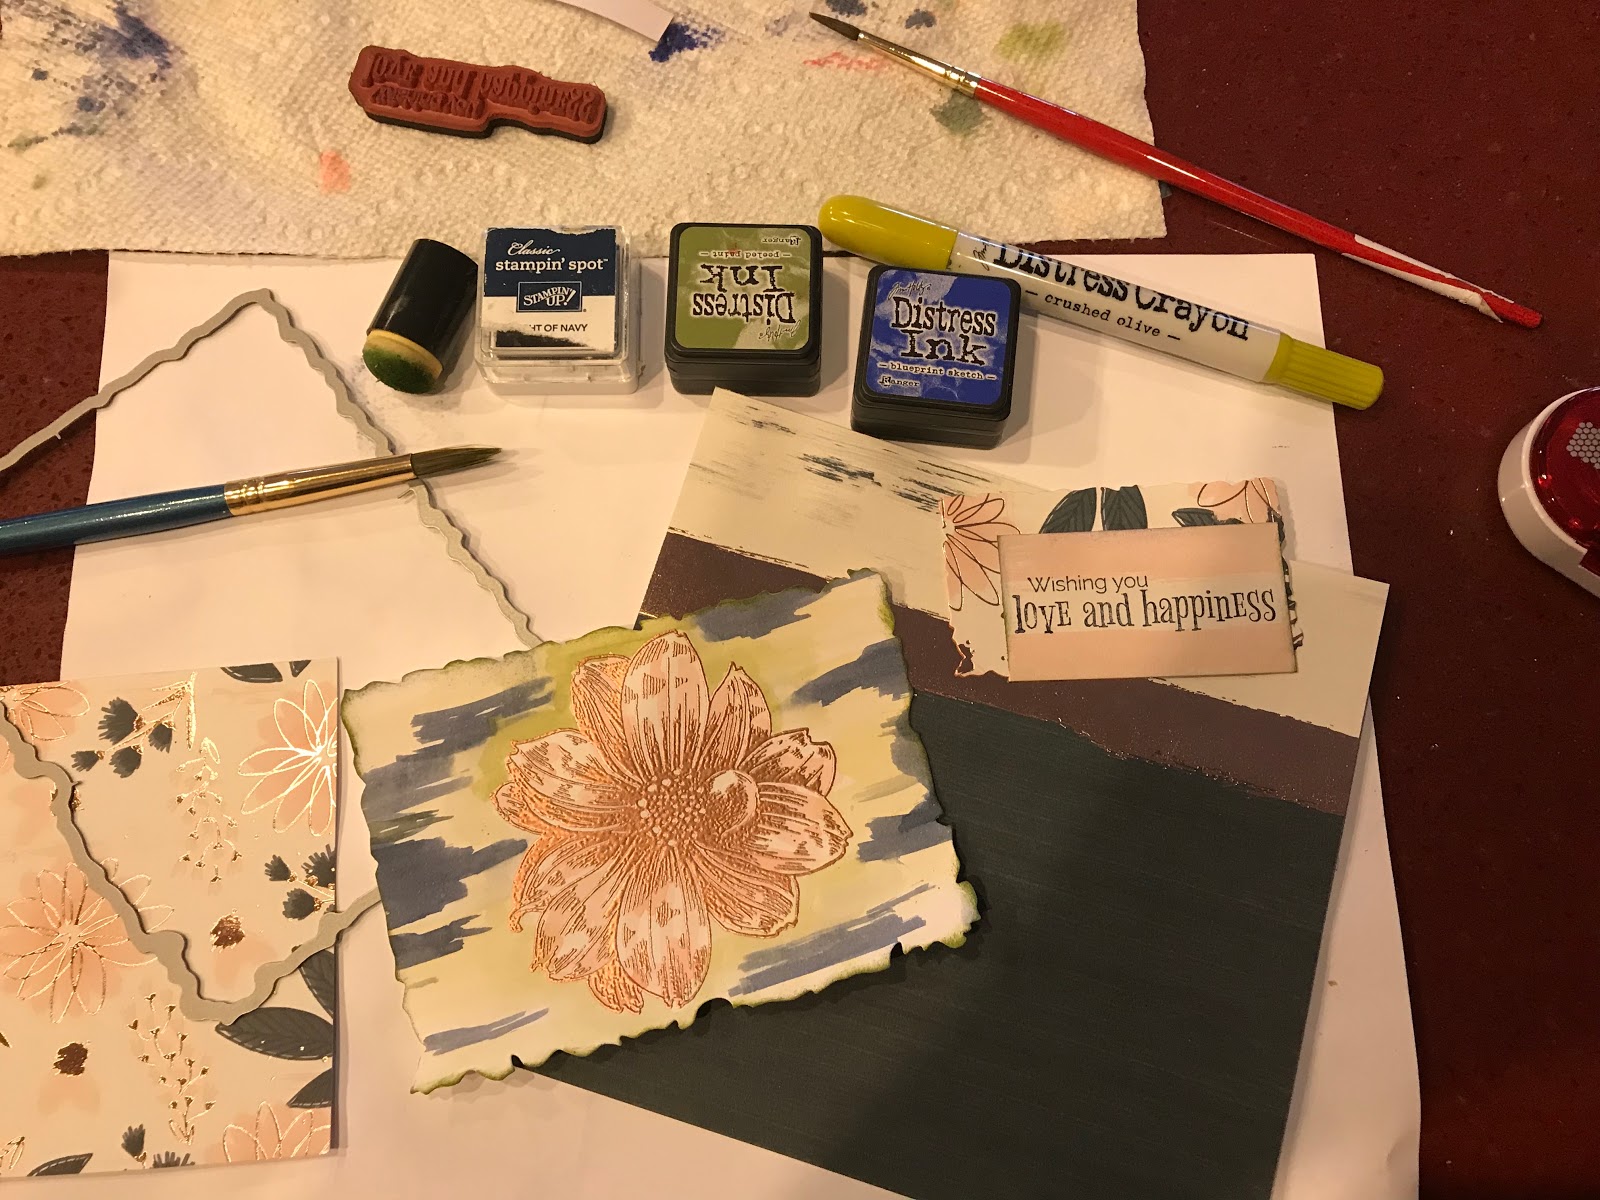
Welcome, today I spent the whole day creating this Valentine’s Day card. Unfortunately, yesterday, I decided to try casing the picture on an old cup box that I kept because I love the art style. Whew, I’m exhausted; not sure I’d do this again! However, it provided an excellent watercolor exercise for me. I created a prototype first to see if I could get achieve the look. The first pic trio below shows the 2 prototype steps on top and the art I was casing.

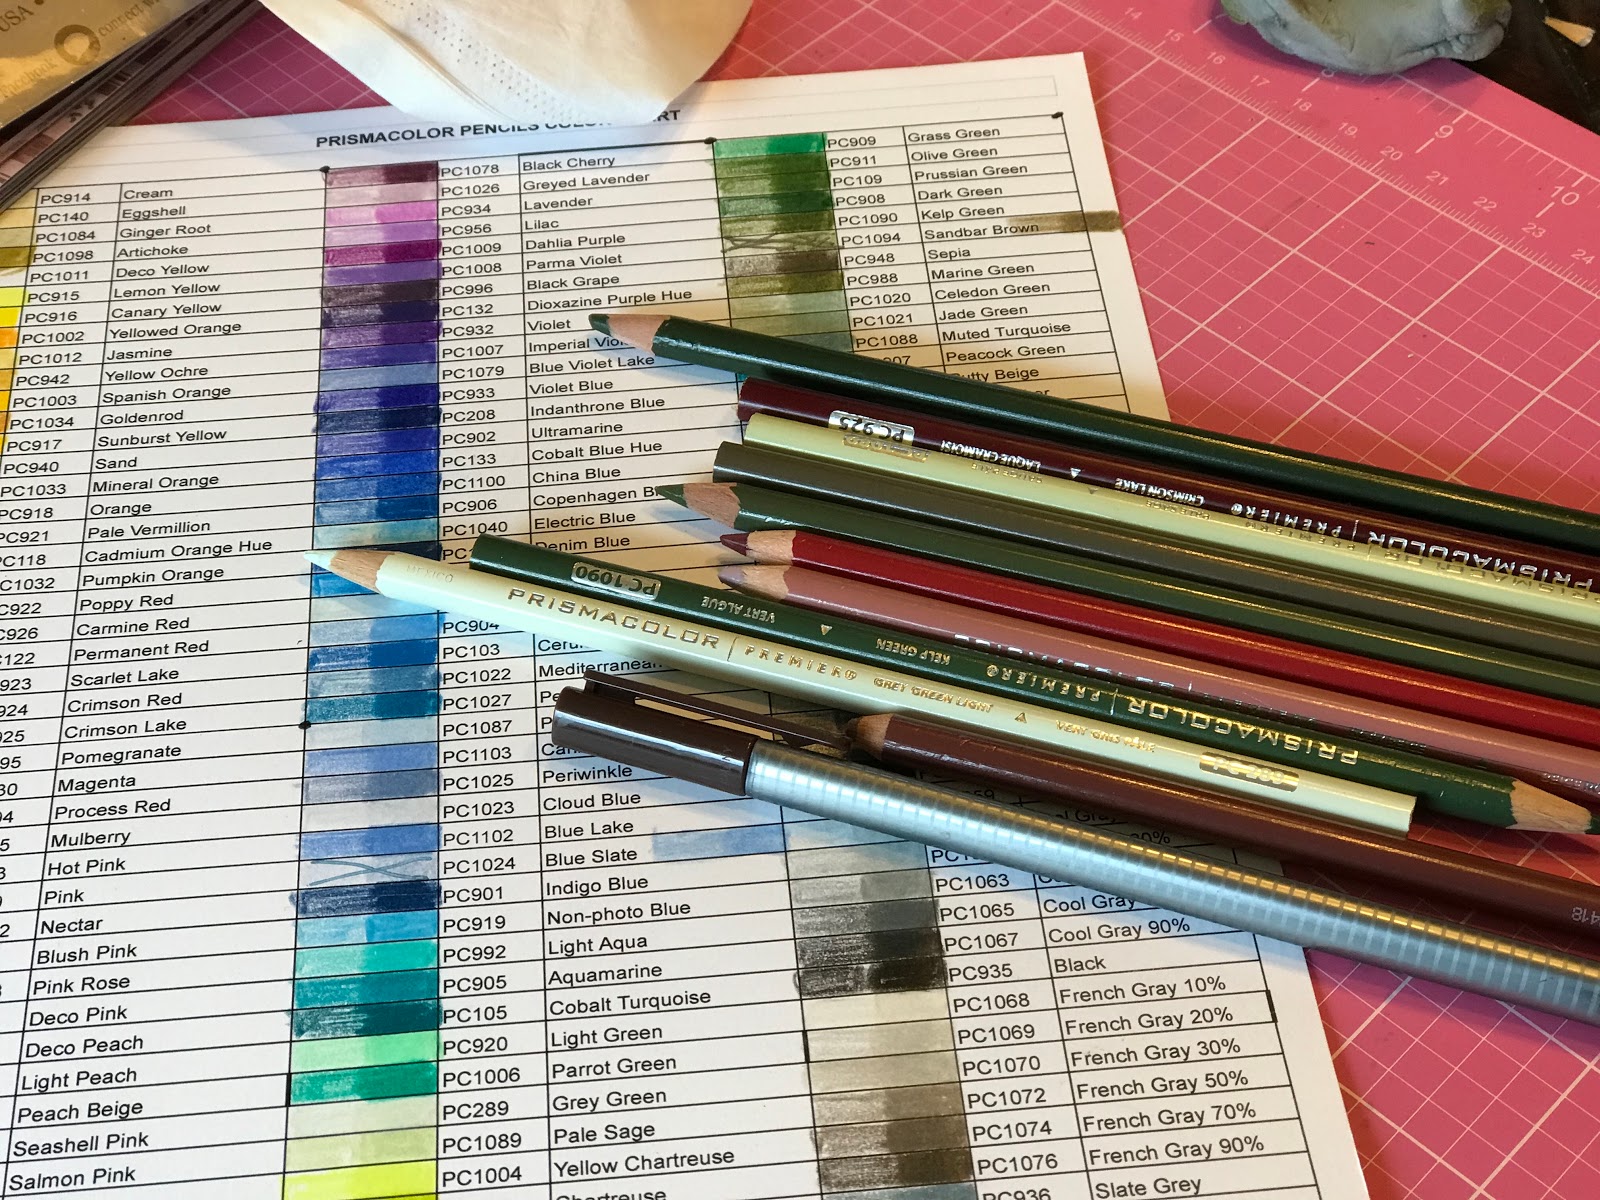
So, in creating this card, I used a bunch of Unity stamps from these kits: January 2018 Kit of the Month (KOTM), Love is Grand, February 2013 KOTM, Cherish Your Dreams, Boldly Believe, Beautiful Birthday Wishes, and We Treasure You. I basically used masking to layer stamps onto watercolor paper using different color archival inks. The masking templates were created by diecutting different size and shape tags to match the individual stamp sizes. As I layered the masks on top of each other, I used a pencil to create the pseudo-outline of the stamp “tags”. Then, once I removed the layers, I started painting each “tag” in 3 different colors and the bottom layer a darker color. I then had to create the shadows for each tag. Once done, I completely washed over the whole piece to mute and deepen the colors. Of course, there was a lot of hair dryer drying the paper between all of these steps.

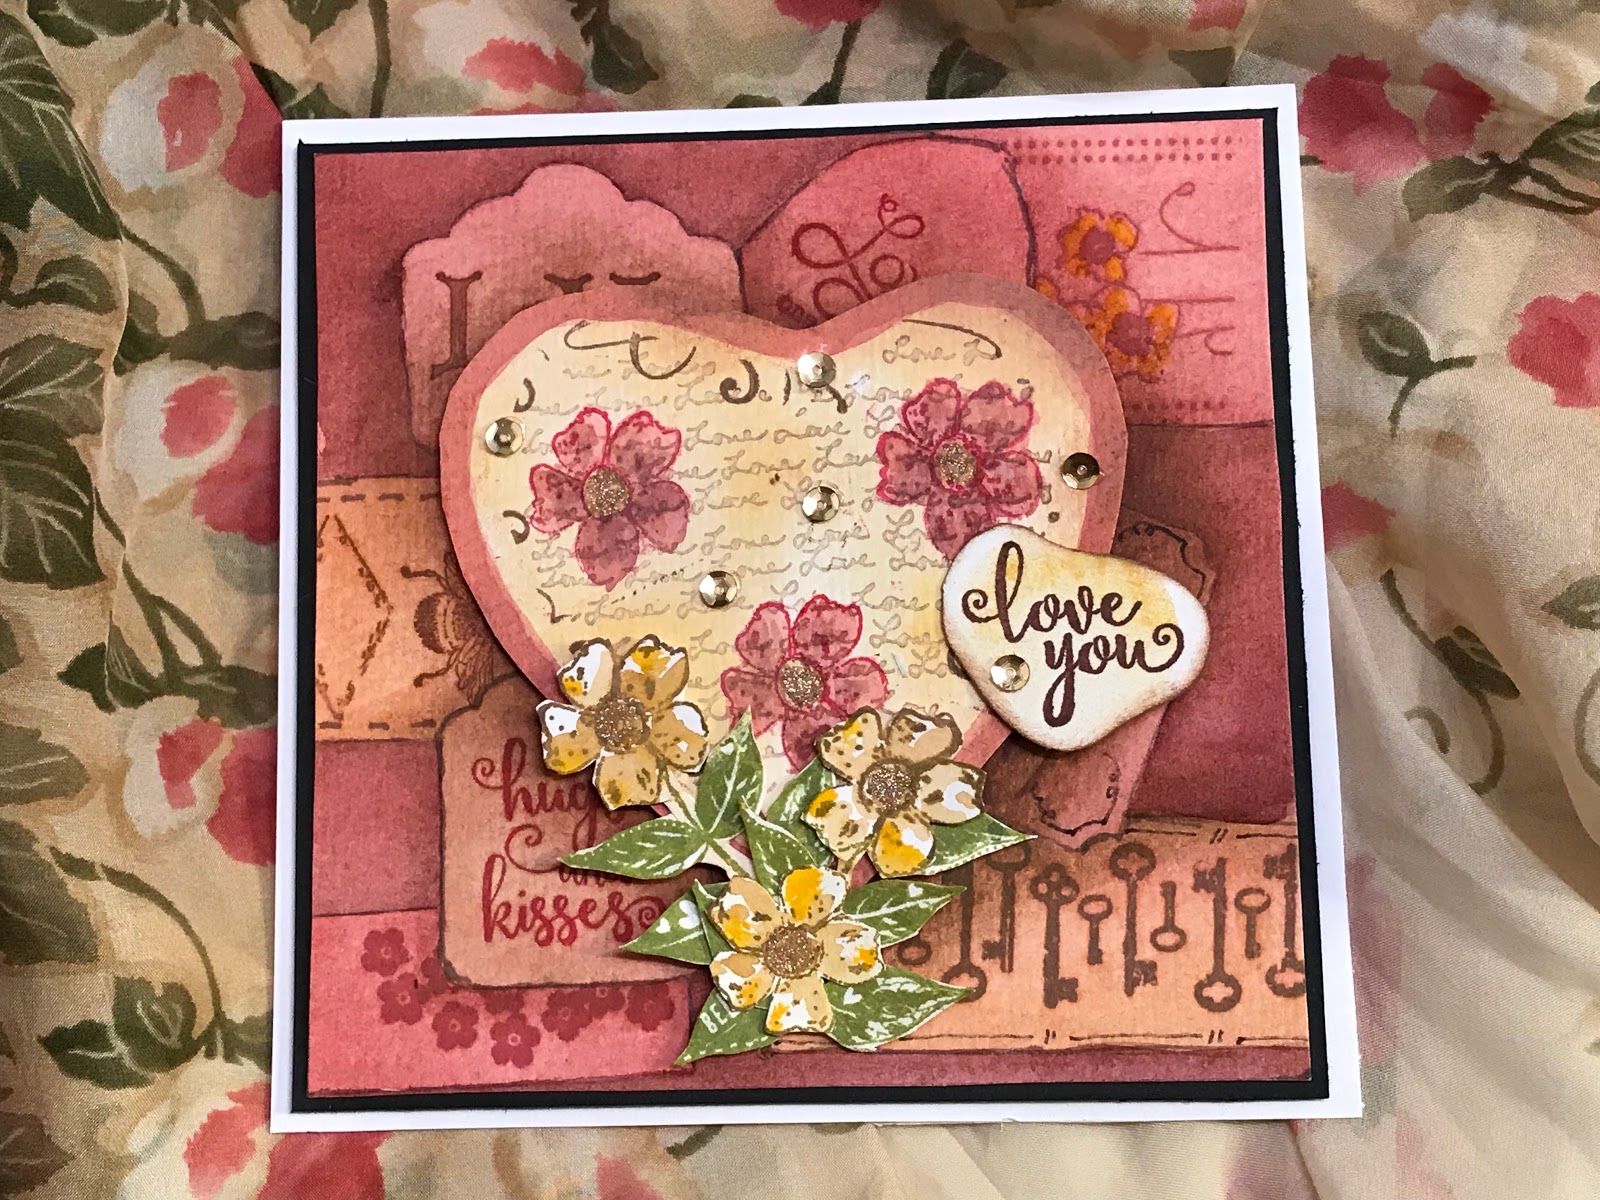
The top layer was easier as I just stamped the heart, used some sentiment stamps to replicate the curlicues on the edge, stamped flowers, painted the outside of the heart and the flowers, and then used distress ink on the inside of the heart. Added stamped and colored flowers at the bottomed the heart.  I then stamped the sentiment and distressed it. Attached watercolor paper using scoretape to black cardstock and elevated that on a white card base. I also elevated top heart and added sequins and colored flower buds with gold spectrum noir glimmer pen. 

Here’s all the pictures! I’m pretty proud of the effort and effect produced, but I hope the card also turned out okay! Thanks for reading and have a great day!


Tuesday, January 16, 2018

Shabby Chic Riding a Bike

Another shabby chic card being posted today using a variety of Unity Stamp Co. stamps.


Stamped the bike from the April 2017 Kit of the Month in Archival black. Watercolored the bike and then used distress inks to match the background to the Prima Love Clippings paper color scheme. Used hearts from Heart Flutter and We Treasure You on the primary image and created some extra hearts for embellishments. Used the splotch from i am who i am for bike path. Also stamped the sentiment from the KOTM in Memento Rich Cocoa. Spritzed the bike image with Prima Color Bloom Poppy Field. Distressed edges of paper and various ephemera and used gears, ribbon, twine and washi tape to pull entire card together. It’s definitely pretty shabby, but I think it works!


Monday, January 15, 2018

Mouse birthday card submission

This card is being used for some card challenges and was inspired by my daughter in law. She requested I use this Stampendous Mice Wish stamp which we picked up at a Tuesday Morning store for her next birthday card (April). I stamped the image in Frayed Burlap oxide ink and then watercolored it using the colors found in the Kaisercraft Cottage Rose collection. Embellished with lace, Melissa Francis wood chips, girl diecut, flowers, pearls, and fussy cut flowers. Not my usual style, but hope you like it!

This card was inspired by the Tic Tac Toe Card Challenge using the vintage, pearls and flowers line. And wood, lace and florals line.
This Freestyle Card was inspired by the soft blush colors, roses, stripes, cupcakes, pearls, and soft greys from the Card Concept 84 Challenge.


Friday, January 12, 2018

Butterfly Valentine’s Day card

And here’s my first card recorded on my new blog! Special card for family member for Valentine’s Day!


I had already stamped out the beautiful butterfly image from Unity’s Start of Something New December 2017 Kit of the Month. I recently went to Tuesday Morning and picked up this 12x12 Echo Park paper pad kit for $5.99.  Loved the Paris theme as I happened to visit Paris this past summer and it’s a perfect color scheme for this time of year! Knew I wanted to add a contrasting color and the complement of red is green, so I picked mint knowing I had some mint flowers I picked up on sale from Blitsy! I also happened to pick up washi tape in pink glitter (with a touch of green in the glitter) and a black plaid for $1 each from Target! After pulling everything together, I then turned to my pencils to find the right combination of colors...I usually select 3 tones for each color and a shading color.


After coloring the image, by using 2-4 colors on every component, I remembered I had picked up mint Sparkle and Sprinkle glitter at a class I took and used it on the blooms! I stamped out a sentiment from the kit. I also remembered I had an Avery Elle pigment ink I could use as well as Picked Raspberry distress oxide to color the edges of the image, the sentiment and bottom of the card. Now, I was ready to start composing the card.

Once major components put together, added a Heidi Swapp heart (also from Tuesday AM which matched), iridescent crystals and mint colored ribbon behind the sentiment for contrast and texture.

As usual, I had fun finding and putting elements together. Hope you like this card (and my family member)! Let me know if you have any questions or whether the amount of detail was too much or just enough! Thanks and have a great day!


Thursday, January 11, 2018

Future directions and blog intentions

Future directions - who knows? I know for a start, I’d like to take the next Watercolor class, enter more card challenges, create an art journal, become a design team member, and try my hand at mixed media canvases, and not, necessarily, in that order! Perhaps, in the future, I’ll start selling my work, if sellable. (Would be nice to fund supplies for our compulsions, wouldn’t it?) I plan to share all my artistic endeavors with you here, so stay tuned!

I’ll be in a learning curve on blogging, so constructive feedback is always welcome. Remember though, I do want this blog to be a positive space for any and all who read it. Negative comments will be deleted; I will block those with harmful intentions. But, that probably won’t be a problem!

PS JoycieLCreations comes from fond remembrances of my Dad nicknaming me “Joycie L period”. In elementary school, I used to sign cards as “Joyc-“, and on the next line (as I’d run out of room), “ie L.”. I had a long last name and I guess I couldn’t be bothered to write it out! Hence, everyone used to call me that! He also always encouraged my artistic efforts, so my blog name was named in honor of him.

My background - Part 2

I’ve always been interested in artistic and crafty endeavors from when I was a child, having inherited this passion from my mom. I used to design my own paper doll clothes when I was little and loved coloring. Started sketching in grade school and took art classes all through high school, even winning a few awards. As I was good in both math and art classes, I came to a hard decision to leave art as a hobby and pursue computer science as a career. Early in my career, I tried cardmaking as a hobby but gave that up once I became a Mom. After retiring, I finally had the chance to explore my artistic side again and started up using coloring books. I watched many YouTube videos - how to’s on pencil coloring, watercolor painting, decoupage, cardmaking, mixed media art, etc. I attended local Stamping Up classes, Stamp and Scrapbook Expo’s, and bought department store cardmaking magazines. I started buying cardmaking supplies (you never finish, right?) and finally developed Christmas cards using precut diecuts December 2016. I also tried to teach myself watercolor techniques and finally took a college course Spring 2017, Intro to Watercolor. This past summer, I created a craft room and started stamping and coloring cards regularly, figuring I would donate the cards. In October, I joined and started posting my creations in several Facebook groups. The feedback on my posts has been inspiring and a great learning tool and I’ve learned a lot from admiring and following others’ efforts. I won a Unity card challenge in December and started getting requests for a how-to blog. Now, you are up to date! As a manager, I loved mentoring others, and I welcome the opportunity to, again, share my techniques and experiences with you! See my next post, Future directions and blog intentions.

My background - Part 1

Welcome to my new blog! First, let me introduce myself! I’m wife to a loving husband, and mother to a wonderful son and daughter-in-law. After retiring from a demanding IT management career, I took on caretaking for 2 young, pesky, adorable, Havanese pups, Pico and Allie, and acquired a brand new titanium hip... “I am titanium” (singing now, sorry, I digress!). As Paul Harvey used to say, “and now, for the rest of the story...”. See My background - Part 2 for my crafty background!