Monday, October 28, 2019

Build a Snowman Card

Had dreams the other night about how I wanted to use Unity’s and Brutus Monroe’s collaboration kit, Sweadda Weadda! After having tried this once now... I have even more ideas! After creating the background using this kit, I decided to combine it with the snowman and sentiment from the 10/19 SMAK kit. Here’s the kit info:

Sweadda Weadda

Unity SMAK Kit 10/19

I began by stamping the background on Bristol paper using both London Fog Archival ink and Versamark black ink. I wanted a varied feel to the design. I then clear embossed it. I then used the Picket Fence blending brushes to blend on 2 different colors, again providing a varied look. I swiped a slightly wet towel over the top to remove ink from the embossed areas. I die cut the image and then blackened the edges. I added white pen to areas on the background for a little contrast. I ended up wrapping a black ribbon over the top.


I stamped the snowman on Kraft cardstock and embossed it with black ink to ensure a dark image. I tore the image out and blackened the edges. I then added a little of the same Gina K. color to the snowman plus a little white Starry Night paint to make it glisten. I stamped the sentiment on black paper using VersaMark ink and embossed it with an Aqua Tinsel embossing powder. I added some Posca dots and a few sticky snowflakes. I put the card together on gray cardstock and added grey sparkly crystals.


I definitely want to do more with these stamps, but this was a good learning start! Hope you enjoy this one!


Spooky Simon Says Stamps Card

Picked up SSS’s Halloween kit because I loved the Spook Up Some Halloween Fun stamp set and some of the other items in the kit. I also recently picked up the SSS Spooky kit for only $6 in a recent sale... love the haunted house background stamp! Stamps:

Spook Up Some Fun

Spooky

So, I started by pulling out Seedless Preserves and Blueprint Sketch oxide inks and a piece of Bristol paper. I brushed on the pink/purple tone first and I wasn’t intending a full coverage knowing this background would show in the circle. I then inked up the sky area in the blue color. Finally I used Black Soot on the sky and bats. I used Gina K Black Amalgam ink on the house, bats and ground area. Finally, I stamped, in Versa-mark ink, the sentiment and white embossed it. To add a little something-something to the image, I added shading and window panes with pens! I also added Black Soot to the moon image in areas. After die cutting this piece, I ended up darkening the edges with the Gina K black ink.

On another sheet, I stamped the ghost and used my Prismacolor pencils to shade it. I then fussy cut that out. Finally, I used a gray paper from the kit to make the card base. I found some coordinating paper to back the house and another to place inside the card. I first embossed the Boo sentiment for the inside paper. I pulled all the pieces together, added black crystals, a leftover Spooky die cut (think it was a Tonic product) and an acrylic bat for inside and called the card done! So fun to make!


If I forget to say this... have a Happy Halloween! Till next time, happy crafting!

Thursday, October 24, 2019

A Special Baby Birthday Card

Can’t help smiling, my little grandson is turning 1 next week! What a joy... giggling, laughing and babbling all the time! I used Unity’s Fall Breeze, Bright Leaves Kit to craft a card for this little guy! I also pulled out a watercolor paper and some Color Bursts for the background and peripheral stamps, specifically, Marigold, Sunflower Sparkle and Merlot.


I started by adding Sunflower drops all over the outer edges of the paper and spraying with some water. I then added the other 2 powders, one at a time, spraying with water again. I dried the paper and added more color where I thought it needed it. Once dried completely, I stamped all the images on the paper using Gina K Amalgam ink and clear embossed them. I stamped and embossed the images again on another watercolor paper and proceeded to watercolor those.


I used and blended Color Bursts colors to get the colors I wanted for the leaves, flower bouquet, underside of umbrella, and bird. I painted the bunny using Daniel Smith watercolors. Finally, I fussy cut the images out and popped up the leaves and bird. I decided to pull in patterned paper by stamping the umbrella part of the image on an Authentique Bountiful paper and fussy cut that out. I pieced together the bunny parts onto the watercolor paper, added a few pen highlights, and cut  the paper down to size. I backed it with more paper and added some crystal dots and sequins.


Turning to the inside, I stamped a sentiment from the Hugs, Kisses and Birthday Wishes Kit and added a number “1“ from an old magazine kit. I also cut out a strip and some leaves from the paper scrap. I then outlined all using a brown pen. I pulled the card parts together and called it done!


I know... just can’t make a simple card for the life of me! Oh well, here’s hoping the little family enjoys the card! Till next time, happy crafting!


Tuesday, October 22, 2019

A Pumpkin Birthday Card

Still on a watercolor kick! This time I needed to combine my need for a birthday card with the already stamped out image of Unity’s Pumpkin Patch border background stamp! And being inspired by a blue pumpkin ATC creatively developed by Jeanie Marie Hays, I changed up the normal colors for this stamp!

To begin, I had already stamped out this image with Dried Marigold distress ink. I selected Daniel Smith watercolors for this card. I watercolored each pumpkin several times, leaving time to dry adjacent areas and layers. When done, I used several colored brown pens to delineate lines. I added white, orange, and blue spatters when I was done, and added more pops of dots in gold and white using Posca pens to finish the card off.

I embossed a sentiment from the Margaret Girl Kit and added coordinating pearl dots. I die cut and backed the paper with Kraft paper and a coordinating patterned paper.


Hopefully, the recipient will enjoy this seasonal birthday card as we celebrate her birthday this week! Thanks for stopping by!

October Unity ATC’s

Had fun this month creating Halloween and more Fall based ATC’s! First off, I started by cutting down paper from the Echo Park Hocus Pocus paper pack to ATC size. I then stamped the sentiment on black paper (and, yes, I will be eating candy and maybe sipping a little potion myself to enjoy the holiday this year!) using an orange/black embossing powder I received in a Love from Lizi Halloween Kit. This sentiment came from the ... Halloween Chatter Unity kit. I fussy cut that down as well as some potion bottles from the same paper kit. I then used a Hampton Art stencil to add spooky eyes to the top of the ATCS using opaque texture paste. Once dried, I went over the eyes again with Brutus Monroe Glow in the Dark Glitter glaze. I added pupils with a black pen. To pull the ATCs together, I first fixed some creepy web like stretchy string (?) to the ATC (from the Love from Lizi Kit). I added Washi tape, Brutus Monroe ribbon, the sentiment, the bottles and sequins and called them done. Not artistic, but fun!


Again, I experimented with the second ATC. I started by spraying a watercolor sheet with Glimmer Mists and an Altenew spray in reds and yellow. Using Stazon inks, I stamped red and green leaves from the 9/16 KOTM kit all over. I then added swirls from the Growing in Unity kit using orange ink and used the Chicken Wire Kit stamp with brown ink to fill in bare spots. After letting that dry, I added Champagne Gold modeling paste using a large Stencil Girl stencil over the whole sheet.


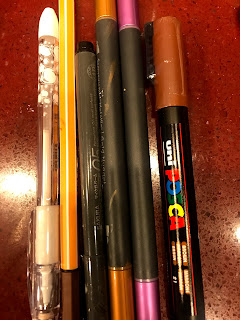
Once completely dry, I cut down the ATC’s. I then stamped and clear embossed the tree using brown Stazon ink from the 9/17 KOTM kit. I stamped the sentiment (9\16 kit) and embossed it with the dark Brutus Monroe Coffee Grounds powder to get the darkest impression. I then proceeded to have fun with a lot of pens, coloring the tree, outlining the background leaves, sentiment, and texture paste, adding the words, “love” and “fall” (my favorite season), and bordering the ATC. Finally, I darkened the edges and added crystal dots and called these done!


It is so fun and freeing to explore new products and techniques using ATC’s, as they are meant to be artistic endeavors. And the group I exchange with wholeheartedly endorses this philosophy! Luckily, Unity Stamp Co. has such a variety of stamps to choose from... from whimsical to artsy mixed media, there is never a need they can’t fill!

Till next time, happy crafting!

Monday, October 21, 2019

Quick and Easy Skates Card

Decided to try making a simple vintage card using Unity’s plaid and ice skate images from the 10/19 SMAK kit. I was inspired by all the plaid cards being posted and I do so need to keep building my holiday cards!

So, I began by pulling out a red card panel and my Misti. I lined up the image and panel ensuring the lines were vertical and stamped the bottom half of the panel. Trying a variation of what I learned from watching Unity videos, I stamped the plaid image with black ink and placed my magnets along the edges of the panel and pulled it out to clear heat emboss the image. I then carefully turned the paper around and embossed it again on the other half of the paper. Now, it didn’t create a mirror image, so lines don’t “line up”, but I think it looked good enough to be used as background paper.


I then stamped the ice skates using the same technique, as this time, I used 2 different inks on the image, clear embossing both sides. I first used black on the skates, heat embossed, and then, green on the pines. I used a poor quality watercolor paper, but there was really not a lot of coloring to be done! I added some shading, berries and used a black pen to darken some of the pines. Finally, I spatter some red watercolor and went around the edges lightly with a red ink and then a black soot oxide.

I die cut the paper and attached it to the die cut red plaid paper. For additional interest, I added die cut pine needles created by using a green scrap paper and a Poppy pine die cut and some red crystals. I wrapped black organza ribbon around both papers and mounted it on a Kraft card base. Finally, I stamped a sentiment from the 9/19 KOTM and backed that with black paper.


This was a quick and simple card to make and I think it turned out okay. If I did this again, I would use vintage photo to distress the paper, not bother with embossing, and use better paper so I could add more details to the skates. Well, that’s it for today, till next time, happy crafting!

Saturday, October 19, 2019

Mondo Holly Christmas Card

Picked up this set, Mondo Holly by Julie Ebersole, from Ellen Hutson, during last year’s after Christmas sale. Such an interesting holly stamp with twist and turns in its leaves. I used the premium Arches watercolor paper and stamped the image about 5 times covering the cut down paper. I used mustard seed Distress ink for stamping, leaving a good image, but ensuring the paint dissolves with the heavier paint. My inspiration... from the web...


Continuing on with my watercolor efforts, I took a couple more Daniel Smith paint swatches and began coloring to a Hallmark channel. (This time of year, I go back and forth between sickly sweet, but fun, romance movies and horror movies! Go figure! Guess I need the balance!).


Took quite a bit of time as you need to let areas, like individual berries, dry before applying paint adjacent to them. I didn’t belabor the painting as it is only a card! Once completed a used a white pen and lines of green paint to add leaf details. I spattered green, gold and white paint over the image. (I need to improve my spattering efforts, but good enough for now.)


I used 2 sentiment strips from the same kit, white embossing them on black paper. I die cut the painted image, backed it with both dark red and black paper, backed the black sentiment strip with red and assembled the card. I added gold crystals and red Nuvo drops to complete the card.


Check... another Christmas card done! Till next time, happy crafting!

Wednesday, October 16, 2019

Experimental Poinsettia Card

UPDATE: since I’m getting asked this question a lot... I used Iced Spruce Oxide to shadow the image and sentiment first with the brush. Then I painted Evergreen Bough lightly on the petals and Bundled Sage on the leaves. I went over the sentiment with the brush again with Evergreen Bough... just over the center area.

After having watched a bunch of videos recently, I was inspired by a Gina Krupsky video technique she used to display her Stamptember Gina K stamp (which I was too late to purchase :( ). However, I remembered my 9/19 Unity KOTM also had a beautiful poinsettia arrangement I could try this technique out on. I used a sentiment from an older KOTM that worked great. The other substitutes I used were Distress Oxide inks for shadowing and also to add watercolor to the image (instead of watercolor brush pens) and a very old white Stamping Up embossing powder. Another difference... I love mint colors for Christmas!


I started by white embossing the poinsettia stamp onto Bristol paper. I then used a Picket Fence brush to add background color to the image. After shadowing around the image I used a lightly dampened paper towel to wipe away any ink residue. I lightly then added colors to the flower and leaves, darker in the center and lightening to adding no color on the edges. I left the centers, adding white Posca to the centers where needed... I knew I was either going to add glitter or something else to the centers. I then die cut the card front out.


When I was done, I did the same to the sentiment, except I also added another darker color to the center of the sentiment to make sure it stood out. Finally, I added Stickles dots to the flower centers and around the card front and some frosty Nuvo drops. Tomorrow, I’ll attach it to a card.


Lessons... be very careful embossing... might need some new white “clean” embossing powder, be more careful watercoloring and fix placement of image. I would move it a little off the card front, die cut with a smaller die and maybe back with mint paper.


Let me know what you think! Be sure to add your email if you want updates from my blog or follow me! Thanks for stopping by and till next time, happy crafting!


Saturday, October 12, 2019

2nd Fall Birthday Card

Well, since all my boys’ birthdays are in October and I LOVE autumn colors, I went again with a fall card for my son! Tried to keep the colors more realistic and muted for a masculine take on this one. If you watched a certain YouTuber, you can tell I’ve been studying her work and developed this card in her style, only using the Unity stamp, Frondescence.


I used Spectrum Noir watercolor paper and a Daniel Smith watercolor paint tag to color in the Gathered Twig Distress ink stamped image. I used a combo of colors on each leaf variety and when completed added a Prismacolor pencils and brown and green pens to fill in color, where needed. At the end I added paint spatters in red and green. I then pulled out a white Gouache tube and Gansai Tambi Starry Colors set to add some sparkle and light.


I stamped the sentiment from the Unity Butterflies and Sunbeams set using Thistle Archival ink and clear embossed it. I added a dark green patterned paper and a gold textured paper as the base on a white cardstock. Finally, I added a gold ribbon, and DIY crystal dots to complete the card.


Hope you like this card... as much as I enjoyed listening to music and coloring it! I absolutely loved painting this set! Have a great weekend and happy crafting till next time! PS if you like my art journey... follow me or add your email to get regular updates!

Monday, October 7, 2019

Fall Birthday Card

Oh, my, I have so many October birthdays, husband, son, grandson, to prepare for! So, I’m starting off with this one, for my love who happens to love vibrant colored flowers! I know, it’s not your typical man card, but, what the heck! They can have pretty cards too!

So, I began this one by stamping the lovely Unity flower arrangement from Autumn Dream using Coffee Archival ink on Kraft paper. I colored it in with my Prismacolor pencils. I added the sentiment from the 9/19 KOTM using both an orange and and brown Gina K inks to get the tone I wanted and clear embossing it. I added Gina K crystals, cream twin, a Bo Bunny paper for the background and backed both with plain brown paper. I’ll end up putting a lovely birthday wish inside.  Hope you like this one!


If you enjoy my style, follow me or sign up for email updates! Till next time, happy crafting!

Saturday, October 5, 2019

Friends of Unity October Blog Hop

Welcome to our Friends of Unity Blog Hop! Once again, we’re hopping this month to a new theme called Change. Must admit it’s perfect for this time of year with the beautiful changes this season brings!

As usual, several members will be doing Unity Co. based giveaways this month. I, myself, will be doing a giveaway! All you need to do for a chance to win one of our goodies is to leave a comment on each blog in the hop. We will generally announce the winners on or before next month’s Hop.

Since I just returned from an extended vacation, I made just one card for this Hop, but I’m very pleased with how it turned out. Hope you like it!


I used the Faith Family Fall Kit. I started by stamping and clear embossing the image using Rusty Hinge Oxide Distress ink (and yes, you can emboss oxides!). I first watercolored the image, then added some ink accents and fussy cut it out. I originally had a simpler paper pad in mind, however since the image ended up being more detailed, I decided to combine the image with Prima’s Amber Moon paper. I embossed the sentiment directly onto the paper, and added metallic mesh ribbon, cut out butterflies and crystals.


I really love the soft feel the colors of this card bring to the possibility of change!


Now, onward to the rest of the Hop:
Dawn B
You are here => Joyce
Dawn F

Reminder, we are not sponsored by Unity and use our own stash to encourage sharing ideas and inspiration. If you enjoy my artistic endeavors, please subscribe to my blog by either adding your email or following my blog. See you next month!