Sunday, September 30, 2018

First Set of September Unity ATC’s

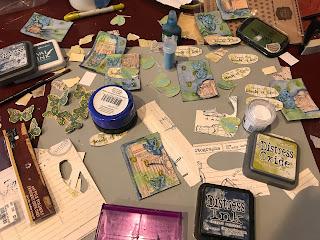
For the first ATC, had to get a little inky here and create a mixed media type ATC with a focus on an agreed upon theme of butterflies. I started by cutting down a set of 7 Gypsies 4x6 folders with camera illustrations on them. Each ATC ended up different, just based upon the base picture. Since one corner was rounded on many of the papers, I made sure each had one rounded corner, no matter where I made the cuts. I lightly painted gesso on the camera free parts of the paper. I dried it and then added blue and green Distress inks over the gesso, darkening the area around the cameras. I then stamped 2 butterflies, one from Cuppa Comfort Kit and the other from Dreams Take You Kit. I used different colored inks, and embossed one of them. I added glitter pen and crystals on one and used a glitter pen on the other. I split the larger one in half. I then added butterflies to the painted ATC using royal blue paste and added light blue embossing powder over the top and heat set it.


I used leftover paper for the sentiment, stamping butterflies from the Loving Today kit first and then embossing the part of the sentiment from the 8/17 KOTM. I figured one way to savor the beauty of life is to capture it via camera. I fussy cut it and then inked the edges of this and the ATC. I assembled all the pieces and added Spectrum Noir gold glitter ink to the lens of each camera. I also emphasized the camera details quickly with a brown pen. I liked them all collectively, but individually, not sure how people reacted!


For second ATC, I started with a beautiful fall napkin by separating all 3 layers. I cut large enough pieces to collage onto the ATCS I had already cut down. I then took watercolor paper and dipped a large sheet into orange, red and green Distress inks. I then stamped a leaf from the same 8/17 KOTM onto the paper. I also stamped random dots from the Never kit on the leaves. I used pens to color in the heart and added white and gold pens to the dots to simulate those flecks that appear on the leaves!  I then stamped the sentiment on coordinating paper which was a freebie and I’m not sure which kit it came from. This was my way to say thanks to the swap group I’ve been part of for half a year! I pulled the ATC together, first by fussy cutting the leaves and sentiments, adding fancy string, then adding a leaf paper cliff and a Bo Bunny cut board piece.


This set ended my participation in this ATC swap group. Decided I had to cut down on my commitments with new competing life priorities, but I really appreciate all the ATC goodies I’ve received and the opportunity I had to play and experiment. Well enough for today! Thanks for visiting!
Friday, September 28, 2018

You are Amazing Tag

As I was watching a live video today of Angie Magnuson, Unity Stamp Co. owner, making tags, I was inspired to make one too! Just not like hers! I pulled out the new Thankful and Grateful Fall Kit and the Make Today Kit. I also pulled out a Fall based Tim Holtz stencil trio.

To begin I took a larger tag and thoroughly coated it with white gesso. I dried it and then pulled out gold, bronze and green Art Anthology paints. The Leaf green is very pretty in that it has specs of glitter in it and the bronze and gold are shimmery. I added paint lightly in vertical and horizontal strips and dried that. I then lightly sprayed some darker color in 3 areas. I dried the tag again.

I pulled out Stazon orange and black inks. I first added orange leaves and then brown leaves. I then used a Memento red to add the 3rd leaf. I decided to go ahead and stamp and emboss the sentiments with clear embossing powder.

Now, it was time to add a little background to the tag, I lightly used all 3 background stamps in a combo of Sepia, dark green and a brown.

Next, I turned to a red wax based paste and added small burlap touches of red. Then, I pulled out a copper paste and added leaves and again more burlap touches. Finally I used a deep gold and added more leaves.

To finish the tag, I added Tim Holtz Vintage Photo Distress stain around the edges. I bundled strips of green striped ribbon, copper/red mesh and an off white linen together, pulled through the hole at the top and wrapped it with jute, adding metal embellishments.

Had a lot of fun getting inky and dirty again. Thanks for visiting and happy crafting!


Thursday, September 27, 2018

Stay Strong Coffee Cup

Inspired by: my new Unity stamp kit, Stay Strong; a Graciellie Design contest; and a shiny, sparkly, glittery card contest on Unity’s Show and Tell site, I decided to make a card today. I also decided to use up another card base I had created and never got around to using. It was made with Trimcraft’s First Edition beautiful paper pad, Love Story ... just gorgeous paper! Pairing the kit and paper made me decide to try paper piecing the cup parts. So pulling out more paper I started stamping parts onto the paper pieces. I used a Spectrum Noir paper as the base and ended up using my Prismacolor pencils to color all whipped cream and shade the pieces. I added Spectrum Noir pen to the whiter sections of the cream top and sprinkled glitter on the wet pen marks. I then added crystals to the cream.

Stamping up the flower for the front of the card, I used my Gansai Tambi watercolors, and a Spectrum Noir glitter pen on the flower part. I fussy cut and put the cup together. I then found another wood patterned paper from the pad, die cut it, inked the edges, and put sticky pink strips around the inside. I then stamped the sentiment and embossed it with Nuvo Hot Chocolate embossing powder. I stamped the heart from the kit, added glue to the center and flicked pink glitter inside the heart. I outlined the strips with pencil and added a bit more to the wood grain. I then ran a fussy ribbon across the bottom.

To put the card together, I added hearts cut from the same pad, string, clear, gold and glittery pink heart crystals. Pretty happy with how this turned out...just love the Graciellie Designs stamps. Till next time, happy crafting!


Thankful Cup Card

I love decorated coffee cups, so I wanted to make a fall cup with leaves on it. Last week, I pulled out Unity’s Cuppa Comfort. Prior to getting my new orders, I had picked up some leaves stamps from a swap (otherwise I would have used Thankful and Grateful Fall leaves). They came from the 9/16 KOTM. I had inked up the top coffee cup image and set it aside, wondering what to do with it.

I made that image by adding fall distress colors to my craft mat, dipping my watercolor paper into it, and drying it in between dips. Once,  I was happy with the level of color, I then stamped the mug using Coffee Archival ink. Masking off the handle, I then stamped the smallest leaf 3 times on the cup. I used my inks to color in the cup and the leaves. I felt the leaves ended up too dark, so I used a Spectrum Noir glitter pen on the leaves to differentiate them out. I then fussy cut out the cup and left it as is. 

Yesterday was one of those days that everything I tried to do had to be done over 2-3 times. Ever have one of those days? I tried to recreate the cup in lighter tones and eventually threw all the attempts away and looked at the original cup and decided to try to salvage it. I did like it! My husband and I are coffee lovers and coffee cup addicts! So, I decided to make a card for him by adding a second cup and the words “Thankful for you” from the new Thankful and Grateful Fall Kit.

I made a partial copy of the original cup, duplicating the steps above and adhered them together. I then took another watercolor sheet and a stencil, and lightly sprayed a gold Tattered Angels Glimmer Mist over the top. I then took another stencil and added small squares in red and brown Distress inks. I then took the Grateful stamp and embossed it at the top using a brown embossing powder. I stamped the For You all over, including adding it to the cup. I then die cut the paper and added Color to the edges.

To complete the card, I used matching paper as the base, added fancy string and sequins, added another fussy cut leaf, colored the same way.

Have to say, this was a very expensive card for an “okay” card, as I redid every single step above several times. Just an off day, I guess! But I persevered and called it a day, thank goodness!

Well, on to my next endeavor! Thanks for stopping by! Btw, if you wish to follow me and you have a crafty blog or FB site, yourself, just leave the name in a comment and I will follow you as well (all in the spirit of supporting fellow crafters)!


Tuesday, September 25, 2018

Cozy Layers Mode Cup

Was inspired to use my new Unity kit, Cozy Layers Mode, by a contest on the Coffee Loving Papercrafer’s site. This card was very simple to make. My inspiration came from the washi tape I used on this card. I ended up using a Tim Holtz stencil to create the pattern on the cup to coordinate with the washi!

I stamped the cup using a Scarlet Colorbox ink. I used a Stampin Up Red and Vintage Photo Distress with the stencil. I shifted up the stencil on the right and left side to give the appearance of roundness on the cup. I then painted the cup, adding hot chocolate, YES!, and shadows. Btw, hot choc color was a combo or red and brown! I fussy cut out the cup. I used another stencil lightly with the red and brown inks and stamped the sentiment.

Card was made with a coordinating pattern paper background, washi, enamel dots, red stripe and brown twine and a couple stamped hearts.


Thanks for stopping by, have a great day!

Monday, September 24, 2018

Forest Guy Birthday Card

Have a special someone’s birthday coming up, so wanted to try my hand at Unity’s Forest Guy kit and a background I’ve been trying to create.

I had 2 quarter circle blue/copper striped acetate plaid pieces I had picked up in a magazine last year that I thought had a men’s feel to it. I wanted to coordinate with those pieces by creating a copper/metal look paper. To do that, I used a combination of blue, brown and Rusty Hinge Distress inks and coordinating Perfect Pearls powder. I would start by stamping the pad on my craft mat, pouring Perfect Pearls in spots, spray the mat with water and then dip my watercolor paper into it. Then, I would dry the paper and move onto the next color, till the paper was saturated with color and was shiny in spots. I then took a copper brown Nuvo Glimmer paste and a TCW stencil and created a riveted metal look.


I then turned to the male image and stamped that on coordinating paper. I colored the image with pencils and paper pieced the clothes onto the image. I fussy cut the image out. I then found a matching blue paper that I stamped the cogs from Unity’s August 2017 SMAK kit using the same inks. I placed Forest Guy onto the blue paper and framed that image with a Gina K die cut of coordinating paper. I used the same paper to create die cut cogs and added some copper Perfect Pearls color to the cogs. I also found some wooden cogs to add to the card.

I then stamped and embossed, using copper embossing powder, numbers from a Bo Bunny set and the sentiment. I added blue paint to the numbers and beige pencil color to the sentiment. I pulled the card together and added a copper kitty cat in honor of the pet.

Hope the recipient enjoys this card! On to the next creative endeavor! Happy crafting!

PS I am participating in a papercrafters follow loop, wherein, if you follow my blog, I will reciprocate if you leave your blog address in the comments. This is an effort to encourage and support fellow crafters and to gain inspiration from others efforts.


Touching up a Potential Card Fail

Not sure what I was thinking when I loosely painted up this image awhile ago, and then, took a pen to it for scribbled detail. Looks like I had used 2 sprays on the background. In looking at it again today, I decided I kind of enjoyed the looseness of the whole thing. So, how to make it into a card?

In cleaning up my work area, I also found a made up card base (complete with patterned paper on it) that I had never finished into a card. I decided I could pair it with the painted rose image (from Unity’s Sept. 2018 SMAK kit). I used a circle die cut on the image card and then looked to see what sentiment would fit this card. I found what I thought would be a perfect match in Unity’s Loving Today frame and sentiment kit. I stamped the image on watercolor paper and pulled some distress inks I thought would be a match. I again painted it loosely and even used a pen again to match the style of the image. I also used a pen to create a circle on the image as well.

I kept the card simple in design and just backed the image and sentiment with a red paper that I inked with vintage Photo around the edges. I added enamel dots and called the card done. Not my best effort, but I think I saved this one. Hope you do to! Will be posting another almost fail today, so stay tuned!


Saturday, September 22, 2018

New Baby Card

Created a quick card today in preparation for a new addition to our family. Used stamps from Unity’s Sweet Dreams and Right Words kits, a Baby Mine pattern paper pad, a cloud embossing folder and a sun ray stencil.

I first stamped a few Distress inks and a Chalk ink on my craft mat spritzed with water and dipped my paper lightly into it. I then stamped the moon using archival ink and the blue chalk ink. I painted the image with yellow and blues. I then used the stencil and added yellow distress rays. After drying everything, I used the embossing folder and some sponges to loosely add clouds. I then stamped the sentiment and embossed it with a mix of blue and green embossing powders to get the right color. I inked the edges. I added some matching vellum stars and trimmed the paper.

To create the card, I added patterned paper as the base, added lace trim to the top and bottom of the watercolor paper, added foam to raise the image, and finally, added sequins. I love how soft this card turned out and hope the happy parents-to-be do too! Happy crafting!


Friday, September 21, 2018

Experimental Christmas Tag

Created another messy tag (need to order some of these) using a freebie Unity tag and their Happy Holiday kit. I used a lot of products again (see pic) after applying and drying a white gesso onto the tag.


I applied the Ranger acrylics in a cross hatch pattern. I then used the Art Anthology stain to apply drips. I sprayed Snow Drift (white) to lighten the drips in spots. I then used the Versaclair ink to stamp the star strip with clear embossing powder. I glued a silver/gold mesh in spots on the sides. I stamped the happy holidays 4 times using the same ink but alternating silver and clear embossing powders. I took Brea Rease Blue paste and applied some strips (after it dried I layered a silver paste on top of those strips to lighten them. I then took silver paste and added circle stencil marks simulating balls. To finish the tag, I darkened the areas with the mesh by dripping the stain over those areas. I also sprayed the white again to lighten areas too dark. I used pens to draw circles around the stencil marks and lines simulating string. I also traced the stars with a pen and added light silver mesh marks over some of the darker areas. I diecut a bubble stencil with matching paper and glued pieces in spots.


Finally, knowing I made a messy tag, decided to stop and add coordinating ribbons (even pieced some on the tag). Some things learned - this tag is way too busy (I like it but I know what’s in it); a little too dark; the Versaclair worked mostly, but there is some product in there it didn’t cover well; I should have dried it more often as when I embossed the words, the background also got embossed (which I ended up liking, but it was a happy coincidence); and finally, I did use my Misti, which helped (although the tag slipped sometimes as I didn’t affix the magnets ...shoot me now ;) )! If I didn’t add the strips, I think it could have been simpler and cleaner and potentially I could have used other stamps.

Anyways, enough on this messy tag attempt. I will try this again, perhaps on a card, or just another tag! Thanks for stopping by!


Wednesday, September 19, 2018

Never Tag Experiment

Decided to try creating a tag after being inspired by watching 2 videos on Unity’s FB site with Jolande van Oosterhout. I improvised using my own stash collection including the Never kit, Red Pearl and brown Colorbox ink, Versamark black ink, white gesso, Art Anthology, Art C, and Tim Holtz products, 7Gypsies trinket and a TCW stencil. This was the first time I created a tag since I began stamping a year ago.


I started by painting white gesso on the tag. I dried it and then added Art Anthology mint and gold painted cross hatch stripes and circles on the card. I dried the tag again. I then tried adding the large scroll stamp with the rose ink. I should have used my Misti here as the tag becomes uneven as you layer products on it. I then wanted to see what happened if I added a Tim Holtz stain on it, so I added some orange pumpkin and spritzed a little water on it to let it run. I dried that and added another stamp in spots using Brown ink. I then added the sentiments and the circles, again, my Misti would have been beneficial here. I added the Art C metallic paste with a stencil, first trying to use a wipe, which didn’t work on my painted surfaces and then my finger! I added the stain again in the circles. I then tried another Art Anthology darker red spray which ended up too dark and spritzed with water. I dried everything again, added the dragonfly trinket, a little gold paste on the black circles, darkened the edges and added ribbons and called it done. 

What I learned...this is so fun, but I need to experiment in my journal with how these products interact with each other. I think I also need to use my Misti more. I also reminded myself that I am a firm believer in “more is more” vs “less is more” (reminds me of all the rings I used to wear on my fingers and multiple necklaces at once). Anyway, hope you share your own experiments as we learn together! Have a great day!


Monday, September 17, 2018

Sunflower Card

Been in a funk lately, made some ATC’s, took a long break, tried some cards that failed....oh well, time to snap out of it! To get inspired, I decided to look through one of my favorite pattern paper pads, Autumn Moon, by Prima. I noticed the daisy basket juxtaposed against the map background and decided to case the style and the soft colors.


I chose to use the vase from Unity’s August 2017 KOTM and the map from the August 2017 SMAK kit, coincidentally. To start I pulled watercolor paper, cut it down and stamped the vase using coffee, yellow and brown archival inks. To get the colors I wanted I to use, I mixed my own. I painted the background a couple times drying in between layers. I then attacked the vase using green and brown distress inks. Then I began adding colors to the flowers. I decided to add the map background stamp using coffee archival ink. I then fussed some more with the flowers and vase, and finally added a bit of the map to the vase as well. To complete the background, I used a rose pencil around the flowers to delineate the edges better. I die cut the image and inked the edges.


To complete the card, I found some vintage patterned paper I thought would complement the image, washi tape, 2 ribbons, gold pen and sequins. I used washi tape on the sentiment tag as well. Hope you like the soft vintage feel of the card. For some reason, I had found the stamp intimidating, but I think it turned out okay in this style! Let me know your thoughts. Have a great day!


Friday, September 7, 2018

Notice Moments Card

Yikes! Made a list of all the cards I need to make this month, for this and next month, realizing between birthdays and anniversaries I have a slew to make! So, to begin, decided to make a card for my son and DIL who are expecting their first child next month! For this card, I used last month’s Unity LOL kit, called Notice Moments (8/18).

To begin, I pulled out a Spectrum Noir Aqua paper and cut it down closer to size. I sprayed the sheet lightly with a light peach/orange Tattered Angels Glimmer Mist. Using my Misti, I stamped the image in Coffee Archival ink and, then, restamped the clock face in Potting Soil and the flower in Monarch Orange.

I then pulled out peach, orange and rust colored Distress inks, 2 greens, and Vintage Photo. I began painting the image again moving between areas and lights and darks, drying when needed. I added shadows to the image and spattered droplets of the paint. I also added a few white drops. Finally, I added a few stencil additions to the paper and then diecut it.

I then turned to the sentiment. I decided to use different kits here. I pulled out a vintage gridded paper for this. First, I used the family words from Bitty Backgrounds with the red ink to coordinate colors. (They probably won’t notice it, but I know it’s there!) I then clear embossed the sentiment from Unity’s Loving Today kit with Olive Green Archival ink.

To complete the card, I used a coordinating background paper, added color to the edges, used a brad with a clock face on it (!), added raffia, sticky dots and some sequined flowers! Inside it will say Happy Anniversary! Certainly is a special time in their life...where every moment will count!

Hope you like this one! Remember, I am participating in a #papercraftersfollowloop, wherein, I will reciprocate following you (even your blogs) if you follow me. It’s meant to encourage fellow crafters and to acquire some inspiration for myself! If you’d like to participate, follow me and just
leave a comment with your blog name! Thanks for visiting!


Thursday, September 6, 2018

Unexpected Love Card

Finished up a card today using Unity’s Unexpected kit. I’m definitely into fall colors and I had this vision of a olive/plum combo for this stamp. So, I began by stamping the image using Plum Archival ink onto watercolor paper. I then pulled out coordinating distress inks and Tattered Angels Glimmer Mists (see pic below). I sprayed the paper in spots starting with the lighter Red and then the green, drying in between.

I then stamped all the distressed inks out on my craft mat and began painting the image. After I was done, I dried the paper and then began adding white and gold paint pens marks on the flower. I also used a fuschia pen in spots. After the image was dried I stamped and embossed the sentiment using Colorbox gold ink and Ranger gold embossing powder. I took an olive green pen and shadowed the letters. I then added white and gold spatter.

I finished the card up by framing the image with gold patterned paper, adding red and green background papers, and adding gold thread and crystal dots. Pretty shiny card closeup! Hope you like this one!

I am participating in #papercraftersfollowloop wherein I will reciprocate following blogs both to support fellow crafters and to gain inspiration for my own art. Feel free to follow either by email or (after I set this up today) the normal follow button and I will do the same (leave your blog name please in a comment)! Thanks for visiting today!


Tuesday, September 4, 2018

Grateful Card

Decided to switch things up and create a collage card using Unity’s Grateful for All, LOL 6/18 kit. These are easy and fun to make. I started by pulling out some Distress inks in dark yellow and blue (which mixed with the yellow to create a blue green, a happy coincidence). First I stamped the yellow on my mat and spritzed it with a dark yellow Prima Color in Bloom spray. I then dipped the card in that twice, drying in between. I then stamped the blue and spritzed it lightly with a Dylusions teal spray and then dipped the card again. I dried it and then stamped the image in Sepia archival ink. I also added a dotted border from the January 2015 KOTM using a gold Distress ink. i finally darkened the edges and added foam to the back.

I then turned to my basket of ephemera I had picked up discounted at Tuesday Morning. I found 2 specialty papers I thought matched perfectly as well as a couple other pieces. I then partially die cut the water color paper and gave the dotted edge a straight line. I pulled out some chip boards from 2 different companies I thought would match and added a bronze color over the top.

I pulled the card together by distressing and tearing the bottom edges of the patterned paper.  I slipped a little piece of green gold foiled paper under a tear and added the dark gold embossed paper on the other side. I added some ephemera, the word ‘WE’, twine, metal pieces, sequins and the chip boards.

I think the stamped image stands out pretty well in this hodge podge card! Hope you like it! Visit again soon! Also, if interested, add your email address to get blog posts delivered to your mailbox. (Remember, this is a 2 step process, where you’ll have to interact later to an email from blogger.) Also, I now belong to a #papercraftersfollowloop, a follow loop, wherein, fellow crafters reciprocate signing up to each other’s blogs in support and for inspiration. Just leave a comment with your blog name, and I’ll follow you too! Have a great day!


Saturday, September 1, 2018

Friends of Unity September Blog Hop

Hello, again, Unity Stamp Co. friends! Back again, with another blog hop. Please welcome 2 new great additions to our team, Bobbie Sue McConathy and Kim Van Zant Klinkovsky! This month there are 4 friends offering giveaways (including me). To WIN leave comments on EACH blog in the hop AND check back on next month’s hop for the WINNERS from this month’s giveaways.

With this month’s theme, Wings, my fellow bloggers went in a variety of directions. For one of my cards, I decided to make a Sympathy card. I used 4 kits total on this one: Give it Up - Let it Go (which I also used on the second card), ...beautiful life, blessed memories; Life Touches; and Border of Bells.


To start, I stamped the flower from Life Touches on watercolor paper using gray archival ink. I then used Distress inks to add color and color splashes. I ended up using a gold Posca pen on the flower center, covered the whole flower with a Spectrum Noir Glitter pen and outlined the flower with a black pen. I then took another watercolor sheet and added the same colors to the paper by dipping the paper into the colors on my craft mat. I then used a TCW stencil with Black Soot Oxide to add grayish script and branches. I was then ready to emboss the bird image on that background using black archival ink and a black embossing powder. I embossed the sentiment on cream cardstock using the same products. I used a Kat Scrappiness die on the flower and trimmed the rest by hand. I found a matching patterned paper and backed all with black cardstock. I added gold thread and sequins and called the cardfront done. I then pulled another cream paper out and stamped a sympathy verse on it in black, added a border using Black Soot and one of the Distress inks I used earlier and darkened the edges using the same ink.


I made one other card with this set. I had received a bird patterned acetate sheet from a class I took and have never used it. Well, lol and behold, it goes quite well with this stamp. This card was made using distress inks to color the watercolor paper and a bit of gold Perfect Pearls powder (I used the same Perfect Pearls to add a luster to the brown Stazon stamped wooden birds). I had already selected the patterned paper I wanted to coordinate with. I made enough paper to use as the background for the stamped image and sentiment and for the shaker. This card was pulled together with a burlap doily, sequins, enamel dots, washi and eyelash string.


Hope these cards and the others shared on this blog hop help to stimulate your creative ideas! Remember, if you wish to participate in the giveaways, be sure to comment on every blog entry in this Hop and check back next month. We, all, on the Friends of Unity design team, are always interested in your feedback! That’s why we use our own stash to offer giveaways.

We are NOT sponsored by Unity Stamp Co., but they approve our hop. We are huge fans of the company, their products, the owners and staff, and the Unity Show and Tell community, which is why this Hop was started. Just wanted to share our theme based designs and some of our favorite stamps.

Friends of Unity blog hop:
Dawn Fields
 Jeanie Marie Hays
Bobbie Sue McConathy

Thanks for stopping by! Till next time, happy crafting!