Saturday, June 30, 2018

June ATC’s - Strength and Dignity and You Are Sweet

Here’s the last 2 sets of Artist Trading Cards. The first Strength and Dignity was pretty easy to put together. I used a sentiment stamp from Unity’s 7/13 KOTM kit and a frame stamp, from No. Journal Box kit, which I embossed using a brown embossing powder. I stamped a background stamp, from the 12/16 SMAK kit, on regular card stock. I used patterned paper, lace, washi tape, a little ephemera and tiny pearl dots. I really like this sentiment.

The second ATC was created using Unity’s June 2017 KOTM and the partial sentiment from the April 2018 KOTM. First, I built a foundation using a wood grain patterned paper. I cut up my brighter alcohol inked papers (I described how I created these sheets in the earlier June ATC writeup). I stamped the circle of fruit on vellum using clear embossing ink and die cut using a circle die. I  used pens to color the fruit to coordinate with the background. I also used a black pen to outline the fruit. I then stamped part of the sentiment on each side of the circle and cut the circle in half. I fussy cut out bits of paper from the Farmhouse paper pad I used. And I pulled out fruit washi to include on the card. I really like how summery this one felt to me. Since there were 2 designs developed I posted pics of both. Till next time, happy crafting!


Tuesday, June 26, 2018

No Caged Birds Card

It may be because I came from a Women’s Lib era, or my years pioneering in a traditional man’s job, but I was driven to create this card after hearing a story of abuse recently. It’s my own way of showing support to someone suffering. But I think it could also be used as encouragement to someone stepping out of predefined roles. I, again, went out on my own limb, to create this collage (I guess you’d call it that) style card. I’d be interested in honest feedback whether it’s worth honing my skills in creating this type of card. (Again, this was just a quick hack).

I started by pulling out the girl from Unity’s May 2018 SMAK kit and the cage from Unity’s She Sprouted Wings kit.  I stamped the girl in Potting Soil archival ink. I then masked her off and stamped the cage in Coffee archival ink. I then looked around for background stamps and I started by stamping the large fleur-de-lis type stamp from the Never kit using a combo of red and browns (it came out a little too dark, but I think it’s okay). I then stamped the No Caged Birds sentiment from the She Sprouted Wings kit using a softer Gina K rose colored stamped. I used the same ink to stamp the script from Lit it Go and Focus kit twice. I then pulled the wire cage/net stamp from Blow Your Mind kit to fill in gaps. To add texture I used a Tim Holtz flourish stencil and a deep gold Bo Bunny paste to add 3 impressions using a palette knife. 

Now I was ready to start painting. I began spraying the edges with a pale pink Tattered Angels Glimmer Mist making sure I masked off the girl. I then dried that and added an overall pale orange red watercolor all over. I then decided I wanted to create a collage type card and started dividing up the areas, adding borders and changing up the colors a little using watercolors. I deepened the colors behind the flourishes. I then decided to spray another deeper gold Tattered Angels Glimmer mist around the edges, again masking off the girl and drying it all afterwards. I added dots from the Itty Bitty Backgrounds to the No Caged Birds section.

I painted the girl, added red to the bird and went on to the sentiment. The sentiment came from Aria girl. I stamped that with a combo of the Gina K rose and brown archival inks. I die cut that and a piece of scrap Kraft paper with a Sissix die. I then colored the Kraft paper with a Glimmer rose colored chalk writer...so it’s not flat. I went around the outside of the sentiment with the same writer and mounted it on the Kraft paper.

To pull the card together, I distressed the edges with Vintage Photo, added eyelash fringe at the bottom, used foam tape to attach it the cardbase, attached the trimmed off sentiment, and added sticky crystals. I’m pretty happy that it came together okay for being so ad hoc. But, again, let me know your thoughts on this style! Well, happy crafting to you and stop by again sometime!


Monday, June 25, 2018

Bold Bloom Card

Watercolored another card today using textured watercolor paper. I find I totally relax when I watercolor... just love doing it. Anyway, used my tube paints again and although I matched colors to a Prima paper pad, the paper was never used. I stamped the large bloom from Unity’s Bold Bloom kit using Stazon Timber Brown. I stamped the leaves in 2 places using Olive Archival ink. I masked the flower when I stamped the leaves and background stamp. I used a couple background stamps: the net from Unity’s Blow Your Mind kit, stamped in yellow archival ink; and the lower right frame from Let it Go and Focus, stamped in Coffee archival ink. Once I was done painting, I stamped the sentiment from Never in the brown Stazon ink.

I painted each petal using 3 mixed colors, and, when I needed to, I dried the paper. Sometimes I used the pigment directly for a pop of color. I then painted the leaves. I then colored the background adding the light red paint in spots. I then added some background leaves to give more depth. I also added more red in the leaves area. Finally, I took a light green and just outlined the flower. I inked the edges with the coffee and added a little vintage photo Distress ink.

To finish the card I add some sequins, a gift with purchase from Unity, and brown twine. Hope you like this one!


Saturday, June 23, 2018

My romantic Live Your Dream ATC

For the second ATC, I wanted to try creating a mixed media card! Tuesday AM store released a few discontinued Tim Holtz items. I picked up a few, like mixed media cardstock (for $1.99!), washi tapes, metal pieces and Dylusions spray paint. I also lucked that week picking up a large collage pack that included special paper and metal pieces. So, my mind started spinning and I got this idea for an ATC.

I know often people start their mixed media pieces with book pages. I went to a used book store hoping to find a really neat sophisticated book. But, I didn’t want to spend money on a book I was going to tear up. I watched a video once that talked about being careful what you use as she finally noticed she had used a book on gynecological problems of bovines 🤣! So, I finally decided on an old trashy romance paperback😁, hoping I could cover it up and that I didn’t used any risqué pages! Anywho, I began by cutting out several pages and tearing them up. 10 ATC’s can be created with one 8 1/2 by 11” piece of paper, so I pulled out one of the pieces of cardstock. I randomly tacked down the paper using Fabric Tac glue (recommended by a class I took). I then took some blue glittery paper and tore that up as well and added that. I then took some Prima pink/black Washi tape and added some pieces of that all over. I was going for a pale pink/dark blue-green/black color scheme. I found another paper I thought would go and added some of that. I then pulled out stencils and started stenciling 2 different designs all over using texture paste. I added a platinum silver embossing powder to the texture paste and heated it up...which makes it colorful and puffy (more texture). I then pulled out the blue Dylusions spray and sprayed in 3 different spots. I also took a pale pink Tattered Angels Glimmer Mist and sprayed that in the empty spaces. I let that all dry out for an hour or so before I cut it up. (I did have to re-glue a little as the cutter is not gentle when going through so many layers). I had leftover paper that I cut up, blackened the edges and added where there were holes on some of the ATCS.

I used Unity’s Live Your Dream kit. I stamped both stamps on watercolor paper. After creating 10 sets, I added watercolor to the bike image (pale blue and pale pink), fussy cut sentiment and image, and inked up all the edges in black. I also inked up all the ATCs edges. I then put each ATC together uniquely - adding a blue glitter washi tape when the ATC was too light, adding a gold and a silver sticky, adding the kit pieces and a Tim Holtz metal piece. I also used a pen to make a frame around the edges. I think these ended up pretty interesting and I had a lot of fun creating these “romantic” Live Your Dream ATCs! I can see why mixed media is popular - I’ll definitely try this again. Again, any questions...just ask! Have a great weekend!


Alcohol ink ATC

Experimented this past month creating alcohol ink backgrounds. After watching some videos I decided to try the shaving cream method and determined that both it’s a bit messy, and, if you are using light colors, it’s not as effective. I wanted mostly yellow with a touch of red (pink) and orange. The first pic shows the results from that method which basically consists of swishing around ink in shaving cream and placing your paper on top to pick up the ink. I then went back to the first method I learned, that is, adding a little hand sanitizer to your gelli plate dropping ink on it and then picking up the ink with your Yupo paper. I was able to reuse the paper from the first attempt and achieved a much darker look.

To create this ATC, I used a stamp from Unity’s 5/13 KOTM and the sentiment from the New Season, New Wonder kit. I started by stamping the image on card stock. I then stamped just the pitcher on the lightest colored alcohol inked paper using an orange Stazon ink and fussy cut out the juice part of the pitcher. I colored the fruit using Spectrum Noir markers and used a grey pencil on the pitcher and attached the alcohol inked paper. I pulled out Authentique’s Cheerful kit and used different papers to be the base and backings for the image and sentiments. I then pulled out some wooden @ signs and used the Stazon ink to color it. I stamped the sentiment on more paper and then pulled everything together. I think this ATC turned out pretty cute and appropriate for the summer season and I also like the swirl effect the alcohol paper gives the juice. Now, on to writing up the next ATC! Enjoy the pics...if questions just ask!


Thursday, June 21, 2018

Every Single Day Card

Today I turned to the new Unity sentiment kit called “... every single day” that I just received. I also pulled out my Cottage Life paper from 49 Market. I decided to coordinate colors for this one.

I started by pulling a scrap watercolor paper and using black archival ink to stamp the flowers and then die cut the paper. I then started mixing my tube watercolors into light and dark purples and purple/blue colors. I also mixed a green I thought would match. I use a scrap watercolor paper to test out colors. I then started painting the flowers and leaves. Once I was done, I used a Hero Arts crackle stencil to add greens into the background. I also added color around the middle flower. Since I decided to add color at the end, I pulled my violet Brea Reese ink out and mixed it with one of the purples and colored the ends. I then filled the white space in between with a very faint green.

I went over the stitched edges with a gold pen and added gold to the flower centers. I also used my white paint pen on the leaves and flowers to give highlights.

I stamped the sentiment on regular cardstock and added green butterflies from the the 9/17 KOTM. I stamped a few more of those for embellishments using the violet archival ink that I stamped the sentiment with. I added gold pen highlights to both sets of butterflies. Because the cardstock was a little lighter than I wanted I colored the edges and used a taupe ink with a dots stamp to tone down the white.

I used the patterned paper as the background, used the opposite checked side to back the image and sentiment and added gold twine and purple crystals to complete the card. The card turned out okay and I got my purple fix in! Have a great rest of the day!


Wednesday, June 20, 2018

Rebel in Me Card

Unity’s Show and Tell has a Watercolor Challenge going on now, and I love watercoloring. So, I finally stamped the huge flower from Unity’s You are Important kit using Plum archival ink on to Canson Montval watercolor paper. I then stamped the small flower background stamp from the Unity SMAK kit from 12/16 using Olive Archival ink. I also used the dots from the 12/15 SMAK kit to extend the dots top and bottom.

I mixed cool and warm reds, and light and dark versions of both and added several layers, drying in between. I originally added a cool soft pink to the background and decided I wanted a green one. So, I mixed a green and added several layers. Once I was done fussing with the flower, I pulled out my Inktense watercolor pencil and used bark to add shadows to the petals. I then used a green to darken the area around the flower. I added red paint to dots and then used black and white Posca pens to add highlights and lowlights to the dots. I also used the black pen on the center of the flower.

To finish up, I stamped the sentiment, fussy cut it, blackened the edges and add espresso Distress ink to the edges. I also blackened the edges of the watercolor paper. Found matching paper in a Farmhouse paper pack and used that as the base layer. I added black twine, and red sequins with a pearl topper and called the card done.

This is a beautiful flower from Donna Downey and was fun to paint! This kit also has some great sentiments so it’s a good buy! Well, enough for today! Happy crafting!


Tuesday, June 19, 2018

Lucille Ball Card

Dreamt of creating a mixed media ATC, but decided this morning to try another watercolor. Should have stuck with the mixed media idea 😏!

Instead, I pulled out a couple stamps from Unity’s 12/15 SMAK kit. I stamped the girl on watercolor paper and the dress frame on Prima patterned paper. I watercolored both using Kuretake Gansai kit, regular watercolors, Distress inks, Brea Reese inks and, around the girl, Tattered Angels spray. I stamped the sentiment using Memento brown ink (which I had also used on the other stamps). I die cut the girl image and fussy cut the dress frame.

I pulled out a Darice button embossing folder, inked up one side with Mermaid Lagoon Distress ink and embossed a sheet of Kraft paper. I lightly painted the buttons as well.

Pulling the card together was easy, using buttons, string and ribbon as embellishments. Quick card to make and because of the Brea Reese, glittery in spots. I love the quote and will probably use it a bit!
Have a great day!


Saturday, June 16, 2018

Amazing Day Card

Had some time today to get back to my new Unity June 2018 SMAK kit. I love this vintage grass stamp and wanted to see what I could do with it. I pretty much used oxide inks today, specifically, Aged Mahogany, Vintage Photo and Antique Linen. I threw in a little dark brown from my Kuretake Gansai paint set. I also used white and black Posca paint pens.

I started by stamping the grass image on my Spectrum Noir Aqua paper using a variety of archival inks - brown on the rulers, green on the stems, and plum on the plumes. I then took out my Itty Bitty Background kit and used the wood grain lightly on the ruler using Antique Linen. I then just added colors and lines. I added more Aged Mahogany to the plumes. I took one of the background stamps from the kit and stamped it one the left side using Antique Linen . I then added Aged Mahogany to both sides. I then stamped a sentiment in brown from the Let Your Wishes Fly Kit and tried embossing with a partial fail...the paper may still have been a little wet. (I ended up using a Spectrum Noir glitter pen on the letter to make the words shine a little.) I then took a spotted background stamp from the December 2015 SMAK kit and went over the image using Aged Mahogany.

After this, I took my pens and added more grasses and some highlights and lowlights. I then added shadows to the plumes. Once dried, I used a postage die on the image and backed it with Kraft paper. I stamped a lace like stamp from the December 2016 SMAK kit on some pink patterned paper, added paint and fussy cut it. I cut a slice of a doily and added Aged Mahogany ink. I added both of these to the image. I took some Prima paper and used that as a foundation, which I added some color to. I then used fringe, twine, beads and metal pieces to decorate the card

Well, got my fix in today and loved the stamp! Thanks for stopping by! Have a great weekend!


Friday, June 15, 2018

Father’s Day Card 2018

Created another card for my husband after having received my Unity June 2018 SMAK kit (just in time)! Decided to make a vintage collage card, as the guy in the kit is young so he doesn’t really represent my hubby, but he’s male and I felt I could add other relevant elements, including other stamps in the kit! I decided to use an interesting Recollections paper pad called Seaglass with a focus on a glittery grayish/purplish stripe paper. My tall husband, with his salt and pepper hair color, his blue eyes and coloring, looks great in lavender shirts, so I felt this was pefect for him. I used black archival ink and colored oxides on this card.

I had to trash my first attempt at coloring the guy on patterned paper...as again, he doesn’t really look like my hubby. Instead, I stamped the image on watercolor paper die cut into a tag form, and also added the words, My guy, from the kit and used a pen to outline the words. It seemed better to leave him uncolored and add background stamps around him. So other than adding gray to his hair, taupe to his clothes, glasses and a little more facial contouring, I left him alone. I then used background stamps to pull in other colors to match the papers I had selected. I added color to the edges and to the stripes and washi tape to the bottom.

I then took a map sheet from the pad and stamped another sentiment and die cut that. I stamped the screws background stamp on another paper and added washi tape to the side. I started to build the card, using the striped paper and another sheet to fill the A7 card. I added a black doily and the tag. I then attached the screws paper and large sentiment. I used some purplish ephemera paper to stamp out some tags with Unity hugs and kisses stamps I recently picked up in a swap. I die cut some forms to add as embellishments to each side. Because I don’t own a Happy Father’s Day sentiment from Unity, I used a Brutus Monroe kit that had a train and sentiment I could use. I again added coordinating color to this image and backed and attached it.

To complete the card, I added more Washi tape to the bottom, a lavender ribbon, a pewter colored metal piece and sequins and enamel dots. Okay, so it’s again, over the top, but I like interesting collages. So, I’m happy with the card. What can I say...but, it’s unique! Have a great rest of the day!


Wednesday, June 13, 2018

Let Adventure Card

This afternoon, I wanted to get back into being creative with watercolors (or at least trying). I was inspired by the Stamperia paper page in the picture. Unity’s Let Adventure kit was just sitting out, not put away, and I noticed it had a butterfly in it! Bingo...now I wanted to try to create a version of the butterfly part of the page, but with the butterfly standing out on my card. I had to pull in a few other stamps from the following kits: Vintage Lace, SMAK 12/17, and SMAK 12/15. The beautiful Let Adventure kit was designed by Jolande van Oosterhout and Marleen van Meerendonk, master mixed media stamp designers.

I started with a special watercolor paper I received in a kit that is very textured. To begin, I first used the corner stamp with my Misti using brown archival ink. I then used a blue archival ink to stamp the circle. I then turned to a gray archival ink to stamp the butterfly. With this stamp, I also used a black archival ink on the edges. I mixed greens and blues to paint the butterfly and used my Kuretake black to darken the edge again. Once I was satisfied, I then started painting the background, blending blues into yellows and browns. At this point I totally dried the whole page. I added more colors to the butterfly and started to color a box around the circle (again mirroring the paper). I then started to add a shadow around the butterfly and decided to add another interest item. I hand stamped the postage stamps (behind the words) and added color to the stamps and a box around it. The paper had a rust color in it..so I made this whole piece more rusty looking with red, orange and brown. I dried everything again.

Now I started pulling out stamps to add faux ephemera to the background, using lace, bubbles, plants, and fabric patterns. I used blue, coffee, and green inks for this. I then added a little watercolor to the plant section (bottom left). I also used a few stencils with gesso and textured paste to add a little white. I used a white paint pen to add to the black sprays and to dot the butterfly wings. I embossed the sentiment on the paper. Once I was satisfied with playing around, I cut it down, blackened the edges, backed it with Stamperia paper which I added fringe to, and finally, added copper stud embellishments and a wooden gear (colored with Stazon inks and chalkwriter pens).

I am pretty pleased with how this turned out. Patterns would have been clearer on a less textured paper, but I like the richness of the paper. If I were to do again, I think I would have stamped the sentiment in the beginning and done a box around it. Hope you enjoy this card! Till next time, happy crafting!


Catching Up Cards

Started both of these cards and thought I’d share them. The first was stamped entirely from Unity’s Gratitude and Joy SMAK 5/18 Kit. I stamped everything using my Misti. I wanted to match up with both the washi tape colors included on the card and the paper on the the top half of the card. I used black archival ink on the vases. I watercolored the vases then added coloring around the card background. I then used coordinating distress/oxide inks on the dots and the red blobs stamps. I stamped those fairly lightly and loosely. To finish up, I added the washi, enamel dots and blue ribbon. I added newsprint patterned paper at the bottom. It turned out okay, I think.


The second card was thought up in response to a post I received from Donna Cervantez. She had commented that her Unity’s Windswept Petals had circular bubbles in the blank spaces between flowers and looked quite different from the card I had recently posted. I went back and looked at the stamp and, indeed, it did. I then realized the ink I had used on my card was quite juicy and ended up filling those spaces in. She was nice enough to post a card she made and I told her I was going to try casing it. She was very gracious and encouraging and pointed me to her blog. This card was started before I checked into her process. So, although the look is a little similar the process isn’t the same. I had some leftover alcohol ink paper I had created and decided to try stamping the image on it. I used plum archival ink to stamp the image. I cut the paper down and found some coordinating papers and created a somewhat similar card. I added a sentiment from another KOTM and backed it with similar paper. I think this card turned out okay, although this wasn’t my favorite alcohol ink experiment. I’ll be talking more about the creation of this paper in a later post.

Back to cardmaking this afternoon. Have a great day!


Tuesday, June 12, 2018

All Cylinders Card

Needed to get started on a Father’s Day card. I pulled out Unity’s All Cylinders Kit and a watercolor paper. Deciding I wanted to try to create a scene, I pulled a tree stamp out of the 9/17 KOTM. I started by spraying the top area with blue Tattered Angels Glimmer Mist and along the bottom with a green one. I then stamped the tree using archival inks, green for the leaves and brown for the wood. It then took to my watercolors and started filling in ground areas and the tree. I also used my Kuretake Gansai paints. I then stamped the car on a separate watercolor paper and painted that. Once done, I fussy cut the car and decided where I would re-stamp it on the scene to make sure the bottom of the tree didn’t peak though. I then attached it to the paper raised with foam tape.

I now had a choice to either cut off the end of the paper or leave it as is. Since it’s a masculine card, with a vintage car, I decided to leave the spiral remnants for interest. I had painted a few flowers in red and decided to add a few other elements of red, with the stars and a reddened doily (by way of Abandoned Coral Distress ink).

I found a teal paper I thought would complement the image and added Evergreen Bough and Hickory Smoke inks to the edge to tie back to the paper. I found a non Unity stamp to add to the image. I then pulled everything together with a soft gray Kraft paper to match to the car (my husband’s car is dark gray...but I decided to cheat with a lighter color.). I added twine and silver enamel dots to finish the card.

It was very hot today and my energy was pretty sapped, so I hope this turned out okay. I’ll try another card tomorrow (with air conditioning on!)! Happy crafting till next time!


Monday, June 11, 2018

Embrace the Mess Card

UPDATE: added sequins, prills and a little more coloring!


Original post:
Returning to card making today! I had created a card base using the patterned paper and circle ribbon, intending to use it elsewhere, but alas the colors were off! So today, not wanting to waste it, I turned to my Unity stamps to see what would complement the paper. I found The Windswept Petals Kit and an ink that turned into the perfect match, Colorbox’s Red Pearl, that I used for both the image and sentiment. I used a sentiment from Unity’s You Are Imporant Kit. I had picked up the 12x12 American Craft Sundrifter pad for $3 at a Tuesday Morning Shop (great for picking up discounted/discontinued craft items).

To begin, I used my Misti to stamp the image several times on heavy cream color paper. I turned to my Prismacolor pencils to shade the flowers. Since Colorbox is a juicy ink, I had to lay paper over the image as it had started to smear a little. I stamped the sentiment and used a die cut on it. Once done, I kept the card simple by using a wood grain behind the image and sentiment and rounded the corners of both. I added 2 brads and called the card done.

Obviously, a very simple card, but I love this Donna Downey image and I think it flows nicely with the paper. I guess I could add beads to the flower centers if you think I should...I’ll let you decide...comment if I need to do that! Happy Monday to you!

Thursday, June 7, 2018

I’m Pretty Sure Card

Today, I decided to try my hand at Unity’s LOL Kit, I’m Pretty Sure from 4/18. This was a total experiment to see if I could use other mediums to create a card. I began by taking a watercolor paper and spraying the left side and all the hedges with a blue Tattered Angels Glimmer mist, making sure of good coverage (I had t tried this color yet). I dried it and then sprayed the inside with a cool rose gold colored Tattered Angels Glimmer Mist in the right center part and then a little to the left...about where the flower would be stamped. I carefully dried this ensuring that the drops didn’t migrate out to the end of the paper as the paper curled due to being wet.

Once dried, I took a pink Brea Reese Glitter Ink and painted the flower Center to lighten it a bit. I then found my very bright orange (with black specks) embossing powder, that I picked up in a Love From Lizi card kit from Halloween. I stamped and embossed the image with Versamark ink twice. I knew I needed a very bright embossing color to show up in the darkened background. I then embossed the sentiment with black archival ink and clear embossing powder.

To make the image stand out more, I used blue and red Brea Reese inks around the image and purple within the shadows inside the image. I used the brush to extend the ink out in. I then took my Posca pen to detail the image, create rays out from it and to highlight the words.

Once completed, I had to find a background. I tried various options out. It so happens, I played with alcohol inks this past weekend and had a sheet left over that seemed to complement the image. I’ll be detailing how I created it in a future post. I decided to add a little offsetting interest with the use of washi tape and tried to place it behind the sentiment. I then added sequins and called the card done.

My anniversary is coming up and I think this will make a great card for my husband...something a little different, extremely sparkly, and with a very cute sentiment, harking back to when we met 34 years ago! Till next time, happy crafting!


Wednesday, June 6, 2018

Reveal Card and Acronyms

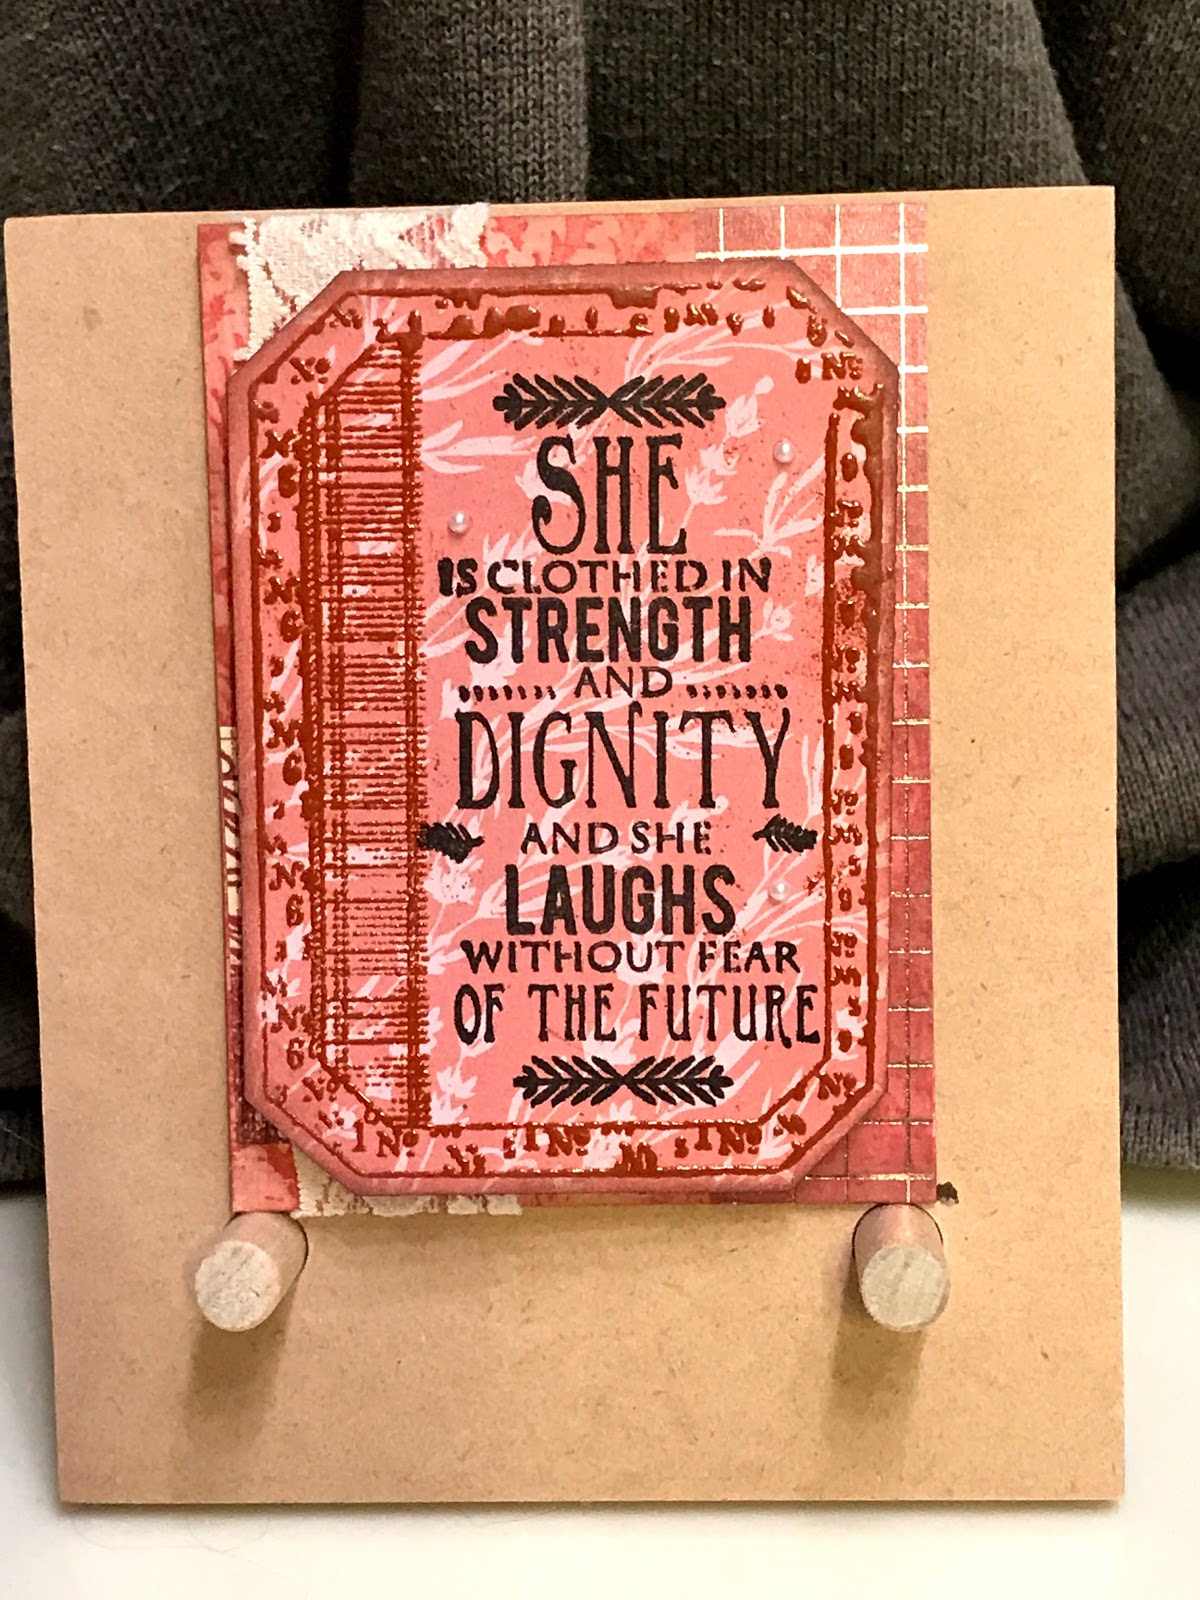
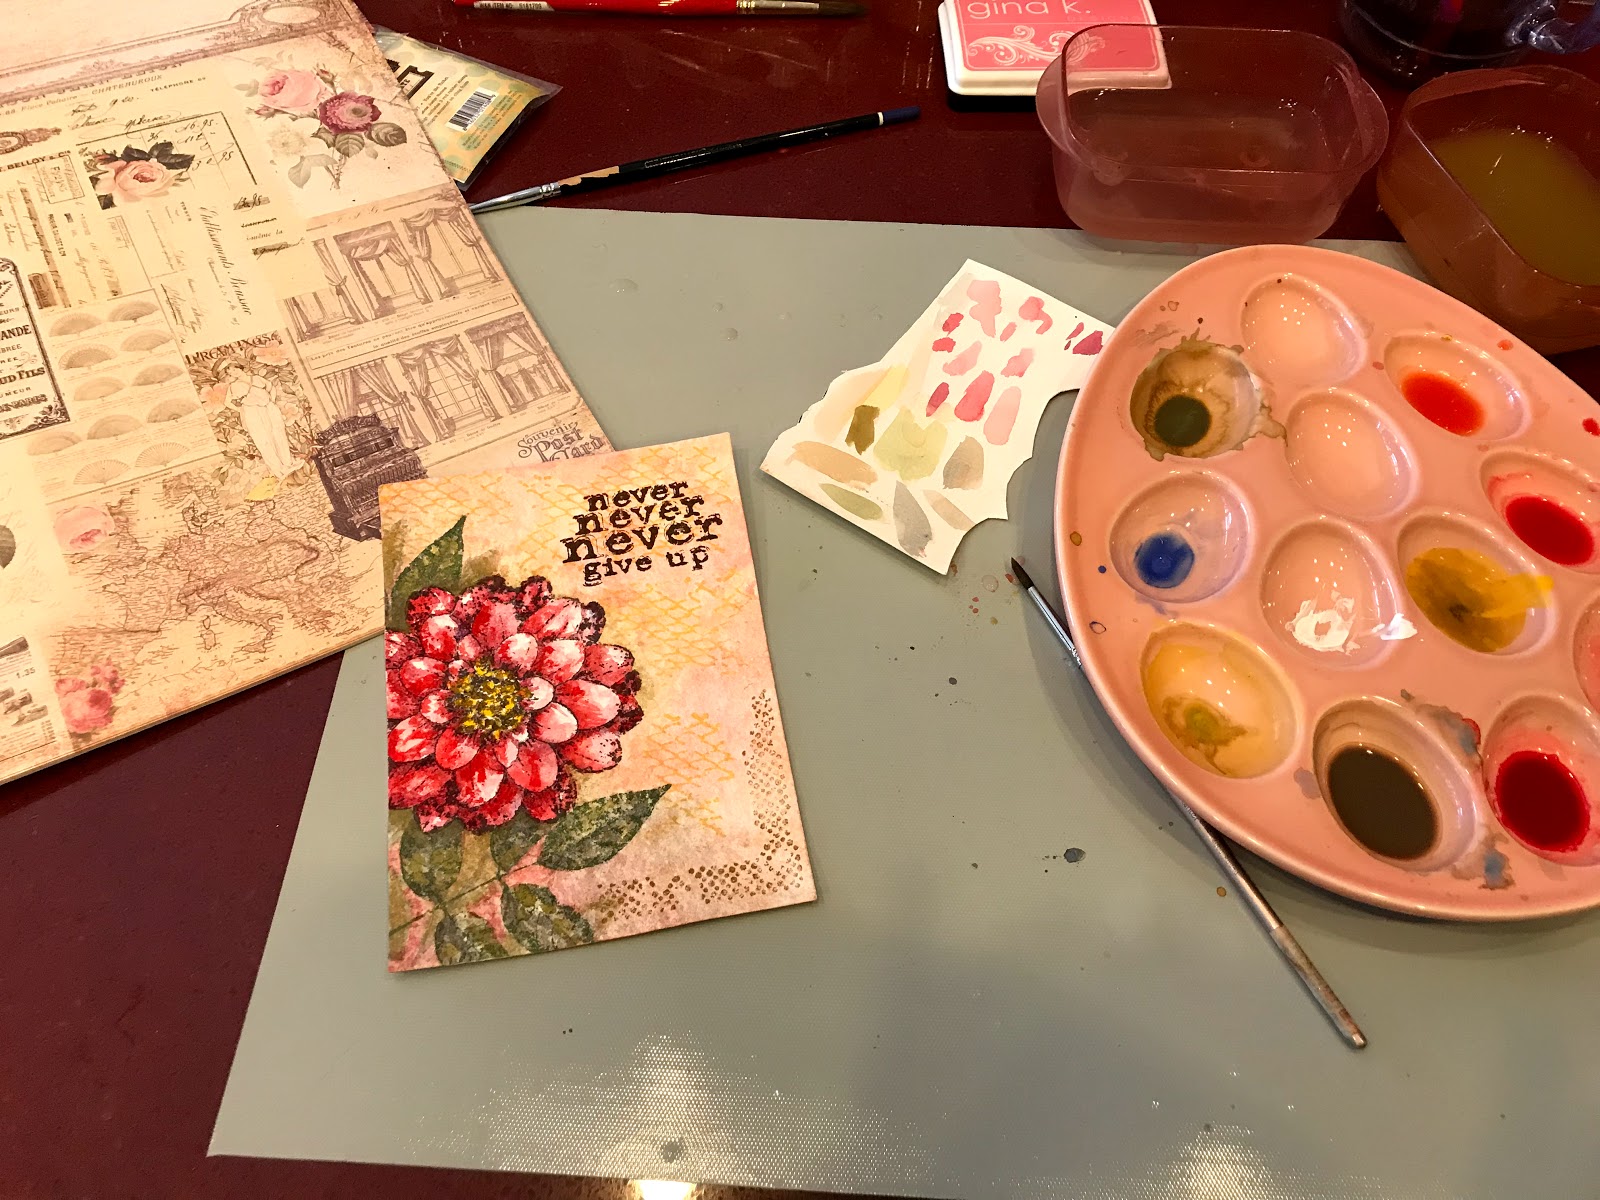
Wow, finally finished up making 30 ATCs (3 designs) using some new techniques I’m excited to talk about in the near future using a little mixed media and alcohol inks (need to send them out first). In the meantime, I still have 10 more to go, but I made this quick and easy card using Unity’s Huge Possibilities stamp kit and ferns from Unity’s 8/16 KOTM. But, before I start, I promised to do a sidebar on acronyms...so, here goes...

ATC - Artist Trading Card. A 2 1/2” x 3 1/2” sized paper that you created a design on, you number, name and sign the back, and you send out to a swap group. I belong to 2 groups and I create 2 designs for each group and I make 10 copies of each design (each group has 10 people in it). So each person has 20 new cards a month - 18 cards in the mail from their trading group plus their own 2. Just like baseball cards I put mine in a notebook using clear plastic holders (I used mixed media to decorate my notebook and have included pics in an earlier blog post).

Unity - Unity Stamp Co., a red rubber, cooked to order stamp store.

KOTM - Unity has several monthly subscriptions that you can sign up for. The KOTM or Kit of the Month is an 8 1/2 x 11” sheet of stamps, images and sentiments that you receive monthly. If you are a KOTM member like all the other subscriptions, you can buy past KOTM kits at discounted prices. I like the variety you get in these kits.

SMAK - Another monthly kit, the SMAK kit or Scrapbooking, Mixed Media and Art Journal Kit, is the same size but has more abstract images and background stamps. I switched over to the kit recently as I like background stamps and the vintage woman/vibe found in these kits.

LOL - Another smaller, cheaper kit similar to SMAK in nature, LOL or Layers of Life is another subscription kit.

UU - A smaller version of KOTM, UU or Uniquely Unity, usually has only 1 image and sentiment.

Let me know if there are other acronyms of interest!

Meanwhile, while busy with ATC’s, I’ve also taken my dil (daughter in law) shopping for baby things and maternity clothes. My son and dil plan on having a reveal party this Friday (I’m just dying to know). So, halfway through this creating this card, I decided to give this to them on Friday!

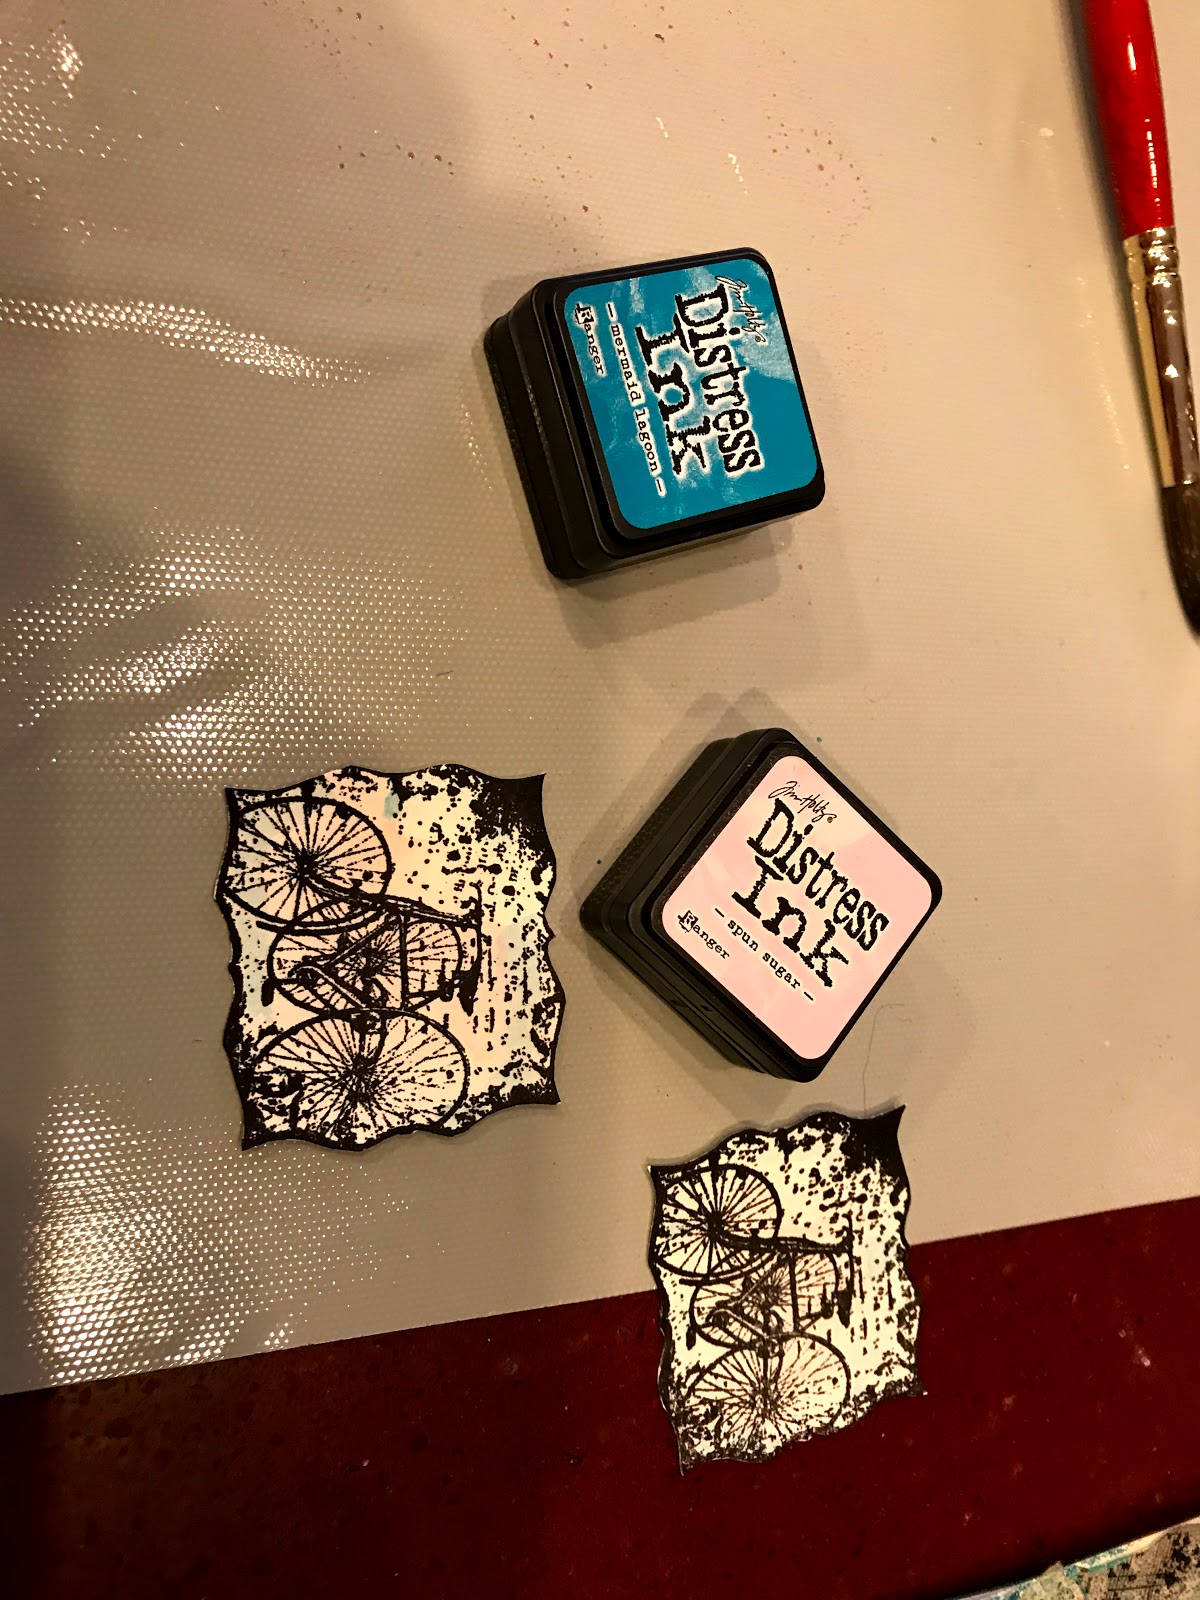
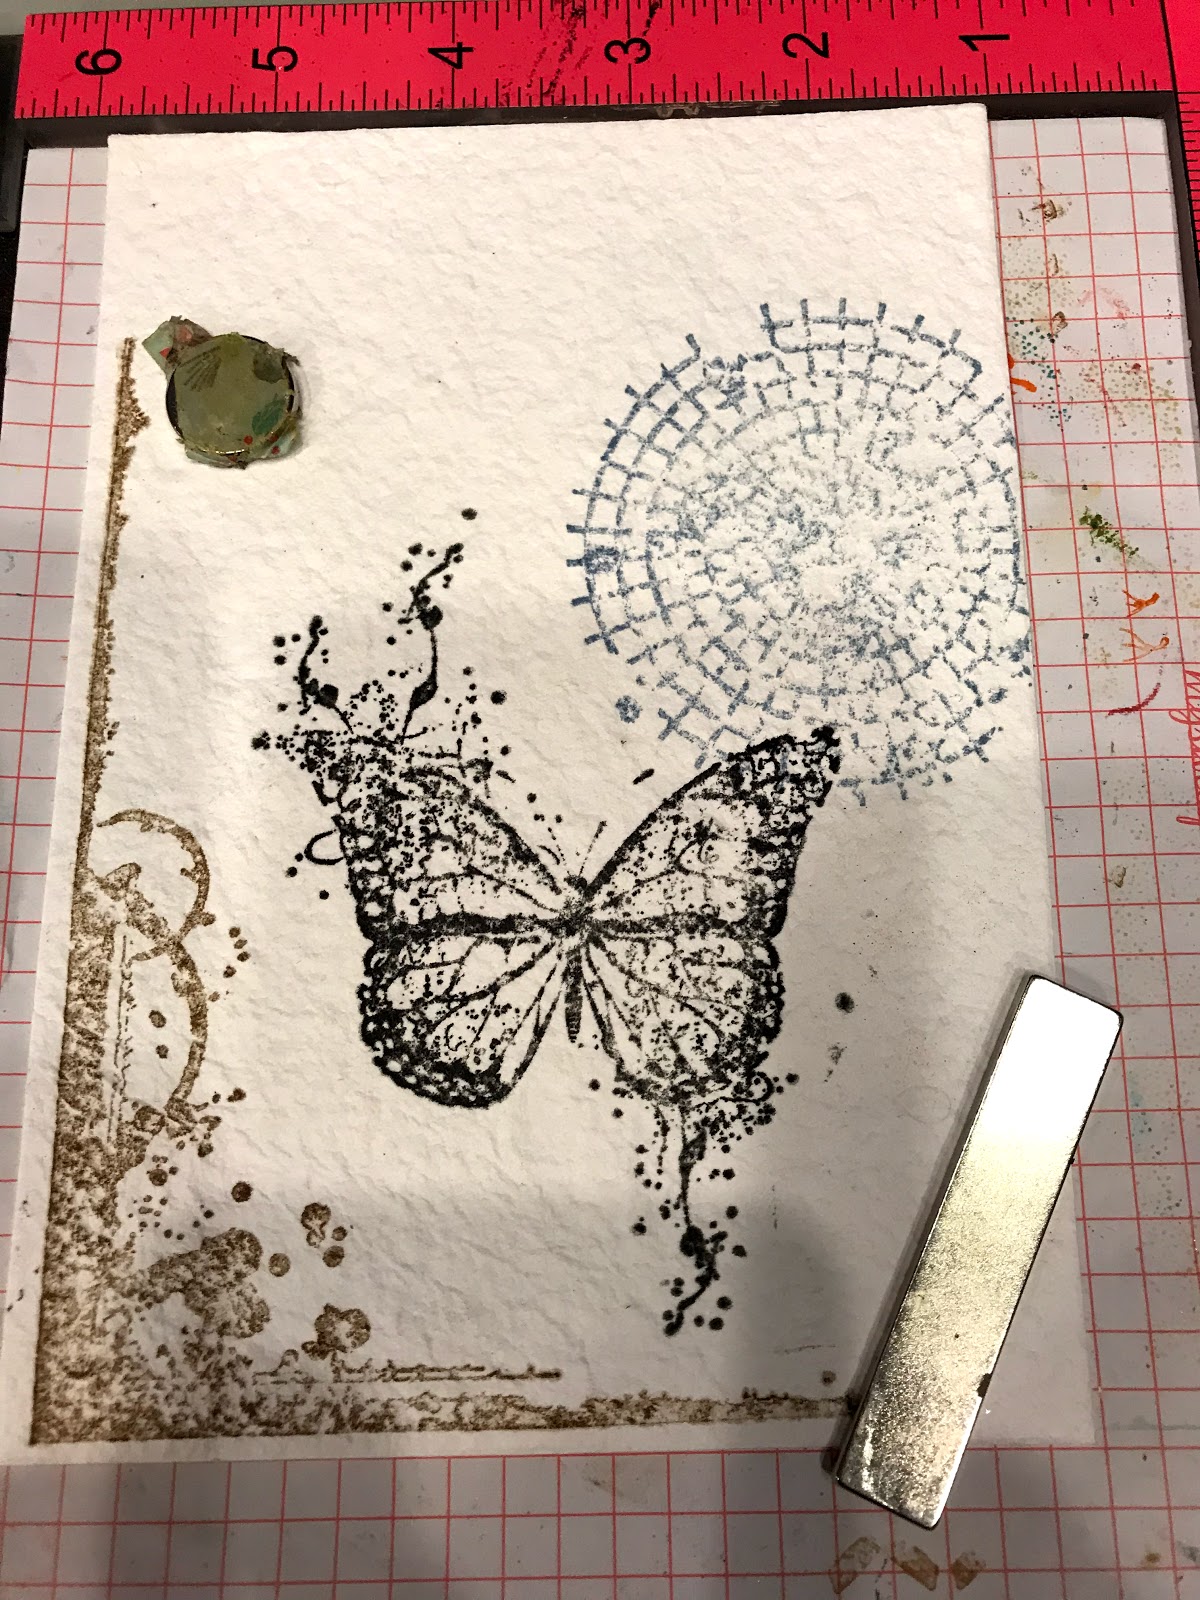
I recently picked up a cute washi tape kit at Micheals 50% off and thought it would match this stamp great! So, using these as a basis for colors, I pulled some Prima paper with mulberry pink and gray  colors and pulled distress inks out to match. I used my Misti stamping platform to stamp the image on watercolor paper using a gray archival ink. I then stamped the small fern several times using the distress inks and sprayed water on them to blend colors a little. I also sprayed some Tattered Angels light and medium Glimmer mists around the sides of the paper. After watercoloring the image, I spattered some ink around and stamped the sentiment in black ink at the top.

To put the card together, I pulled a dark gray paper out to back the image and added strips of washi tape to it. I added some strips of the other washi tape to the image. I wrapped the base paper with pink and blue ribbon, and after mounting the image I added blue and pink enamel dots to the image. Since I am not sure if there are such a thing as gender reveal cards, I figured, this may serve as a good  card for this purpose...ESPECIALLY, since Dumbo will be theme for the baby room! Hope you and my son and dil enjoy this card! Have a great day!


Friday, June 1, 2018

Strawberry Card

I changed things up today, after playing a little with alcohol inks (will try to use the paper for my next set of ATC’s), I decided I needed to go full summer (warm outside today)! Pulled out the Unity Strawberry Greetings stamp. I also added a stamp from some Unity KOTM, not sure which one. I also pulled out a couple paper pads that had strawberry paper on it. Actually, both had mint colors in them. So,...

I started by putting my watercolor paper in my Misti and began by using archival inks on the words, postal stamps and the leaves. I cleaned that off and grabbed 3 different reds, 2 distress and 1 pink archival ink and stamped the berry. I then used my paint brush to blend a little. I then pulled out Evergreen Bough Oxide and added color around the berry. I also used Fosilized Amber on the postal stamps and added yellow Brea Reese ink. I then spattered the mint and the Brea Reese yellow...which turned out nice as there are now streaks of Glimmer. I then pulled out a white and black pen and textured the berry pits! I die cut, distressed the edges, and backed it with berry paper.

I printed the Sweet word using a red dye ink on more paper from the pack, die-cut it using a Sizzix die and used the oxide on the edges. I then pulled a basket weave paper, cut that and a strip of berry paper and pulled everything together. I added the plaid paper to the white cardstock, wrapped the berry image with twine, affixed the sentiment and added sequins. I think this card is very summery and hopefully turned out well! Have a wonderful weekend!