Saturday, November 30, 2019

Unity’s Winter Apple Blossom Card

Decided I wanted to paint apples today... my favorite fruit to try to paint! So, I pulled out Unity’s Winter Apple Blossom kit designed by Gracielle.

I started by stamping the image using Antique Linen distress ink on Arches watercolor paper. I then colored the image using my Schmincke paints. I lightly used a pen to clean up edges and darken small areas. I clear embossed a sentiment from the kit and die cut the image. Finally, I spattered red, white and gold shimmer Gansai Tambi paints over the top.


I decided to use a yellow gold shimmer paper, a paper from Unity’s Holiday Tradition pack (another Graciellie Design), and a Gina K black paper to frame the image. I added gold sparkly crystals and red /gold Prima dots to complete the card.


Had fun painting this one. Reminder, if you enjoy my art adventures and haven’t signed up your email address or clicked follow, I encourage you to do so! And thanks again, for those of you that already have. Have a great rest of the weekend!

Friday, November 29, 2019

Gina K Peace and Joy Card

Was inspired by the paper behind this card to paint the cardinal in the Gina K Peace and Joy Kit. The paper is part of LDRS Creative Christmas Cottage collection. After trying a few things, I decided to paint the background by itself on cheap watercolor paper and add, after drying, Brea Reese Metallic White paste with the Snowfall stencil. I used my Schminke watercolors to color the background adding green paint in spots to hint of foliage.

I stamped the large image and then, back to back, the smaller foliage image twice on Arches Cold pressed paper. After watercoloring the image, I used pen and pencils to enhance the bird’s image. I fussy cut everything... although I ended up leaving white areas, not wanting to tear the soft watercolor paper. To fix that, I just watercolored the white areas and added some white Posca dots to make everything blend together. I cut the snowy background image down and backed it with a Gina K blue paper. I then mounted with foam dots the cardinal after cutting off one of the added images. I mounted the cut off foliage beside the cardinal.


To complete the card, I stamped the Joy sentiment from the kit on white scrap paper, die cut it and backed it with blue paper. I die cut the patterned paper, attached everything to a Gina K card and finished the card off with some enamel dots.


Well, that’s it for today! Hope you enjoy this card! Till next time, happy crafting!

Wednesday, November 27, 2019

Simon Say Stamp December Card Kit Card 1

So, went a little wild with Simon Says Stamp! this year; just loved both Christmas kits. Here’s my first gnomie card using the December 2019 Kit -  certainly not my style, but I fell in love with these cuties. I combined it with another new favorite of mine... Polkadoodles Ho Ho Gnome paper pad.


To begin, I pulled out a piece of Bristol paper and stamped and white embossed snowflakes across the top. I then cut up paper to create snow mounds and grabbed Tumbled Glass Distress ink and a Picket Fence brush and added ink to the top and layered snow mounds on the bottom. I then stamped the images on watercolor paper and painted them using distress inks to match the paper colors. I used a colored pencil for light shadows. I also added a layer of various Spectrum Noir Glitter inks in spots to make some parts sparkle. Finally, I used pens to create definition and fussy cut all the images.


To create the card, I used 2 papers from the pad and stamped the sentiment on white paper. Using a Gina K ink, I embossed the sentiment with Brutus Monroe’s Vintage Sparkle powder. Must admit, these were fun to color. Still learning how to place little images around a card, but this was a fun card to create. I can see why scenes are so popular! I decided to leave the card as is, as the embossed snowflakes are shiny, and the sparkly bits shine and that paper... GAH... I love it and done want to distract from it!


Well, enough for now... here’s hoping you have a great Thanksgiving and have fun Black Friday shopping (must admit, I’ve already begun!)! Till next time, happy crafting!


Tuesday, November 26, 2019

Limited Edition Simon Says Stamp Kit Card 1

So, I stamped out a flower arrangement with Antique Linen Distress Ink on watercolor paper last night using the Magic of Christmas 2019 Card Kit stamp set. After stamping it, I masked the poinsettia off to create the arrangement. This morning, after pondering papers, I picked the colors to paint with based on one of the papers included in the kit. Once almost complete, and looking at the paper again, I decided to match some of the stylistic elements on the paper using white pen. I then fussy cut the arrangement out. I added some dots using embossed Snowflake Tinsel powder using stamps from the kit to give some silver sparkle to the arrangement.


I cut down the patterned paper and added more dots using an embossing pen. I attached the watercolored arrangement and silver ribbon. I then embossed a sentiment from the kit using a navy Simon Says Stamp embossing powder. I backed the sentiment and patterned paper with a silver glitter paper, added sequins and called this one done.


As usual with my cards, it’s unusual, but festive! (Maybe next card, I can shoot for something more professional and traditional.). Till next time, happy crafting!

Saturday, November 23, 2019

Picket Fence Christmas Poinsettia Star

Been admiring this stamp and the beautiful work I’ve seen done with it by the pros... so, I finally broke down and bought the Picket Fence Studio Christmas Poinsettia Star stamp. It came today and after eyeing it all afternoon I finally couldn’t resist playing, creating a more impressionist painting was a real challenge for me!

I started by cutting down a piece of Arches Cold Pressed Watercolor paper. I stamped the poinsettia using a combo of Distress Tattered Rose, and some pink and red archival inks. I then used a large paint brush to create broad strokes and varied my technique between laying down a wet wash and just painting directly on the petals, always skipping petals to avoid bleed between. I used a combo of reds from my Schmincke paint set. As I worked around the petals, I ended up circling back several times on each petal. After I was finished, I turned to my Prismacolor pencils to add a little more color and a black pen for more definition. I then went back and added several layers of green paint, adding a darker color around the edges. I then pulled out the products in the pic below to add spatters all over, drying in between. Finally, I used Posca pens to add more dots and add gold and white dots to the flower center.


For a sentiment, I pulled out Gina K Designs lovely Christmas Script set as I believe this card is staying close to home! I stamped and white embossed the sentiment on black card stock and cut it down. I used an A6 sized white card base for this one and backed the image with black paper. To compete the card I just added black Prima crystals.


Hard to tell right now, as it’s late and I’ve been looking at it for several hours, but I think I did alright by this stamp. It was certainly a lot of fun to paint!


Thanks for stopping by, and, a reminder, if haven’t already and you’re interested in following my art journey, leave your email on the right or click follow. As always, I’m interested in feedback, especially critical advice. Feel free to comment.

Till next time, happy crafting!

Thursday, November 21, 2019

Last Gina K Ornament Card

Okay... I just HAD to fix my 3rd attempt with this ornament stamp from yesterday! Wasn’t going to post this, but I’m on a journey - still learning, and, hopefully, you don’t mind the ride along! So, here’s the Gina K Design kits I used on this one:

Merry and Bright
Christmas Script
Folk Art Snowflakes

Again, I had embossed the ornament, this time with a Ranger Aqua Tinsel powder. You can blame the colors of this eye opening (put your sunglasses on) card on the aqua colored card stock included in the Warm Winter Wishes Card Kit! I just had to pair the color with bright pink and to really lay it on thick... silver! So, how this came about was that, yesterday, I was distracted by the Folk Art Snowflake Kit... just gorgeous snowflakes, and had the bright idea to make my own background for the ornament. It became a hot mess after I used a few too many techniques. By that time, I had already added pink to the inside of the ornament using, again, a Fuchsia colored Spectrum Noir Glitter Pen.

So, today, I ripped everything apart and was left with the aqua card base and a fussy cut fuchsia/aqua ornament. Starting over, I pulled Bristol paper out and 2 inks, Turquoise Sea from Gina K and Picked Raspberry Distress Ink. I used Picket Fence Blending Brushes to add both colors to the paper. I then stamped the ornaments on the paper using both inks. Finally, I added water to my hands, clapped them over the paper, let the water beads sit a minute and then dropped a paper towel over the paper to absorb the residual water. This left lightened areas on the paper. I then took the stencil included in the card kit and taped it down over the paper. I pulled out a Brutus Monroe Silver Glitter Glaze and smeared it over the top of the stencil with a palette knife. Gave a perfect sparkle to the paper!

I decided to make a coordinating backing paper for the ornament and the sentiment. I ended up adding the Picked Raspberry ink to the shadier areas of the ornament to ensure the pink color in the ornament was in sync with the background. So, again, using the brushes, I blended the pink ink on to another paper. Wanting a little pattern to peak thru, I ended up stamping the sentiment on to the paper with the very pale gray Pumice Stone Distress Oxide ink and then darkening the edges of the paper. After stamping and embossing the sentiment with Ranger Silver powder, I decided to back that with a paper blended out with Turquoise Sea ink. But, first I blended some Turquoise Sea on to the white strip.


To pull this card together, I used a light white/silver glitter paper to back the components. For embellishments, I found my annoying Target iridescent snowflakes (they get everywhere), clear crystals, and silver ribbon and string from a Tim Holtz set. (Luckily, I have plenty of women to give cards to that may enjoy some bling!)


Okay, no more ornaments for awhile! The bee has left my bonnet and I can go on to other projects I have lined up! Yeah! So, till next time... happy crafting!

Wednesday, November 20, 2019

Gina K Ornament Card

Oh, my, spent all day playing with the ornament stamp from the Merry and Bright Gina K Designs Kit to see the kind of effects I could achieve. Finally, after 4 tries, I created cards out of 2 of the 4 attempts. Here are the Gina K Design kits I used:

Merry and Bright

Christmas Script

For the first one, I decided to try embossing the ornament with 3 shades of green. I wanted to match it to the paper that I wanted to use out of My Mind’s Eye Sugar Plum paper pad. (Yes, it’s discontinued, but, if you are like me, I’m sure you have beautiful Christmas paper you’ve been hoarding for that perfect moment.) I used a combo of Wow, Ranger and Zinc powders. I stamped the ornament with clear embossing powder and carefully pored each powder over a portion of the ornament. To make the ornament sparkle a little more I added Clear Spectrum Noir Glitter ink to the center of the ornament. I took a sentiment from the kit and embossed that on another paper from the pad using Ranger’s Liquid Platinum powder (one of my favorite powders). The glitter on the paper is neither silver nor gold, so this color is the perfect match! I backed the image and sentiment with a green scrap paper I had. I added ribbon and Prima crystals and called this one done!


For the second ornament, I used the Liquid Platinum embossing powder again, knowing I wanted to use the Craft Smith Shimmer Noel paper (yes, it probably is also discontinued, sorry)! This paper has a combo of gold and silver shimmery goodness. I selected a paper with a drapery design that I thought would complement the ornament and a gold matte paper. To make the ornament have apthe same silver/gold combo look, this time I used the Silver Spectrum Noir Glitter pen. I painted on a watered down silver darkening the ornament on the lower left side and lifting off some of the paint on the right side. After cutting down all the panels, I backed them with Gina K black card stock. I then used Hero Arts white ink to stamp the sentiment from the Christmas Script Kit onto the black paper and embossed it using another Wow powder, Metallic Silver Sparkle Embossing Glitter. I made this into a banner. I pulled the card together and just added clear crystals.


Okay, now I’m going to go back to see what everyone else created with this beautiful stamp. I know I’ve only scratched the surface of possibilities. As you can see, I love glittery Christmas cards! This stamp just seemed to call for a more elegant card.

Till next time, happy crafting!

Tuesday, November 19, 2019

Adornment Card

Watercolored another card using a great Unity background border stamp, Adornment. I began by stamping it onto watercolor paper using Pumice Stone Distress Oxide ink. I then pulled out my Daniel Smith cards and Schmincke watercolors. I began each ornament by putting down a very light iridescent paint in the coordinating color and then added a darker color or two for shadowing. I sometimes added a second layer if the colors were too pale. I used the pan paints for the stripes and shadows. When done, I used gold and silver glitter pens and a black pen.

Adornment
Sentiment

I used a sentiment from the 9/19 KOTM, stamping it using black Versafine ink and embossing with Ranger Aqua Tinsel powder. I added black pen to shadow the sentiment. I spattered red, blue and white paints over the paper and added white Posca pen dots. I die cut the paper and added a teal and patterned paper to frame the image. Finally, I added a gold ribbon and crystals dots.


My only issue, I need to practice paint spatters... I either overdo it or not enough! However, my hands, tabletop and floor always look very well spattered! Need some tips... better watch some videos or if you have ideas, leave them below! Reminder, if you enjoy my art journey, add your email or follow me for updates! Till next time, happy crafting!

Monday, November 18, 2019

Gina K Merry Christmas Card

Wanted to try something new today! I opened up my new Gina K Warm Winter Wishes Card kit! This kit is so cute with 3 full stamp sets, dies, paper, a stencil, ... will take me a few years to use all these goodies up!

Warm Winter Wishes Card Kit

Used Kraft paper to stamp and emboss the lovely poinsettia flowers and bird, and stamp the leaves and twig on. I used Christmas Eve embossing powder from Brutus Monroe, and Distress Oxide Peeled Paint and Versafine Clair Shady Lane inks. Used another Kraft paper and a paper from the Simple Stories Simple Vintage Christmas pad as a backing. I stamped and embossed the sentiment onto a lighter Kraft paper to make it stand out. I ended up making a frame out of the patterned paper to highlight the sentiment and create a base for all the die cut pieces. I used one of the included green papers as the card base and added some red crystals to complete the card. Pretty easy to make a cute card glittery card! Love this kit so far!


Back to watercoloring tomorrow! Till next time, happy crafting!

Thursday, November 14, 2019

Santa Card

Oh my, little rough day today... a mood downer, wrist I broke months ago was aching, no energy... and I was stumped for cards. Watched videos, checked Pinterest and was inspired to check out embossing, in a light color, a joint Brutus Monroe/Unity background stamp, called Christmas Over/Again, using a scrap of white paper. Was going for white or vintage, but ended up stamping it in an Archival pink and using Brutus’s Vintage Sparkle embossing powder on it. Interesting result as it has a cream cast to it, it softened the pink in areas, which I liked. It was too pretty to through away... so next thing... Knowing I needed a baby grandson card, wondered what a snowman would look like with this background.

Christmas Over/Again

Jolly Ol’ Santa

Snow, Snow Cute

So, I then stamped a snowman from Unity’s Snow, Snow Cute Kit using Pumice Stone Oxide ink onto another scrap paper. I used Prismacolor pencils to color the snowman. I used a gray pen to darken the lines a little. I then fussy cut it out. I then stamped a sentiment from the Jolly Ol’ Santa kit using Stormy Sky oxide ink and embossed it with a blue Stampendous ink. I repeated that process with the snowflakes from the snowman kit and fussy cut them out. I used frame dies to create frames around the background and the sentiment. I created a blue cardbase and adhered all elements, using foam tape on the snowman and flakes. I added crystal dots and called it done.


All said and done, it’s not a baby boy’s card, is it? Oh, well, still want to try embossing that background in a lighter color, too... both for another day, I guess! Till next time, happy crafting!


Tuesday, November 12, 2019

Warmest Wishes Card

Well, I just received another Prima paper pad that I’d been waiting to go on sale, Santa Baby. Loving the colors and papers, I decided to combine it with a beautiful Unity stamp that has many components in common, Warmest Wishes. They’re not identical, of course, but it gave me ideas for coloring this beautiful stamp! I ended up pairing it with the sentiment from another wonderful Unity stamp, Winter Bunny Cuddlebug, designed also by Tierra Jackson!

Warmest Wishes

Winter Bunny Cuddlebug


I stamped the wreath onto off white Kraft paper using Pumice Stone Oxide ink. I then pulled Prismacolor pencils best matching the tones of the paper (I knew I wanted to use the paper as the background for this card). I began first adding white to the individual elements and then working around the wreath, in general, before moving on to the next component. You can see in this pic where I picked up my colors. I used a gray, a green and a brown pen to bring some definition to the elements. (I have to admit I needed this coloring exercise/distraction as I was preparing for a common procedure with a very nasty prep requirement that I always get anxious about! I completed that today and the coloring... once I recovered some! Everything went well today btw, but I found my extra heartbeat had returned...  oh well, more is better, right?)


When I was done coloring, I decided to stamp the sentiment in red, and Momenta’s Rhubarb Stalk is a perfect shade for this. I ended up embossing it with a new Brutus Monroe powder, Vintage Sparkle, giving it just a bit of sparkle. I spritzed a little Perfect Pearls Biscotti mixed with water on the paper. I then die cut the panel using a Gina K die and backed it with the Santa Baby paper. I added crystals and ribbon and called thus one done.


Hope you enjoy this card! That wreath stamp is just beautiful and on sale right now along with everything else on Unity’s site! Till next time, happy crafting!

Sunday, November 10, 2019

Simon Says Pinecone Card

Wanting to watercolor again, I stamped on smooth watercolor paper, my new Simon Says Stamp! (SSS) large, beautiful, background stamp, Pinecone. How naive I was! It’s beautiful, but to do it justice, you need to take your time and instead of stamping with Antique Linen, as I did, it needed a darker distress ink (easier to see details). However, I persevered for half the paper and then stopped, getting a little bored and thinking I could use panels instead of whole card front coverage. I used my Schmincke paints for this. I spattered green paint and then spritzed it with water and Perfect Pearls gold powder which I had mixed together in a small mister. I spattered acrylic white paint and then added Posca pen dots. The Perfect Pearls gave it a soft glow.

SSS Pinecone Stamp


I then looked at my new SSS Christmas sentiments and decided on this beautiful one from the Holiday Greetings Mix 1 kit. After thinking about what I could use as a panel for the sentiment, I decided to create my own. I gathered together another watercolor scrap, a stencil, Potting Soil Archival ink and the Perfect Pearls mister. I first added the potting soil in spots using a makeup sponge. I spritzed the remaining perfect pearls solution through the stencil and let the paper dry. I then stamped the sentiment using brown Stazon and embossed it with Ground Espresso Brutus Monroe powder.

SSS Holiday Greetings Mix 1 Kit

I cut the panels down, found paper to back the panels, and another as a background. I added ribbon, and crystal dots.


I think this turned out pretty good, but after working on it so long, it’s hard to tell. Well, enough for now... happy crafting till next time! Again, if you are enjoying my artistic endeavors, sign up for emails updates or follow me!

Saturday, November 9, 2019

Hero Arts Christmas Card

Picked up a beautiful Hero Arts background stamp, Forest and Deer, over a year ago and finally had the chance to try it out.

Forest and Deer Stamp

After securing the watercolor paper to my Misti using purple tape, I stamped this very large background stamp onto watercolor paper with black Amalgam ink and clear embossed it. I then added shimmery watercolor in spots from Daniel Smith. I let that dry thoroughly.

After searching my paper stack, I found a DCWV Washi Icon paper pad with Christmas images that worked perfectly as a background. I peeled it off it’s backing and adhered it to white paper.

I pulled out a new to me Simon Says Stamp! Merry Christmas die. I had a scrap mint colored glitter paper that I used first to die cut the words. Wanting a stronger base, I die cut the words again using black paper and adhered them all together with a glue pen.

Merry Christmas Die

To make the shaker, I used 2 dies to create a border large enough to showcase the image. I also die cut, not very effectively, acetate, which I then used a scissors to trim. Before assembling the shaker, I adhered the watercolor card to the paper first, using strong 2 way tape (helps with slightly buckled paper). I then adhered the acetate with glitter glue to the frame and added foam tape to that. I piled snow glitter I picked up from Target onto the watercolor paper, used my embossing buddy on the acetate to try to reduce static, and put the shaker together.

Because I am clumsy getting windows centered, I finally cut the paper down to A2 size when all assembled. I adhered the card front to a card and added the die cut words and crystals and called the card done.


Pretty easy card to make, but takes a few steps! This one will stay close to home for a special someone! Till next time, happy crafting!

Wednesday, November 6, 2019

Believe Card

Today, I experimented with my new camera holder and trying to video some of my efforts. I’d give myself an E, for effort! But... it’s a start. I still need to learn how to edit and splice videos, but now I have some footage to play with. For the sake of providing a little insight into my process, I included unedited footage. (Feel free to provide input, although I already know it’s bad.)

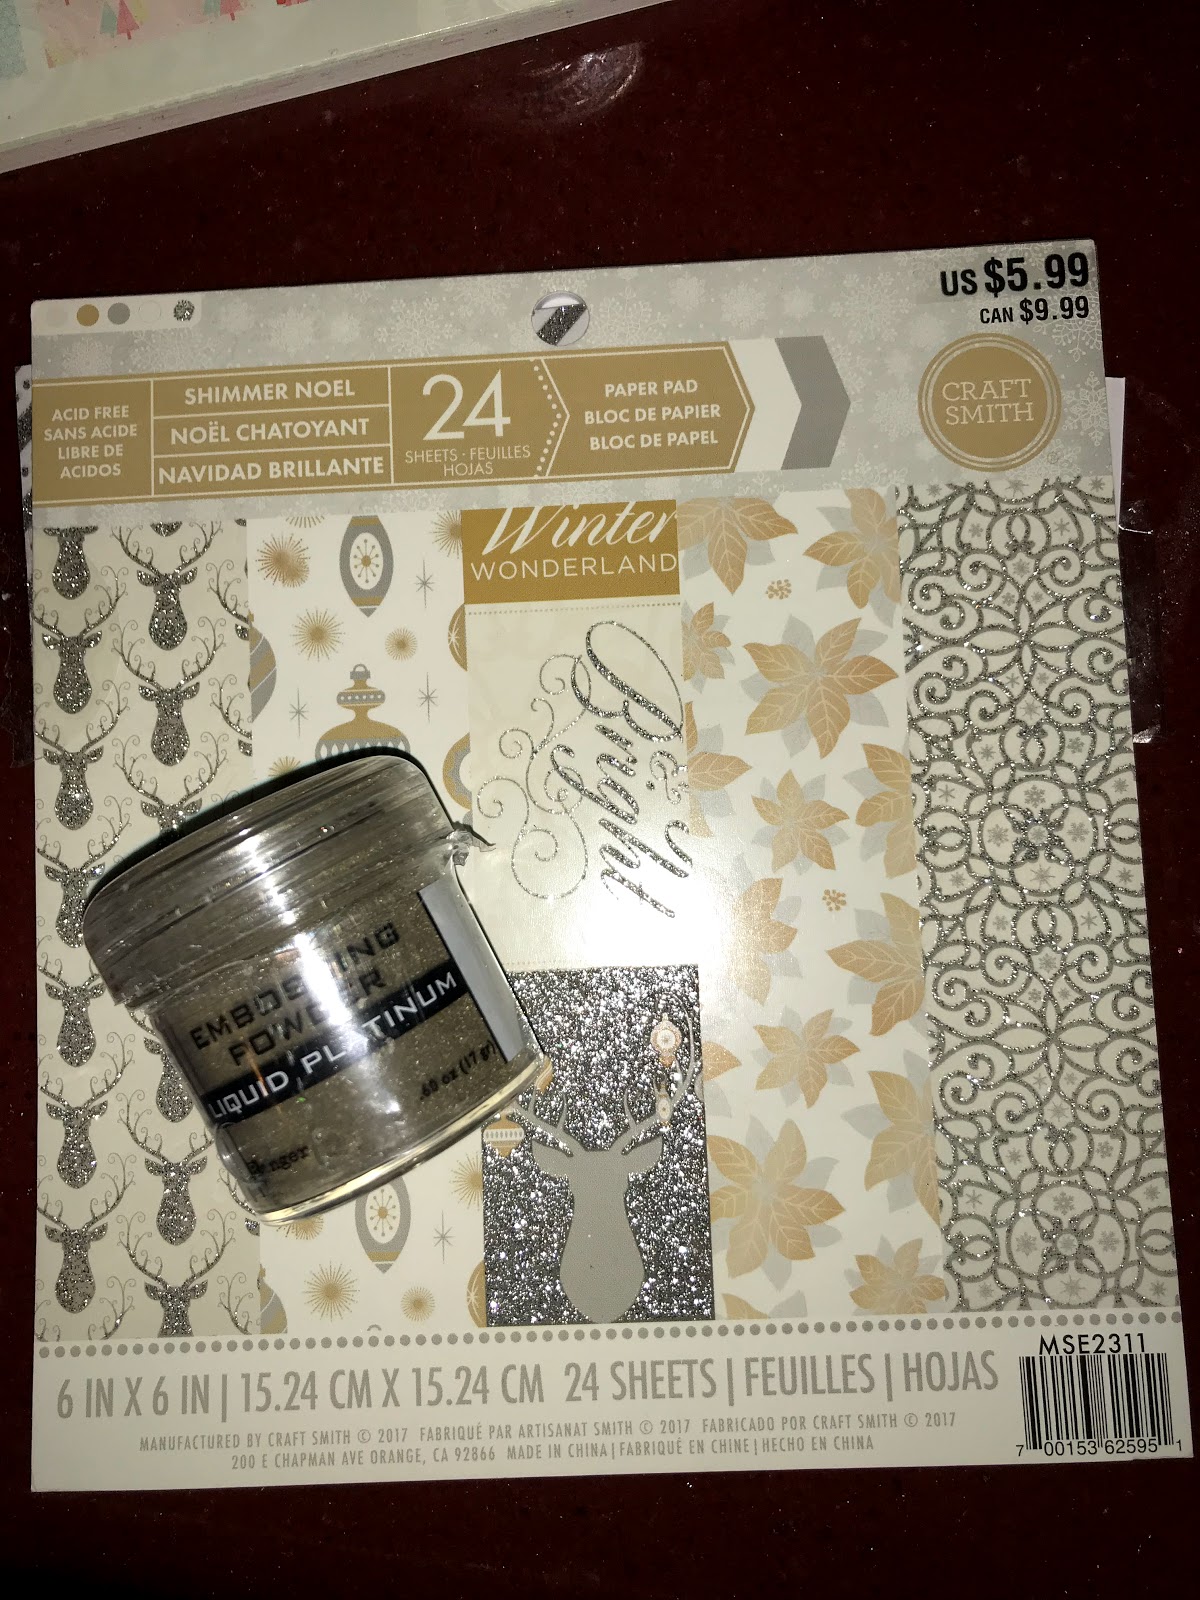
Inspired by a blue paper I was drawn to, I decided I wanted to try my snowflake card again, only in blue. This time I pulled out a 12x12 paper pack (that again I picked up cheap at Tuesday Morning). I always check to see if the patterns are small enough for cards, but invariably, there’s a few that aren’t usable. I cut one up and decoupaged other paper onto it. I then covered it with clear gesso. After drying it, I stamped a Unity background stamp, Worn Music, all over using black archival.


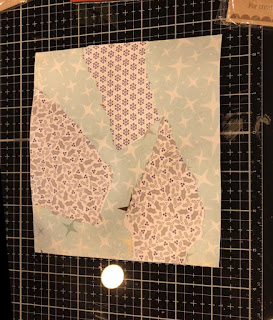
Next, I pulled out a light blue and a white acrylic paint and mixed them to get a light blue. I scraped the paint on with horizontal and vertical strokes using a palette knife. I let that dry and then stamped again this time using a dark blue Stazon ink. The point is to provide variation in background tones. Finally, I mixed white acrylic paint and an iridescent glaze and scraped that over the top. Not satisfied with the coverage, I scraped more on using the same mixture but with a little silver glitter ink added in. (That’s the video you’ll see... which is mostly offscreen). While still wet, I sprinkled a little blue Stampendous embossing powder over the top and dried/embossed the whole thing.

The final step in preparing the paper is to “vintage” the colors. For that, I took a Raw Umber paint, mixed it with water and painted that over the top. I quickly dabbed unevenly the paint back up to just leave a stain.


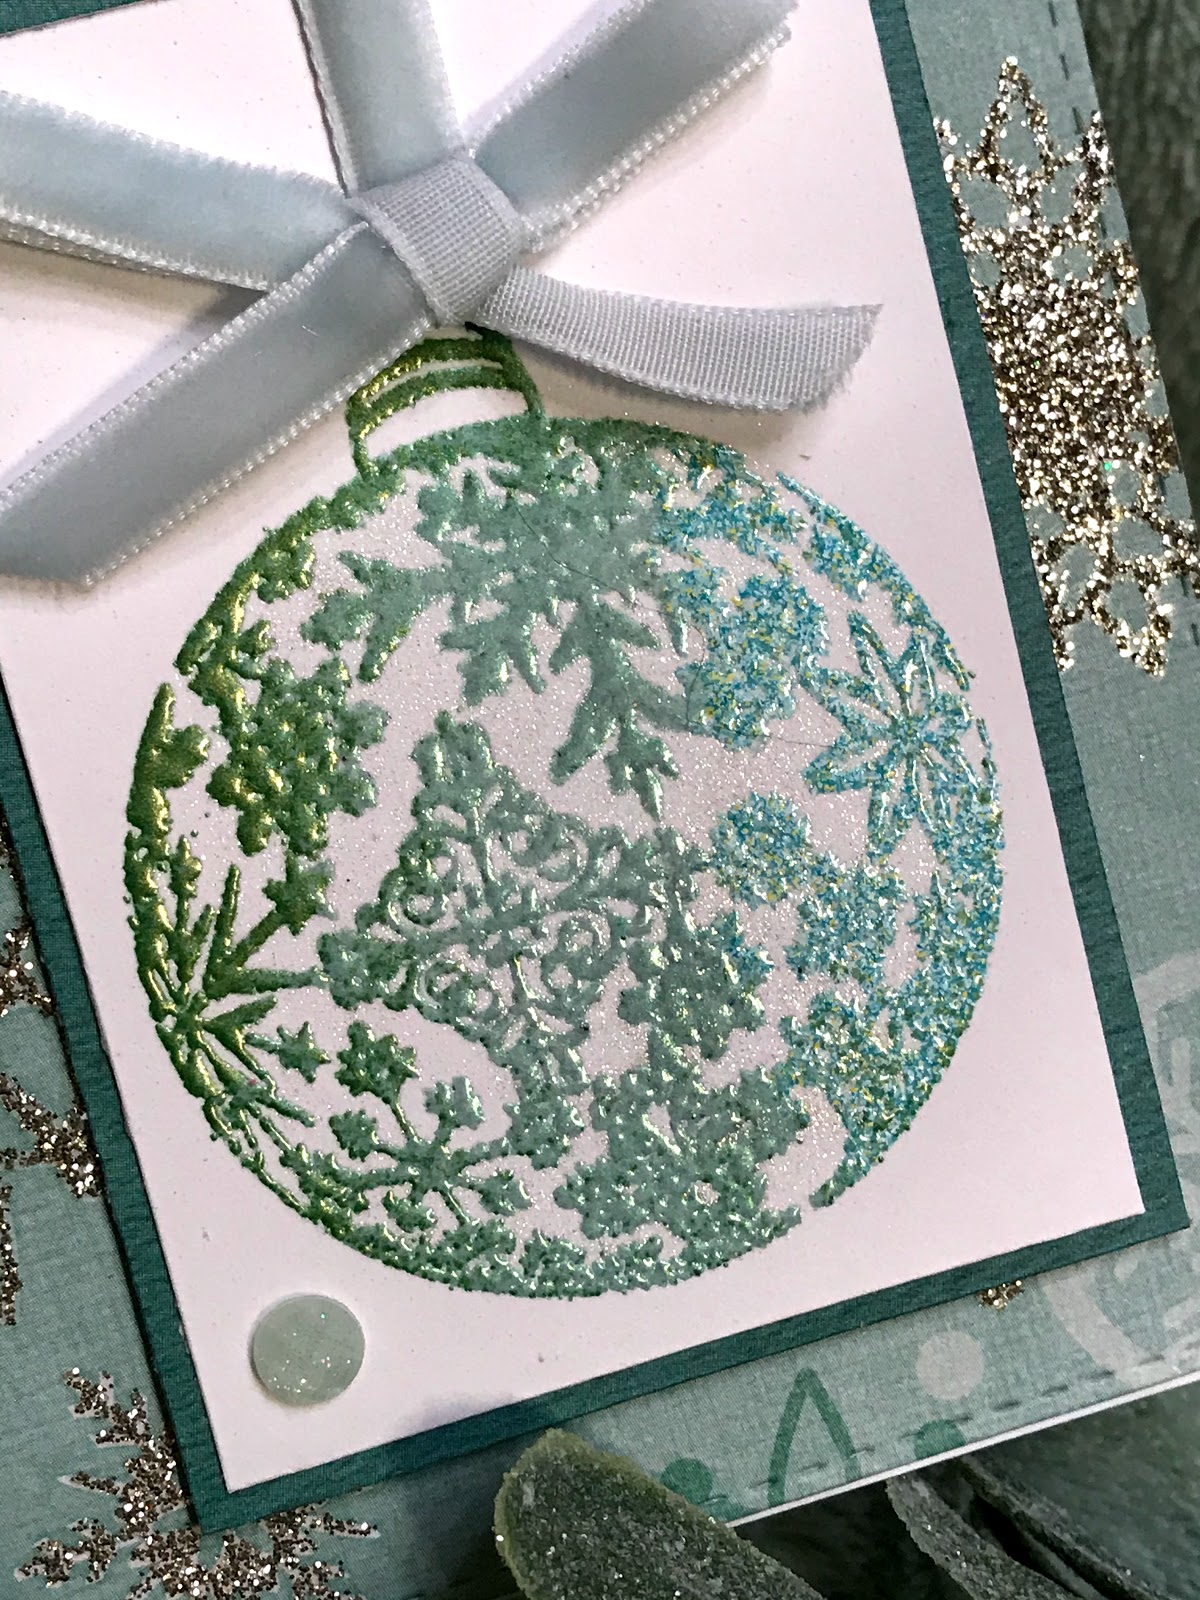
After drying, I embossed the snowflakes from the 10/18 SMAK kit using both a white/blue/gold #Stampendous powder and then covering it again with an old Stampin Up white powder. I stamped the Believe sentiment using another all blue powder from the same Stampendous 5 pack.

Next step, I outlined everything using a black Prismacolor watercolor pencil and used a brush and paper to even out the shadowing. I followed that up by using a blue pencil to darken the centers of the snowflakes. I added snow with a Posca pen.


To make the card, I die cut the paper and used a charcoal pencil around the edges and smeared it. I then found paper I thought matched perfectly and used those as a background with eyelash string. I added Kat Scrappiness sequins I just received free with an order and called this one done.


Pretty happy with how this one turned out. If you are enjoying my efforts, add your email above to get copies of my post and click follow! Thanks so much to those of you who already signed up... I so appreciate your support. You inspire me to continue! Till next time, happy crafting!

Tuesday, November 5, 2019

Stay Cozy and Feel the Warmth

Made a 3rd card for the Coffee Lover Blog Hop! Having already inked up another coffee stamp, Unity’s Hot Mess border stamp, I proceeded to watercolor it, using Christmas colors. Thought it would make a cute holiday card! After it dried, I used my Prismacolor pencils and pens to tighten up the look. I then added white paint spatters.


I then found a great stamp to pair with it, from Unity’s Planner Girl: Stay Cozy Kit. I inked it up with a Gina K red and then embossed it with Brutus Monroe’s beautiful Christmas Eve embossing powder  (red with gold glitter). I decided to add glitter dots all over to spread the sparkly look and used a Wow gold glitter and glitter glue to do this. I also added more white dots and glittered those as well.


Finally, I found the perfect papers to pair with my watercolored sparkly card front... the My Mind’s Eye’s Cozy Christmas paper. The sweater pattern has a red glittery stripe. Felt it paired well with the sentiment and coffee/tea/mulled cider/hot cocoa cups (whatever your preference... I love all of them)!


Stamps used:

Hot Mess

Planner Girl: Stay Cozy

Thanks for stopping by! Happy crafting till next time!

Saturday, November 2, 2019

Coffee Card Number 2

Wasn’t going to make a coffee card today in support of the blog hop, but I received my Christmas/birthday present early... yowser, it’s a 36 half pan Schmincke watercolor set! For the small quick paintings I do, the tubes were too cumbersome, however, I wanted a pro set! And, boy, did they deliver! Love them! Hope I can learn to do them justice!


Anyway, I had already stamped out with Distress Antique Linen, the tea cup from the the lovely Unity set, Tea Cup Floret. I decided I wanted to use this card as either a birthday card or thank you card, so I wanted the colors to be bright. I looked around my paper stash and happened upon a My Mind’s Eye pad, called Splendor. I tried to match the colors as best I could with a new set and began painting. Once finished, I fussy cut the tea cup out.

Unity Tea Cup Floret


To pull the card together I die cut 2 sheets from the pad, stamped the sentiment on another sheet from the pad and cut that down. I raised the tea cup with foam tape, added the sentiment and crystals and called it done. Lately, I’ve been adding spatters to the image, but I think it turned out okay as is. (Let me know if you think I should go back and add white spatters.)


That’s a wrap for today! Happy crafting till next time!