For this card, I used Colorado Crafts stamp kit, Slimline Gnome. I watercolored the festive gnome image, added white gel pen highlights, and Posca pen “snow” dots to match the background paper I picked out. To complete the card, I added the sentiment from the kit and coordinating enamel dots. I did add a little sparkle to the snow drifts at the bottom.
Join in the fun and link up some pretty holiday cards… and check out all the beauties already submitted! Remember, the Falling for the Holidays 2022 {BYSHC} Linky Party also has a great list of sponsors and giveaways. See rules in the attached blog post!
Thanks for stopping by… till next time, happy crafting!
For this very simple card, I used a piece of paper from an older paper collection called Painted Poinsettias, by Wild Rose Studio (which no longer exists). I just love the soft colors in the collection and the bird image on the paper. I used Unity’s September KOM, again, Fa-La-La-La-La. I stamped the poinsettia using a combo of Festive Berries and Ripe Persimmon oxide inks and embossed with a very light sparkling clear powder.
I cut the paper down to size and found some matching paper to back it with. I die cut the word Love from a shimmery soft mint colored paper and backed it with a darker color. I added a sentiment from an older Unity Kit and a piece of Washi tape with the words Merry Christmas. To complete the card, I added red/white twine and matching crystals.
Well, this certainly turned out quite different from yesterday’s card! Hope this provided some inspiration for using a stamp like this in concert with a beautiful piece of paper.
Join in the fun and link up some pretty holiday cards… and check out all the beauties already submitted! Remember, the Falling for the Holidays 2022 {BYSHC} Linky Party also has a great list of sponsors and giveaways. See rules in the attached blog post!
Thanks for stopping by… till next time, happy crafting!
So, I bought this 12x12 paper set from AB Studio, called Breeze of the Forest. It’s clearly very ethereal, fluid and full of free flowing designs with a winter and/or holiday theme. It’s available through Etsy and AB Studios site. It’s a very thick paper which I thought could be useful for water mediums. This paper coupled with watching mixed media artists create more “artsy” holiday cards, inspired this card. I think I also saw a recent video showing the technique I used below on a standard card as well.
I started by cutting a piece down to card size. I then pulled out inks which coordinate or match the colors in the paper… more of a magenta/plum color and a green. I placed the paper in my Misti and pulled out Unity’s Fa-La-La-La-La kit (September’s Kit of the Month) and the Christmas Over/Again background sta mp. I first stamped the poinsettia with the “magenta” color onto the card. Then, I cleaned the stamp and stamped the background stamp onto the poinsettia stamp and in turn onto the card. Now, with words, you need to be aware that it stamps the mirror image, which I was okay with (and actually the sentiments in the background stamp go upside down sometimes anyway). I loved the look, but I wanted more…
So, I then proceeded to add by hand leaves to the poinsettia and used my watercolors to add some color loosely. There were also branches already in the paper I added color to as well. I took a charcoal pencil and using the side of the pencil I added very rough outlines to the larger image. I took a green pen and gold and silver Posca pens and randomly outlined and added filler to some of the letters in the poinsettia. I added outlines to the leaves as well. Finally, I stamped the background stamp around the whole card and added spatters. I stamped the sentiment from the kit, fussy cut it out as well as a few flowers from the paper set. Finally, I added twine, backed it with paper from the kit and added some dark green enamel dots, and called this messy card done. Like all mixed media, I can’t tell you how much fun I had pulling this together!
Hope you enjoyed this messy artsy holiday card, for a complete change. Clearly, this will need to go to someone who enjoys mixed media… let me know if that’s you and I’ll send it along!
Join in the fun and link up some pretty holiday cards… and check out all the beauties already submitted! Remember, the Falling for the Holidays 2022 {BYSHC} Linky Party also has a great list of sponsors and giveaways. See rules in the attached blog post!
Thanks for stopping by… till next time, happy crafting!
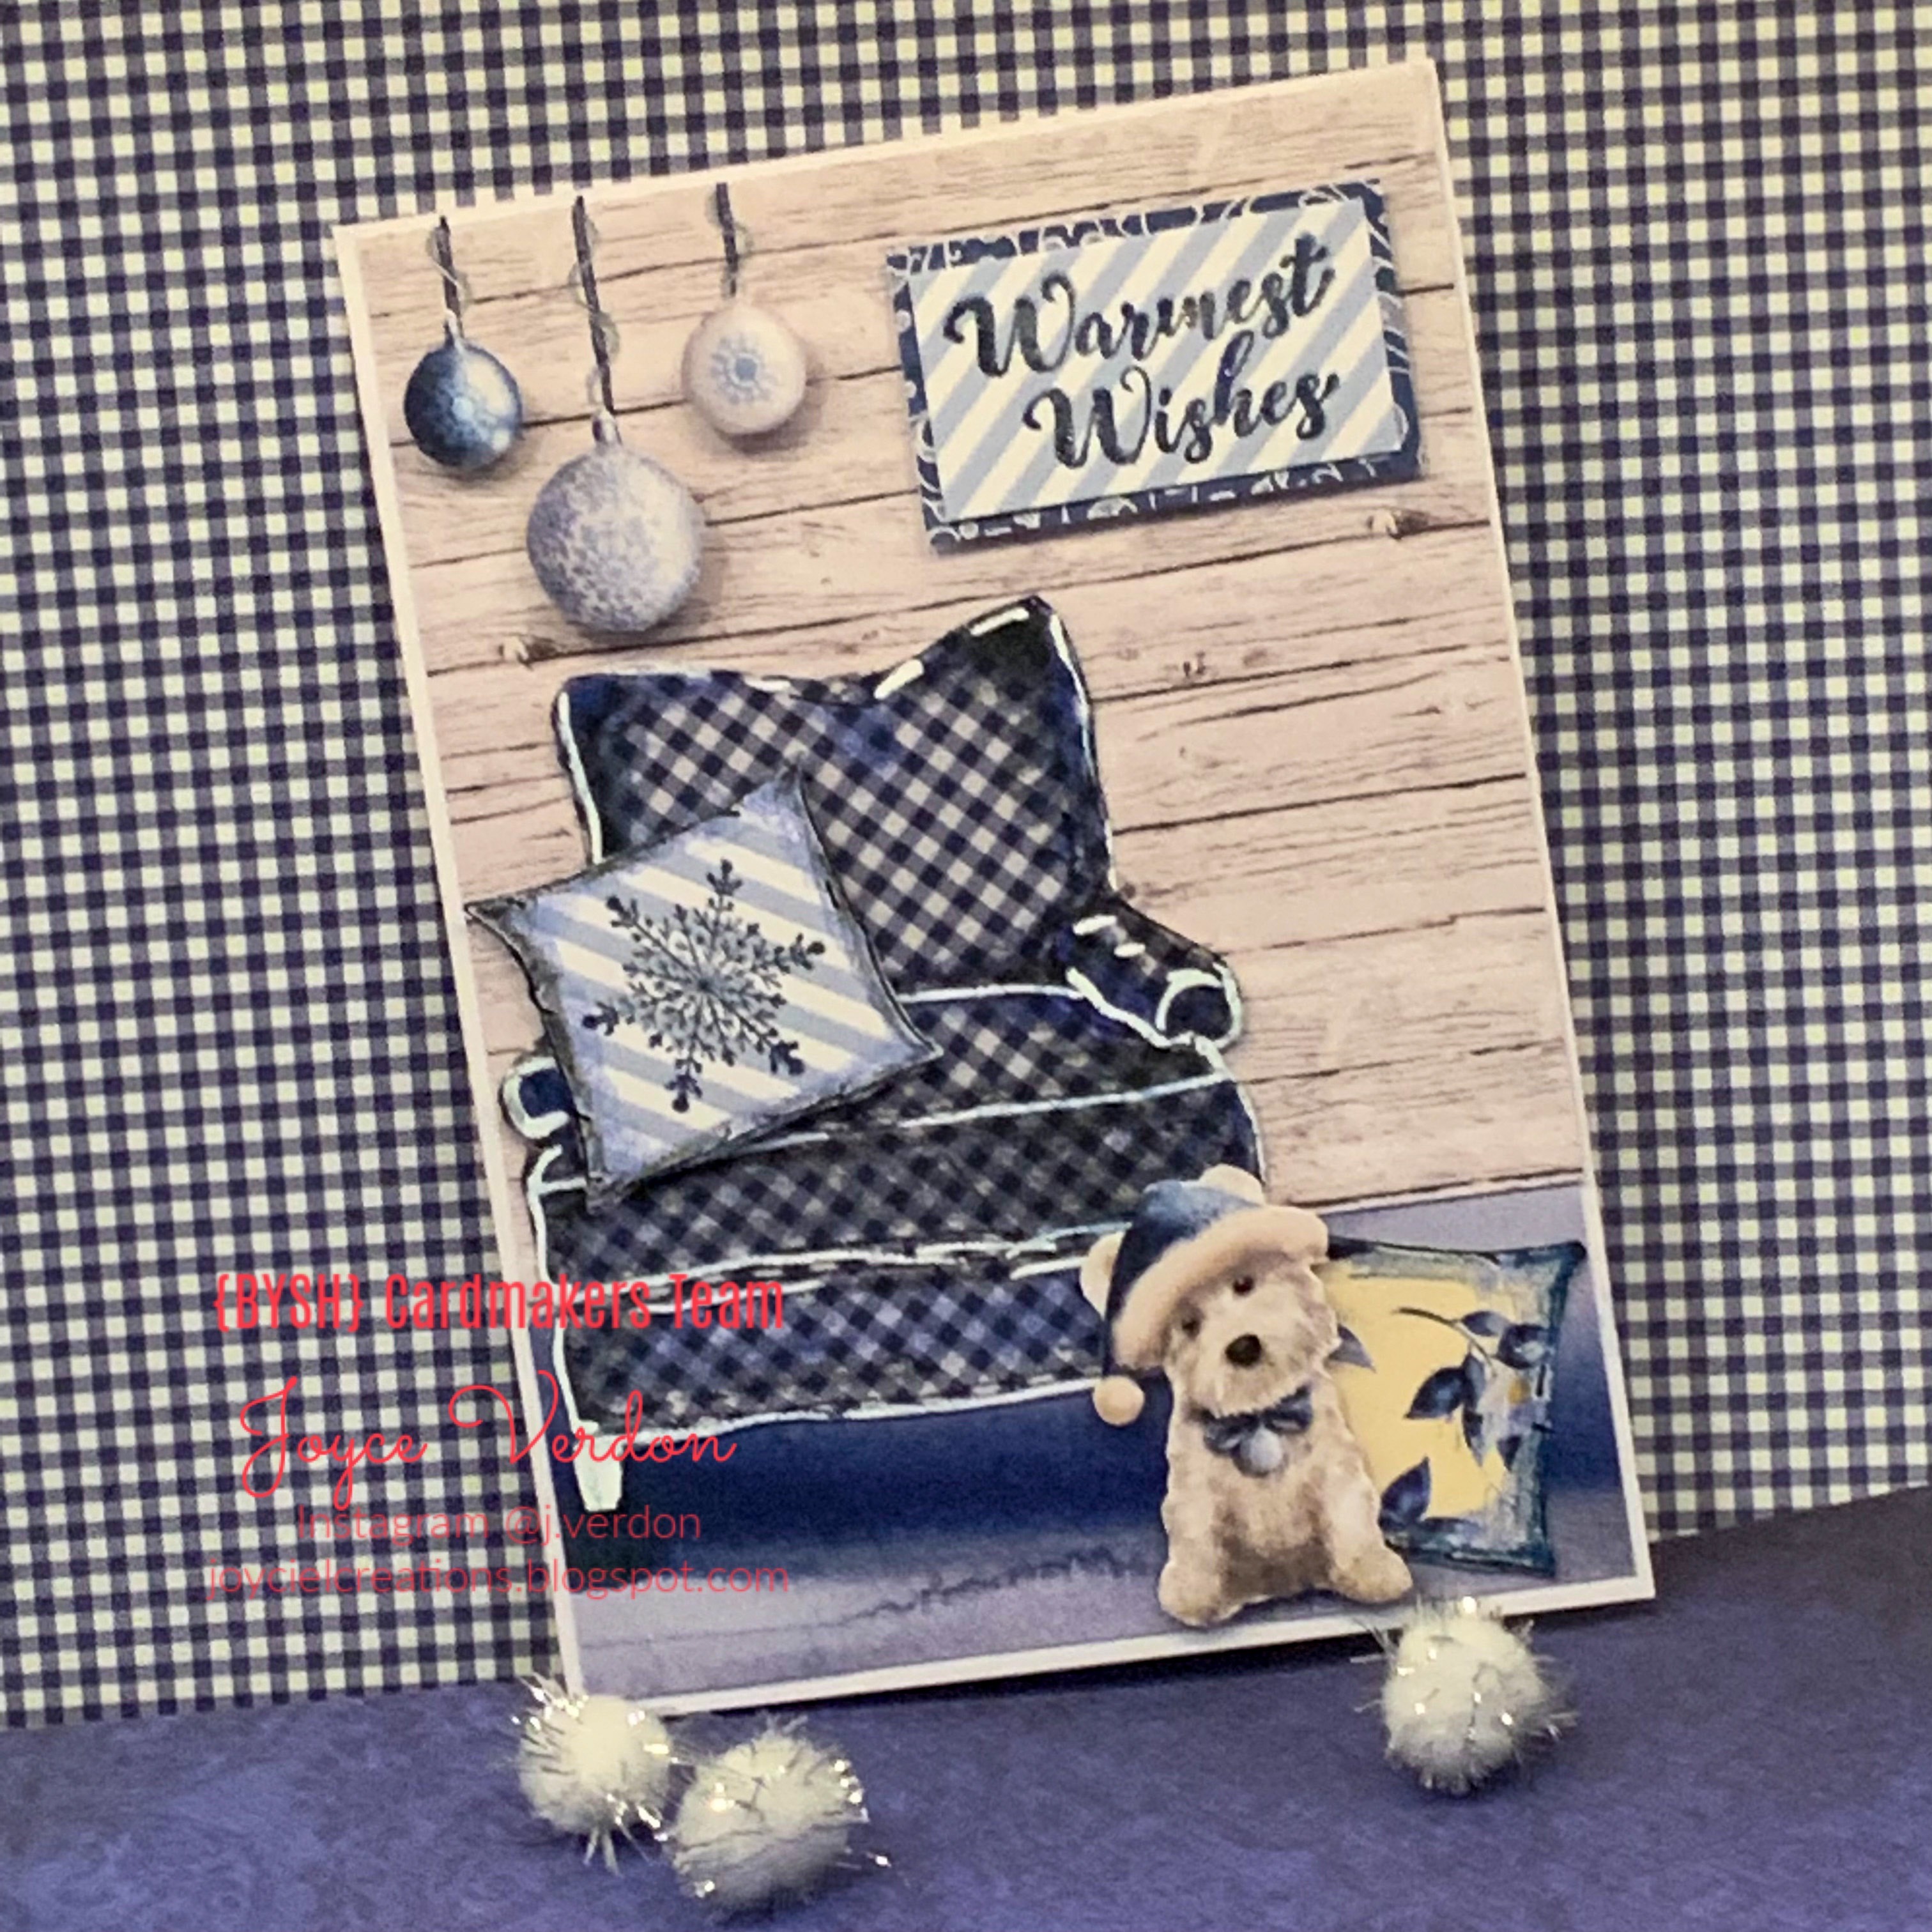
For this non-traditional card, I used a popular chair stamp from Unity Stamp Co. (one of our sponsors!), designed by a crafty friend, Jeanie Hays. This stamp can be purchased in the standalone set, My Happy Place, or if you are a member, in a prior Kit of the Month (KOTM), Beginning of Anything, from May 2020. I got the idea of this card from looking at new 2022 paper pads… chairs seem to be in! And why not! They are comfy and cozy… especially with a little holiday decor!
I also used a new paper pad that reminds me of my little Havanese dogs, Paper Roses’ Snuggly Christmas. I love the fresh use of a new color for holiday cards! So, to begin I stamped the chair, added a little pencil shading and fussy cut it out. I did end up also using a white Posca pen to outline the chair. I then stamped the pillow twice on 2 different sheets from the pad, shaded them and fussy cut them out. I also fussy cut the ornaments and a cute little pup! I decided to make the background using 2 of the sheets from the pad, one for the rug and one for the wall.
Before putting everything together, I decorated one of the pillows with a snowflake to match the ornaments. I found the perfect one in September’s KOTM, Fa-La-La-La-La, along with a perfect sentiment! I embossed both using a sparkly blue Stampendous embossing powder. The pillows, sign and ornaments are all foam raised. I used a navy and a silver pen to “attach” the ornaments to the ceiling!
To be honest, this turned out better than my expectations! But then I’m known for my love of quirky cards! Hope you enjoyed this one… now… your turn!
Join in the fun and link up some pretty holiday cards… and check out all the beauties already submitted! Remember, the Falling for the Holidays 2022 {BYSHC} Linky Party also has a great list of sponsors and giveaways. See rules in the attached blog post!
Thanks for stopping by… till next time, happy crafting!
I needed a card for my grandson’s 4th birthday, so I pulled out Unity’s …Bountiful Owl kit and a sentiment from Hugs, Kisses and Birthday Wishes. I found my fall paper scraps and pulled out an embossing folder I think I picked up in a magazine!
I started by spritzing the green patterned paper with water and added brown ink to the embossing folder. The impression turned out pretty good, so I added color to the tree image just using my distress ink cubes.
I then brown embossed the owl image and used the ink cubes again to add color. To enhance the image, I used colored pencils and a brown pen and a white one. I used more scraps for backing papers and a green card base. I just embellished with a few crystals.
Pretty simple card for a bright happy little one! That’s it for today, happy crafting!
Welp, made my 2nd, 3rd and 4th 2022 holiday cards! I’m on a roll! So, ended up making 3 similar cards on my “second” holiday card for Sketch Challenge 27. I realized as I was taking pictures of my first rendition that I had attached the panels wrong! So …I started over! And, actually, I wanted to try another technique to create the image and I had leftover paper I could use!
So, to start off with, these cards were first inspired by a very pretty holiday paper I received years ago in a magazine. It’s the bottom layer on right side of both cards. For some reason, I was just fascinated and in love with it. Without being shimmery, the colors and shading used created that illusion. So, then I started pulling out distress oxides I thought I could use to recreate the tones of colors in the paper. I used Wilted Violet, Chipped Sapphire, Blueprint Sketch and Tumbled Glass for all the cards, but with different techniques. I used a Brutus Monroe sparkling white embossing powder… that actually gave me some problems. And, finally, I used the Season of Joy kit from Simon Says Stamps.
For the first card, I used a smooshing technique on a mixed media paper, and over that, because I wanted a darker background, I ink blended the inks onto the card. I think the combination of colors approximates the paper colors. I clapped my hands over the paper with water to create drops. I also spattered white acrylic ink over the paper. To create the snowy mounds, I used the same ink as well as Posca white pen. I had to go over the embossed parts as I found the powder flaked off or was not opaque enough. I used a bluish purple card base for this one. I added glue all over and sprinkled tiny silver stars onto it. I used a Spellbinders Joy die for the sentiment. When I was taking the picture, I noticed I layered the pieces wrong 😟.
For the second card, I copied a Tracy Evans technique, “brayering” the ink onto the card. Her latest video shows how to do that. I used the same water and ink spattering techniques. I also changed things up by embossing tracks from a Unity SMAK kit to create the hills. I filled in colors again with both the white inks and, this time, I also used white paint from my Kuretake Gansai Tambi paint kit. This time I die cut stars for embellishment and embossed a sentiment from the kit. The card base this time is a purplish blue. Again, the embellished image was problematic for me.
For the last card, I changed things up by using Bristol paper and Gina K fine detail white powder. Also, I had to resort to other papers but pretty much kept to the same palette with the addition of a little green. I used the Brayer again but also used ink blending with a torn paper to make the hills. I used a specialty white shimmer paper for one of the panels the stars and the Tonic die cut sentiment.
If at first you don’t succeed… well… you know what they say! That’s it for today, happy crafting!
Well, hello to a new group of fellow cardmakers! Yay - I’ve just joined the Build Your Stash Holiday Cardmembers Design Team! I’m was so excited to be able participate in this group, that I immediately made my first holiday card and here it is! Here’s the sketch providing inspiration for this card!
For this card’s focus, I used a Kraft paper card base, a paper from Prima’s Santa Baby pad, and 2 Simon Says Stamp kits, The Magic of Christmas and Season of Joy. I started by stamping the image using Victorian Velvet Oxide ink onto the a piece of precut mixed media paper. I watercolored the image using same tones as the Prima paper strip. I lightly added both paint spatters and a very faint Unity script stamp to the background. To add a fancy border I thought would match the Kraft paper, I embossed strips of Stampendous powder. I did this by taking a small cube of Brutus Monroe embossing ink and very carefully wiping it down the edges of the paper.
To create the card, I found some coordinating paper scraps I cut down and used those to recreate the sketch image. I embossed the sentiment and added that to the image. To complete the card, I added Simon Says stamp die cut leaves (Privet Branch), painting the paper in the same tones, and a few sequins.
So happy to have been invited to join this team and looking forward to creating a bunch of holiday cards! See you next time and happy crafting!
Welcome to our Friends of Unity October blog hop! This one held a very different kind of challenge…
Well, I really had fun with this challenge! Finally had the opportunity to take my mixed media skills to another level. I’ve been wanting to develop skills in this area as I’m just in awe and fascinated watching the wonderful YouTubers that handle this technique with such ease and create such beautiful creations. I would love to complete my own art journal completely filled with page after page of inspiration to look back upon. To go from this…
to an inspirational page, like below, with special meaning to oneself is so rewarding! Art therapy is a real thing, and I totally enjoy every minute getting away from the world as I wander around in the creative process. Also, will serve to track my progress as I continue to develop my skills.
Before I continue on to this month’s efforts, I’d like to congratulate
Crafty Deb
on being the winner of my post from last month’s hop! Please message me your address and I’ll send along a little package with some Unity goodness! As usual, I, as well as others on the hop, will be doing another giveaway this month as well, so be sure to leave a comment on each post for a chance at some freebies!
So, I started attacking this challenge by opening my large art journal I picked up at a class a few years ago. I pulled out some interesting ephemera, I think from Bo Bunny, that I picked up at a discount store years ago. (I’ve collected a variety of odds and ends that I could use on this technique.) I also pulled out Unity stamps, coordinating paper scraps, acrylic paints and went to town. It took me over 2 days with a lot of drying in between layers. The thing about art journaling is that the audience for the piece is oneself. There’s no one else that needs to be satisfied with the result. Did I make a ton of mistakes… heck yeah. Would I change any of the decisions I made… of course! Does it make anyone else happy… probably not. But it was so fun! I took amateur video of my efforts, and sliced and diced it into 2 parts. Used several stamp sets and stencils for this one: Unity’s Stories to Tell, Just Magic, Open Your Eyes, Emerge and Border of Bells, and a Studio Light and an Art Anthology stencil. Hope you enjoy watching them! (There were a few steps I missed filming, but I think you can get the gist of what I did.)
For my second project, I wanted to make a tag using freebies from my Unity membership. This time I used 2 stamp kits, Love Anchors and The Ocean is Calling and paper scraps again… in some cases crumpled for texture). I also used a couple stencils on this one as well.As you will be able to tell from my video, I am all about texture! Enjoy watching this one!
Finally, my last 2 efforts were devoted to making Christmas tags using some of the tiny stamps from Unity’s Advent calendar kit. The first set, Ho Ho Ho, were developed with distress oxides, Primary Elements shiny powders and specialty embossing powder. Because the backs were dirty I attached paper that I used to paper piece the hat. I added some die cut snowflakes and a snowflake button to each.
The second set was developed using 2 tags. I adhered large music sheet Washi tape strips over the top tag. I then stamped the images and papers pieced them together (with the exception of the largest tag which I just added pen colors to). Fussy cut them out and added little die cuts and preprinted sentiments. Had fun creating these Christmas tags… I need to do this every year!
Thanks for stopping by… hope you received a little inspiration from my creations! Remember to leave a comment! Now onto my fellow bloggers’ beautiful ideas…
Found this Crafty Individuals stamp in my stash, that I picked up in a craft magazine from a couple years ago. I fell in love with it as, by adding another dog, it feels like a view of my husband and I!. He always wears flannels and plaid shirts and I have longer hair. When I first saw it, I had considered picking it up from a craft store, but then happened upon it in a magazine rack! The stamp is called A Walk in the Park.
Pulled Prima’s Amber Moon paper pad from my fall paper craft bin. I stamped the image on one of the papers using a combo of ink colors that coordinated with the paper. I stamped and fussy cut a second dog, as both Pico and Allie needed to be on the card! I then used colored pencils to add dimension. I cut up the papers and distressed all the edges. I fussy cut a couple tags, a butterfly and pumpkin image. I used 3 sticky images that were part of the Amber Moon line. I also found some matching lace to use and a fussy thread. Finally, after pulling the card together, I added several Prima crystals, also from the line.
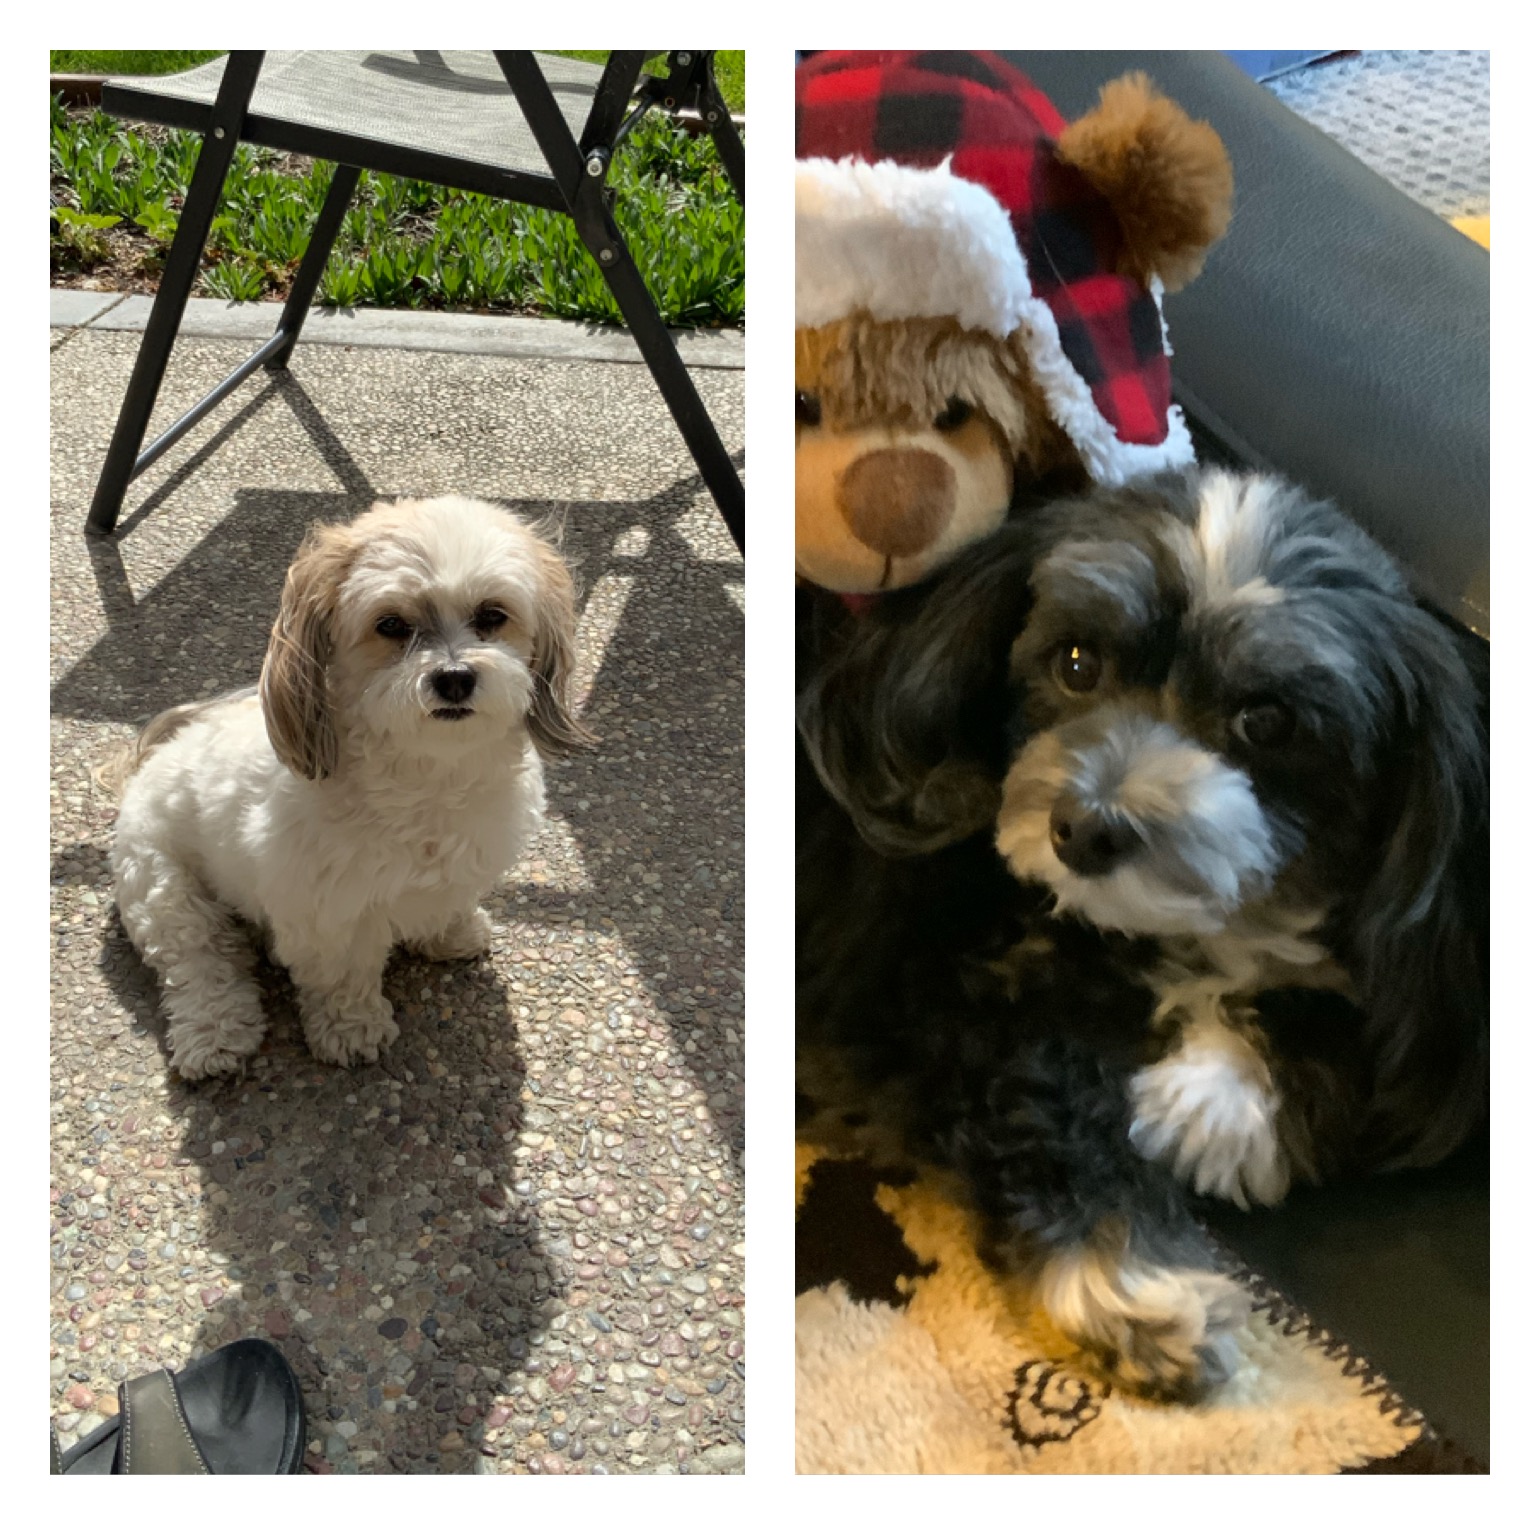
Update: forgot to take pic of our lovable 2 little Havanese:
Hope my husband enjoys this card! Love how it turned out! Thanks for stopping by! Happy crafting till next time
Well, now that I’ve mostly organized my craft room and found a bunch of magazine kits, I’ve decided I need to “shop my stash” and try to use some of them. So, here’s my first card. I’ve long discarded the magazine, but here’s a picture of the set… btw, I have no idea which companies (magazine and craft supplies) produced it!
I started by pulling out a wood patterned paper from an old industrial looking paper pad and embossed the texture into it. I then rubbed a Nuvo cream colored paste onto the top of the paper to enhance the look. I stamped the wood panel stamp 3 times using a combo of Gina K inks onto ivory colored paper. Luckily, I managed to line up the images fairly well by sight using my Misti! I stamped the sentiment in between wood panel images. I added nail heads with white embossing powder using the kit image, and then, paint spatter images using both the Gina K color ink and an old VersaMark chalk ink in teal.
I pulled out an old Handy Man die set and cut up a set of black tools and I used one of the gray papers from the pad for the second set. I also cut up some gears the same way using the die set from the kit. I glued them together. I added white pen and brown pencil to add dimension to the die cuts and painted a little of the teal color on top.
Finally, I stamped and colored the stop watch image using pencils and the chalk ink and attached that and square silver stick ons and an old nail stick onto the card. I backed the embossed paper with a wood textured paper I had from an old ArtC ephemera pack and called this card done!
Hope this card provided a little inspiration for you to shop your stash as well! And, I hope my son likes his birthday card! Till next time, happy crafting!
Oh my, I’m so out of practice! Now that the weather is finally cooling down in California, I decided I needed to get back to crafting! And today was a lesson that while practice may make perfect, lack thereof, is guaranteed to result in something else altogether! 🤣
So, today, I decided to pull out some of my fall patterned papers. One of the pads, Mintay’s Fall Festival, has very muted colors perfect to create a masculine card. I then searched thru some of my newer kits and found Our Blooming Story. I stamped the image on sketch paper using Acorn Archival ink. I then pulled out my Prismacolor pencils and matching colors and filled in the image. I ended up using and couple pencils as well. This stamp is beautiful and I certainly didn’t do it justice, but after playing around a long time I called it done. Couple lessons, the sketch paper wasn’t that great a quality and pencils are not great at detailed images. I did splatter some acrylic paint as well onto the image which was also a no no as it blurred the image too much. All good lessons to take into the next project!
I had some Tim Holtz chipboard windows lying around and one particularly caught my eye. I decided to couple it with the image. I stamped the sentiment on paper from the pad. I used an A6 card base and added ribbon, flowers and sequins for embellishments.
Glad I spent the time on this card trying to build back skills and knowledge. As usual, my cards are the farthest from CAS as one can get. So enjoy the layers!
Hello again! Just here to show how I put together this card using an old fall based Bo Bunny paper pad, Farmer’s Market, Unity’s Thankful Oak kit and a Couture Creations Celebrate die. I needed a card today to celebrate my kids’ anniversary!
First I identified the papers I wanted to use and pulled out a Sketchbox watercolor pad (another subscription that was fun for while). This paper is not that great for detailed watercolors… but okay for cards. I stamped and clear embossed the image using Gathered Twigs Oxide ink. I then quickly watercolored in the image matching colors to the papers, smoothed it over with a bit of gold colored pencil, and added gold, white and black Posca pen marks. It’s a bit of a mess, as I said I did this quickly, but I think one knows it’s a twig with leaves.
I die cut the image and background paper and cut the other patterned paper to fit an A6 card. I then stamped a sentiment from another Unity kit, and die cut the Celebrate word a couple times. I pulled the whole card together and added buttons to match the background paper, for embellishment.
It’s funny… you might wonder why I didn’t spend hours on this… well, kids today are not that into cards. At least mine aren’t! So, given time is priceless, I say, know your audience and match your effort to that reality 😂!
Hello friends. Oh, it’s so good to be back and feeling crafty! Enjoyed a marvelous European trip where my husband and I visited 5 countries! So refreshed. We thoroughly enjoyed the countryside, the cities and rich history that you can’t help but stumble upon every step! But, I’m back and ready for this month’s hop theme…
As a reminder, we do giveaways, so be sure to comment on every blog in the hop! And this month, I’ll be doing a giveaway! So, check back next month to see if you are a winner!
I had a lot of fun using my favorite techniques this month, starting off with a mixed media collage and the Revive kit! I started with a mixed media paper and started “collaging” onto it pieces of paper and vellum. I added splatters, Nuvo pigments, pencil marks, white gesso, and acrylic paint. I love this technique as I can just play and relax while doing it.
I then stamped the image onto the dried paper and die cut it. I colored in sections of the image with metallic paint. I then restamped the coffee cup, colored it with metallic pen and fussy cut it out. I die cut 2 Tim Holtz coffee spatters to use as the base of the cup and rounded the cup so it’s raised. After inking the edges, I added a blue butterfly, twine and black enamel dots to complete the card. I used part of one of the sentiments and another sentiment from a new snarky Unity Kit.
For the next card, I used beautiful Unity paper from Coffee Lovers and the Coffee Lovers stamp kit. Had fun watercoloring the image to match the papers and fussy cutting the donuts out! This card was really easy to create… but the colors of that paper… oh, my, are just awesome!
Finally, last but not least, another favorite technique… colored pencil coloring! This time, I paired One Sip at a Time with a Mintay paper pack, Homemade. I tried something new this time - I used a blue toned drawing paper. Must say, I think it worked out pretty good. I stamped the image with Hero Arts white ink, so that I could see it. What’s kind of fun is, I used a metallic pencil for the cup sleeve, so it stands out. I stamped the sentiment on an image from the pad. Because the image and paper are so pretty, I just embellished them with a pink and a blue ribbon.
Well, hope you enjoyed these cards and find inspiration in the ideas used! I so loved finally using these stamps for a coffee themed event!
Now on to Alaine’s post… ps… don’t forget to leave a comment!