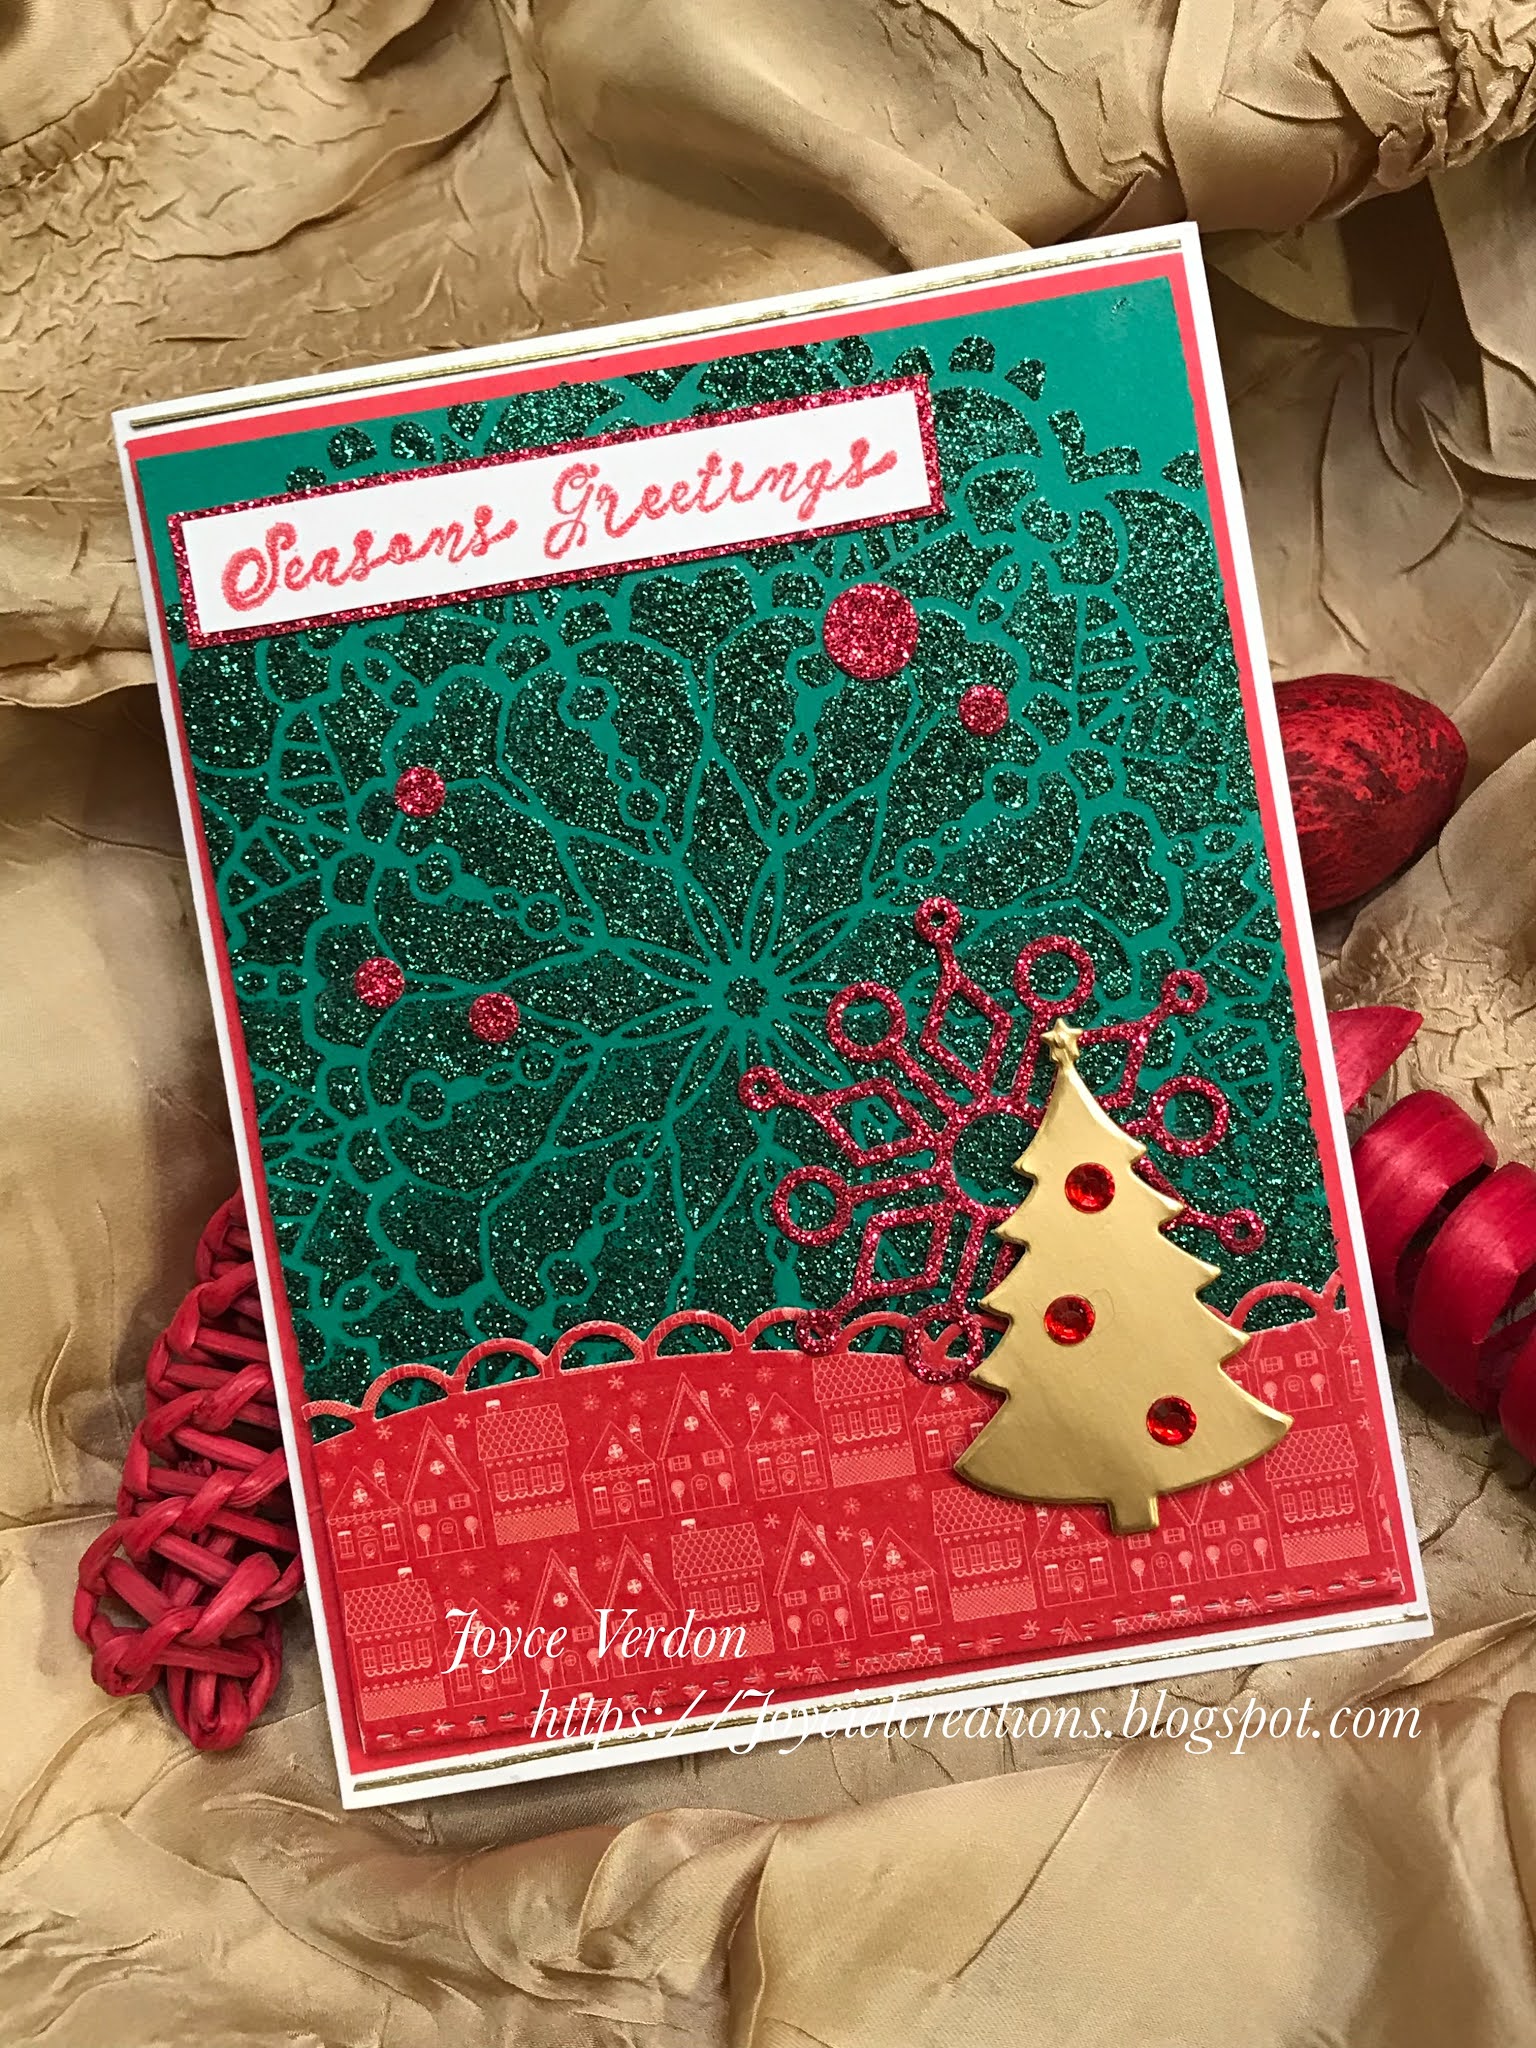
Friday, January 29, 2021

Violin Card

Picked up this pretty Crafters’ Companion Violin Solo stamp set from Tuesday Morning awhile ago with someone special in mind. My very best friend, who I’ve known since kindergarten, played violin all though grammar school. Music has filled her whole life since, through guitar playing, singing groups, and community theater.

So, given her birthday and Valentine’s Day are near, I started this card. I pulled out 3 of my new Magical pigment powders from this Lindy’s Stamp Gang set. I started by spraying watercolor paper with water and sprinkling on the powder, spritzing again if globs formed. I kept at it till I was happy with the colors. 

I then stamped the violin on watercolor paper using Antique Linen Distress ink. Using the first paper as a color guide, I painted the violin and flowers with my Schmincke watercolors, drying in between layers. I then took out a few Prismacolor pencils and added some more depth of color and evening out of tones. I used a black Sharpie in spots, and called it done.
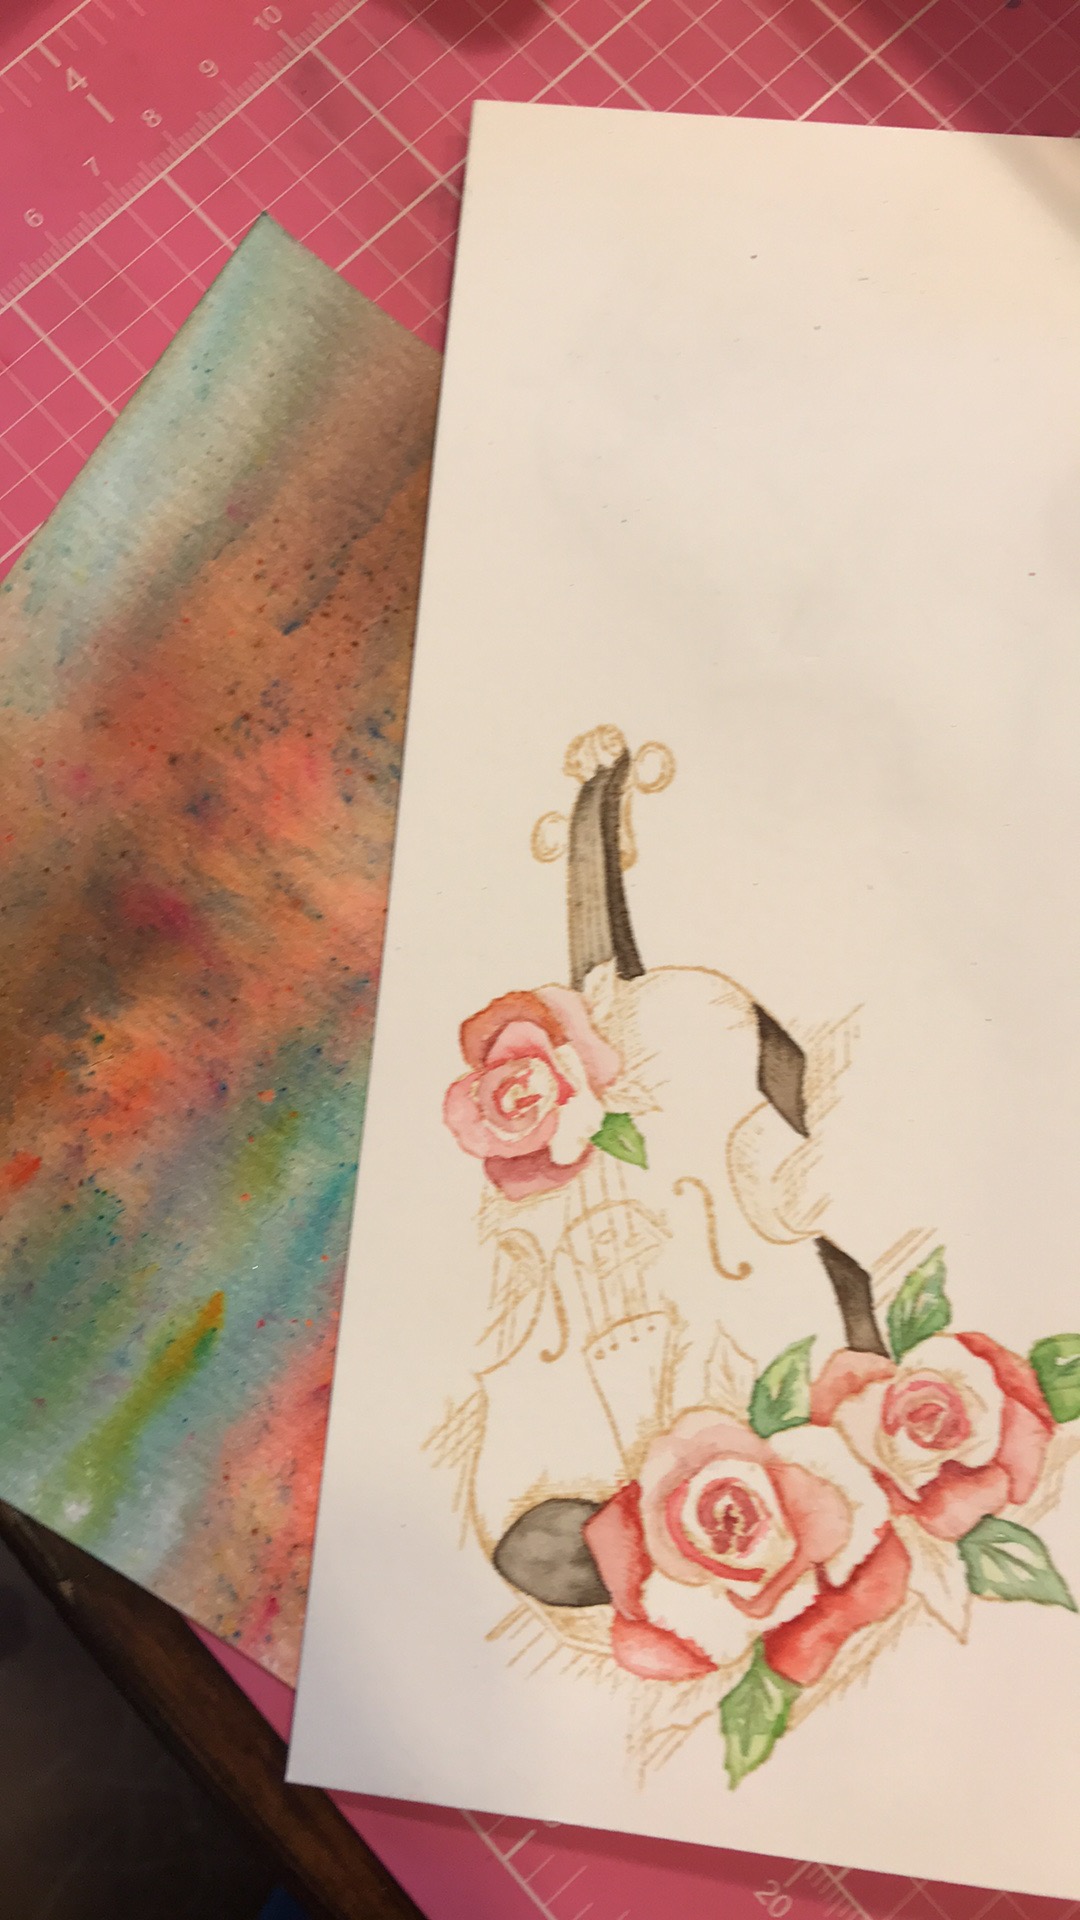

I then grabbed a Stampendous Ledger Script stamp and added brown script marks to the first colored paper using brown Versafine ink. I then used black ink to add notes from the stamp kit. I die cut that paper with a Heffy Doodle oval die and inked the edges. I also die cut a smaller oval using black paper. I created a wash on the leftover piece of watercolor paper and sprinkled a little of the powders on it. I then stamped the sentiment of the kit on that and cut it down. I backed the sentiment with black paper.

I fussy cut the violin out and die cut a coordinating piece of patterned paper out of Stamperia’s Time is an Illusion paper. Using a Kraft card base, I pulled the card together, embellishing with black thread and enamel dots.


Hope she enjoys the card and the memories. Till next time, happy crafting!

Tuesday, January 19, 2021

Hand Painted Card

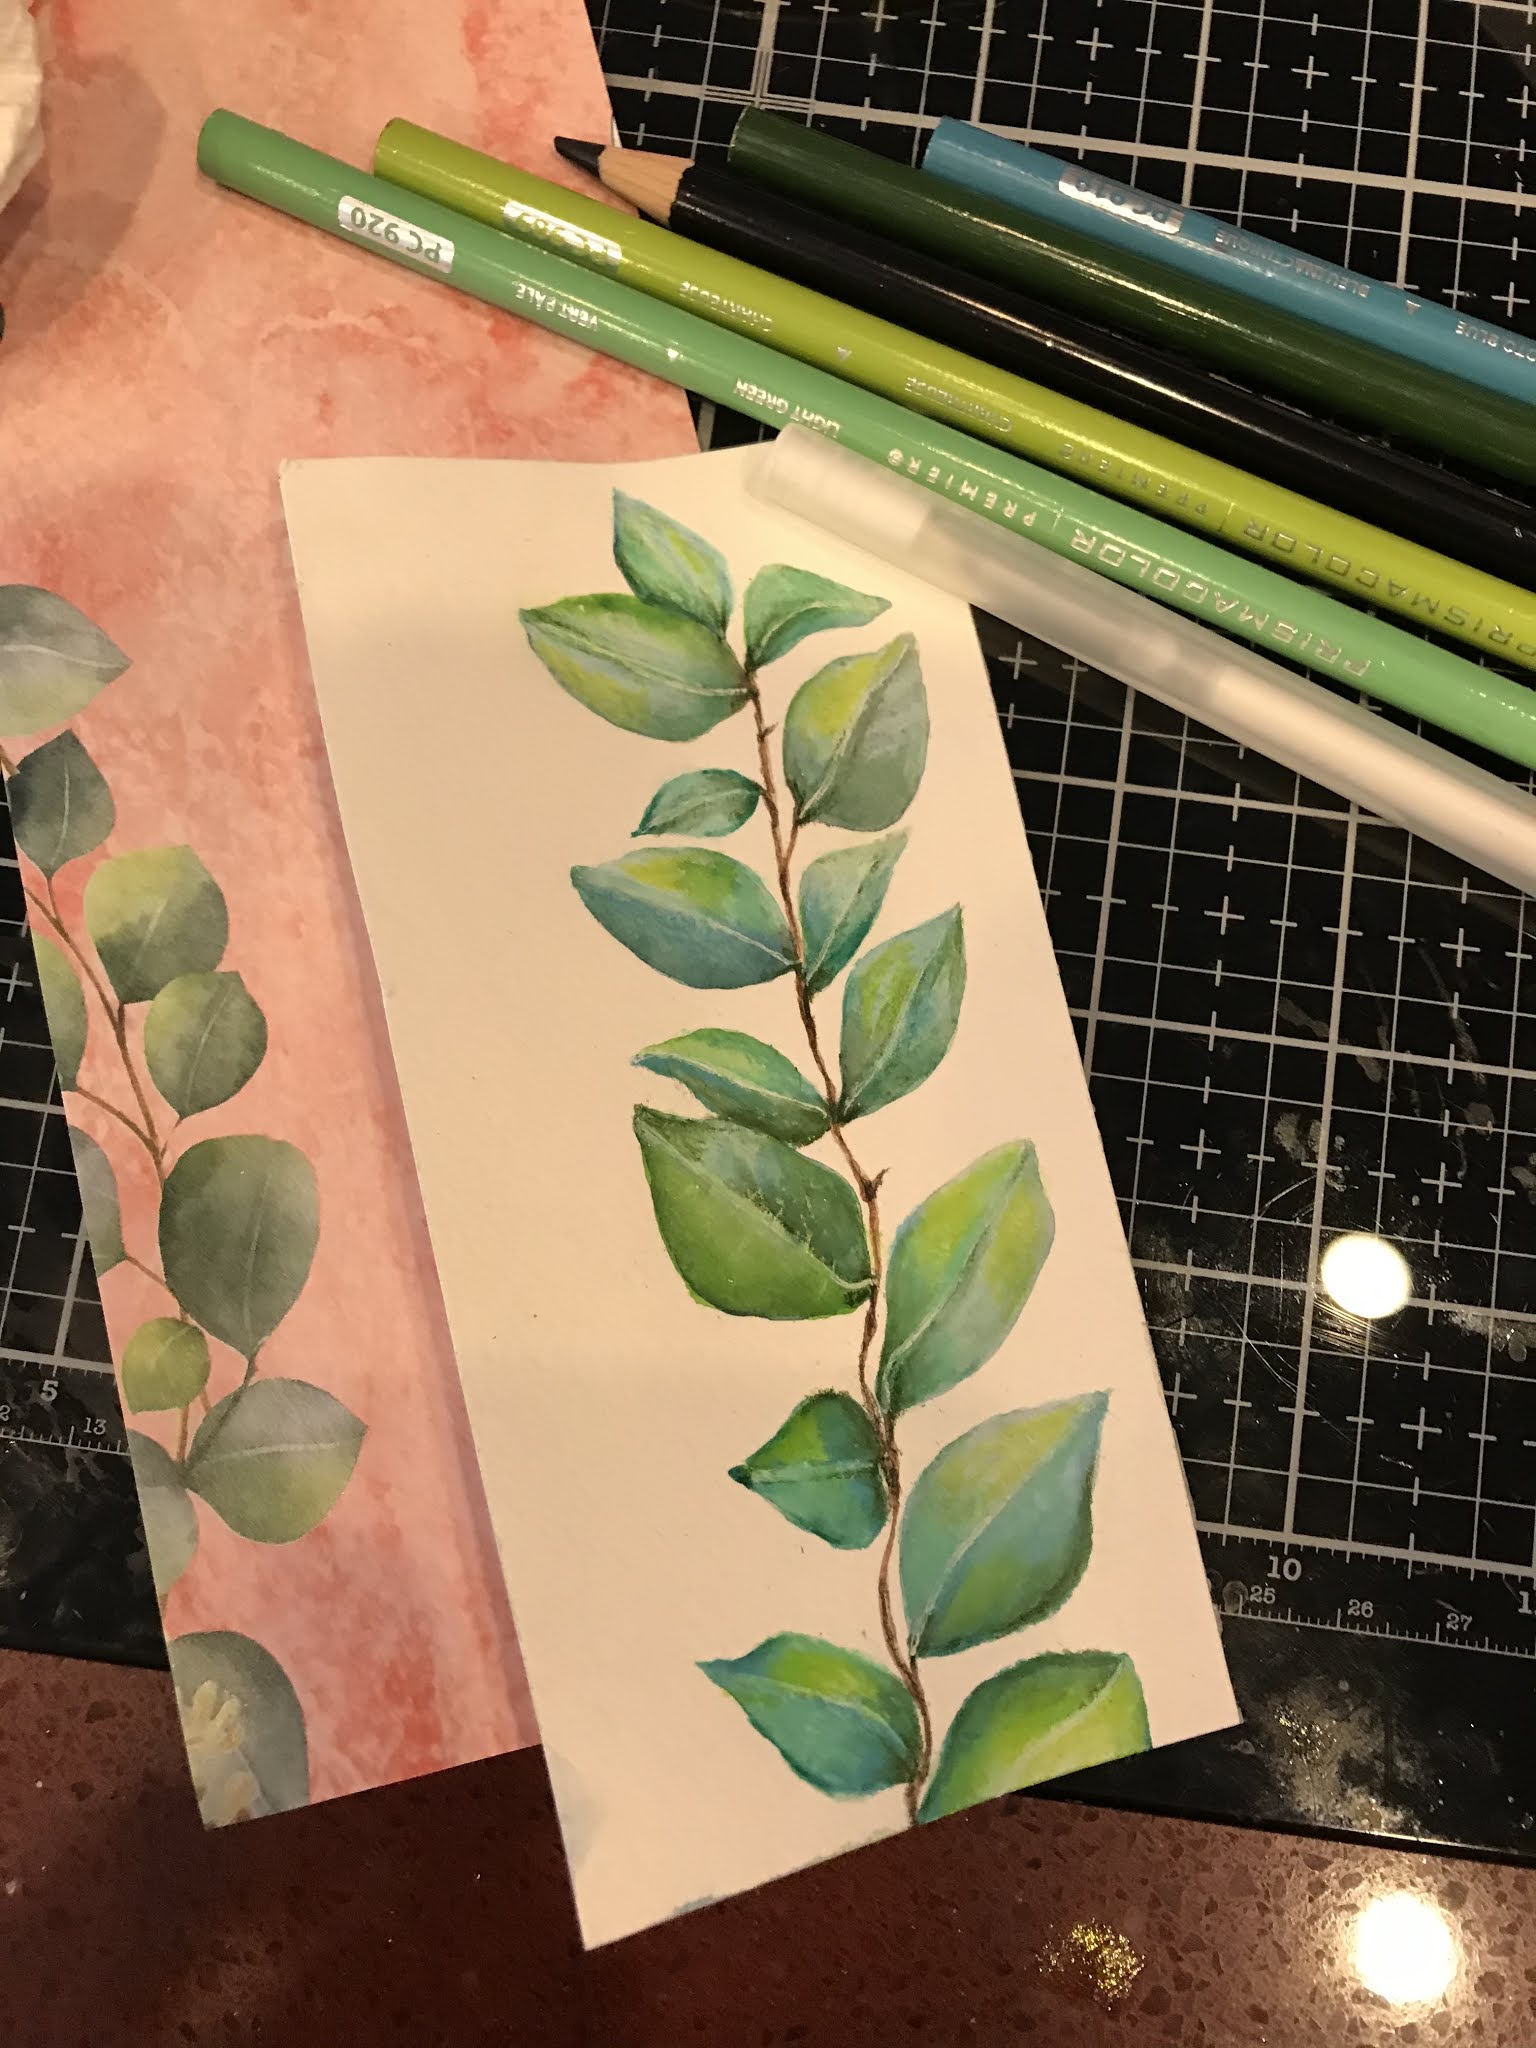
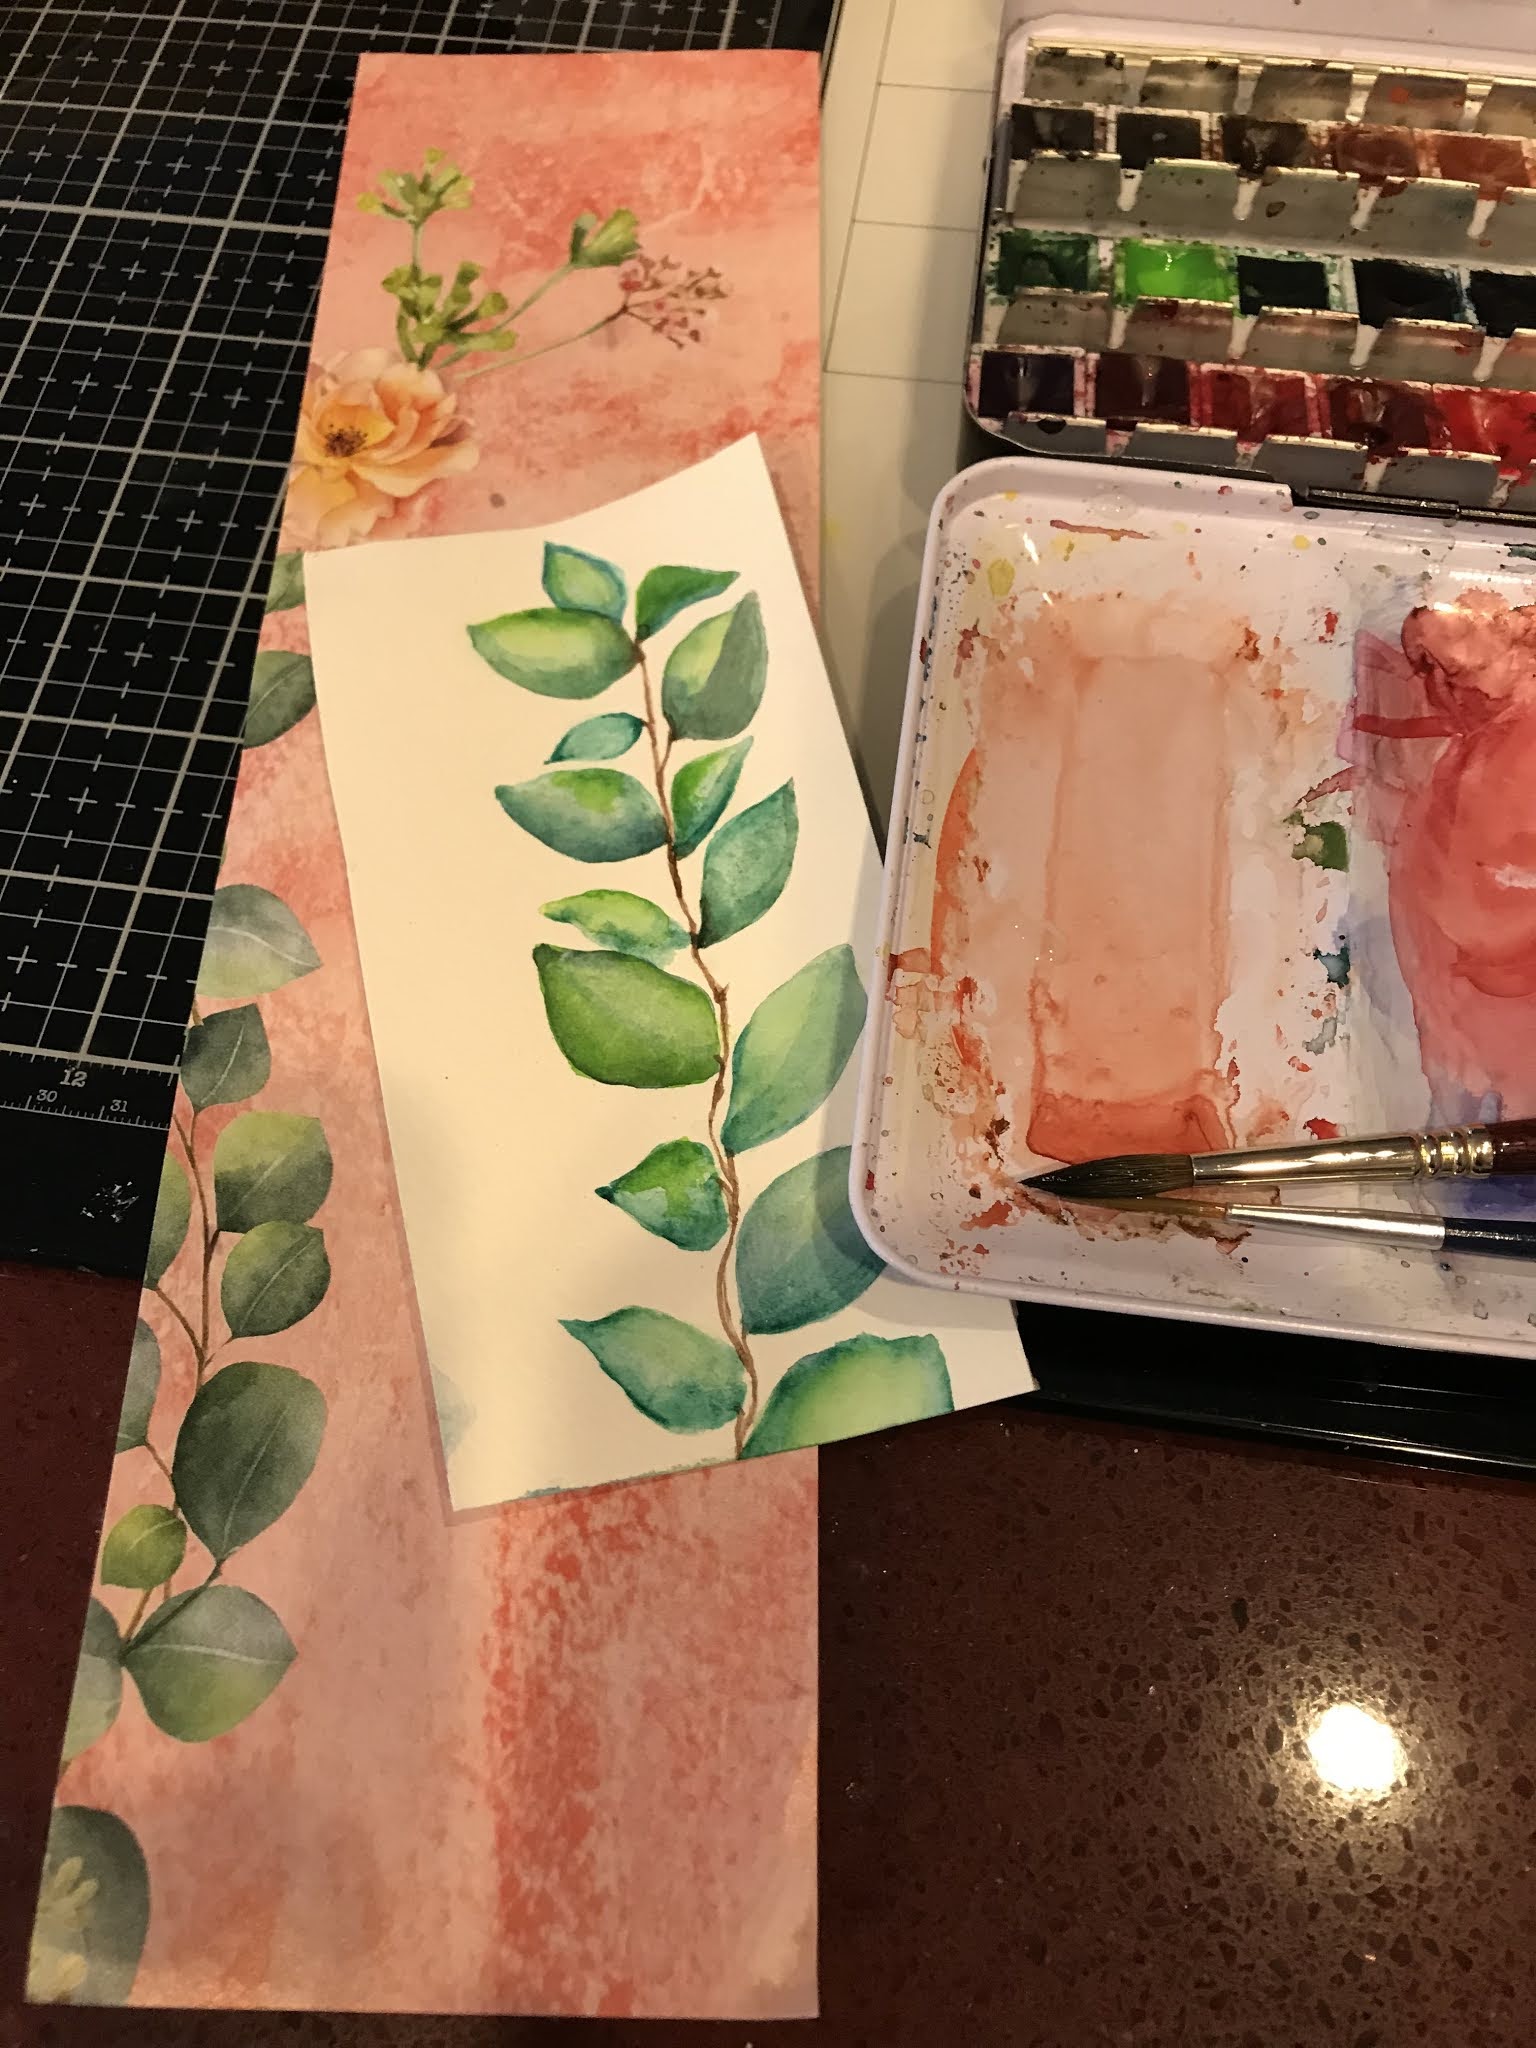
Hello, fellow crafters! I was browsing through an old Daphne’s Diary magazine and cutting out pages of interest, when I was drawn to a particular page. I had an urge (gotta follow those when they strike) to try my hand at replicating the watercolored leaves. So, I pulled out my Schmincke watercolors, a small piece of watercolor paper and tried painting free hand the leaves. When I was satisfied I had a good first layer down, I changed over to a smaller brush and sat down to add more detail and to clean up lines. This is where I stopped water coloring:


I then pulled out some Prismacolor pencils and tightened up a bit the edges and colors. I also used a white gel pen to add lines, shading a bit around them. Here’s where that effort ended up:

I then looked for how I could make it into a card and decided to create my own background first doing a watercolor wash on the same type of paper using a few of the colors from the painting. I then pulled out 3 different Stampin up green inks and the Infinite Birthday Wishes stamp from Unity Stamp Co. I then stamped the image using all 3 colors for interest. 

Using Brutus Monroe’s Espresso Coffee powder, I embossed a sentiment, from the Include Yourself in Beauty kit from Unity, onto vellum. I then cut down and backed both, a little offset, with shiny glitter paper from DCWV. I then cut down special textured brown paper from a prior Whit Kit for backing of both pieces.

I mounted everything on a brown card base, added fussy ribbon and brown Crystal dots.

Pretty pleased with how this birthday card turned out. Hope you like it. Till next time, happy crafting!

Monday, January 18, 2021

Sentiment Says it All

Hello! Well, I am starting back crafting at a slower pace. Turns out I didn’t need carpel tunnel surgery, so I got an injection instead and decided to rest my aching hands and wrists by taking a break. I have compression at the elbows, so I’ll also have to watch that (numbness in pinkie fingers).

So, this card says it all for me for a variety of reasons. Clearly, 2021 started off not so great... but let’s still hope for new beginnings with a change of leadership. Also, speaks to my crafting efforts. Hopefully, starting fresh here with rested limbs. And, met a very old friend online, a friendship which ended painfully decades ago, now restarting anew. Finally, with Covid vaccinations on the rise, unfortunately, we will continue to experience high levels of loss, a very painful ending to a horrific pandemic with a glimmer of light ahead.

So... here’s to new beginnings... cheers! To start off this card, I stamped the image from Your Life is Your Story using Antique Linen Distress ink onto watercolor paper. I then used the Nuvo watercolor pencils from this months January 2021 Whit Kit and a few pens and pencils to add color to the image. I spritzed the card with watercolors and Brea Reese Yellow Glitter ink. Finally, I stamped the sentiment with Simon Says Stamp black ink.


I die cut the paper using a Memory Box die, added twine, K&C paper and shiny paper dots to complete this simple card. Thanks for stopping by, and happy crafting!

Tuesday, January 5, 2021

Unity’s Last SMAK kit, New Year New Chapter

Created another tag using the 12/20 SMAK, New Year New Chapter. This heart stamp is so big, I can’t even get it on a giant tag. I used an 8 1/2” x 4 1/8” manila tag. 

I started by using a brayer and red acrylic paint to unevenly coat the tag. Then I used a stencil and an alcohol wipe to clear off some of the color. I then reused the stencil to add white marks. I used another stencil to add black marks. I then black embossed the heart image and used the alcohol wipe, white stenciling and a layer of white acrylic paint to lighten the inside of the heart image. I also used Posca pens to accentuate the image.


Wanting to play more, and given some recent news, I decided to add white paint drips and then replaced the white with black paint drips from the top and the bottom, signaling a few tears. Because of arm pain and a herniated disk in my neck, I had a nerve conduction test last week. I’ve also been diagnosed with severe carpel tunnel in both wrists. Clearly, not a major issue, thank goodness, but given my strong need to craft, I was very bummed. Seeing a doctor this week, but it’s clear I will need the procedures to fix both wrists and I’m sure recovery will take a bit. Good news is, hopefully, my hand will stop going numb while painting!


So, going back to the tag today after resting from the blog hop, I decided to add dots from a stencil using modeling paste and just random dots all over with the Posca pen. Wanted to brighten the whole piece. I had originally adhered a black stamped on white card stock sentiment. I decided to change that up by embossing with red and pink powders the sentiment on black card stock.

To complete the tag, I added ribbons and twine. I’m much happier the darker tag was lightened with white. There is so much that can be done with this kit. Unfortunately, I will have to pace myself going forward until I’ve recovered from surgery. I don’t want to incur any more muscle damage.


Word of warning to fellow crafters: read your body and take heed of signals. I know my IT career is probably a big reason for my problems, but crafting too is an issue. Ever since I broke my wrist 2 years ago, I’ve been in pain. I first thought it was arthritis in my fingers, then the break, then my shoulder, then my neck. In reality, it’s all of those plus carpel tunnel. Don’t give up identifying issues. And address them as soon as you can! 

Thanks for stopping by and till next time, happy crafting.


Saturday, January 2, 2021

Friends of Unity January Blog Hop

Welcome back to another blog hop of the Friends of Unity group. We are starting off 2021 (it’s finally here, thank goodness!), with a Black and White theme, always a challenge. As a reminder, to be eligible to win Unity stamps, you must leave a comment on each blog in the hop! 

As a matter of fact, I’d like to announce my winner from last month! Congratulations,

Becca Yahrling!

Please PM me with your address and I’ll get out your kit!

So this month, I have 2 ideas to share! First, I used the Array of Fall kit and December 2020’s Uniquely Unity kit, Take a Break, to construct the first card. I white embossed the flower array onto black card stock. I then re-stamped it using grey archival ink on watercolor paper and watercolored several flowers. I fussy cut those out and mounted them using foam tape on the embossed flowers. I black embossed the sentiment on white card stock. I backed that with black paper, cut holes on the corner and threaded striped twine through the holes, attaching in the back. To finish, I just added back crystals and white pearls.

I made a large tag for the second idea. I used the December 2020 SMAK kit, New Year, New Chapter... so sad it’s going away. The heart in this kit is beautiful and massive. I took a black tag and used a roller haphazardly to add a glossy white acrylic paint to it. I then grabbed some stencils and first using an alcohol wipe removed the paint behind the stencil. I then used the stencils again and the black paint to add darker impressions. Finally, I black embossed the large heart. I proceeded to play with Posca pens adding outlines and lightening areas. Finally, I white embossed hearts from the kit all over. I black embossed the sentiment on the bottom and just stamped the one on the top, outlining both afterwards. I darkened the tag edges, added crystal hearts, ribbons and twine, and metal pieces. I’m not as confidant about this one, but I think the ideas have merit. 

Thank you for stopping by and remember to comment before you leave! You should have come from:

Dawn’s

But, next stop is:

Amber’s

If you want to start from the beginning, head to:

Crystal’s

Enjoy!

Thursday, December 10, 2020

Power Poppy Fully Stocked Card

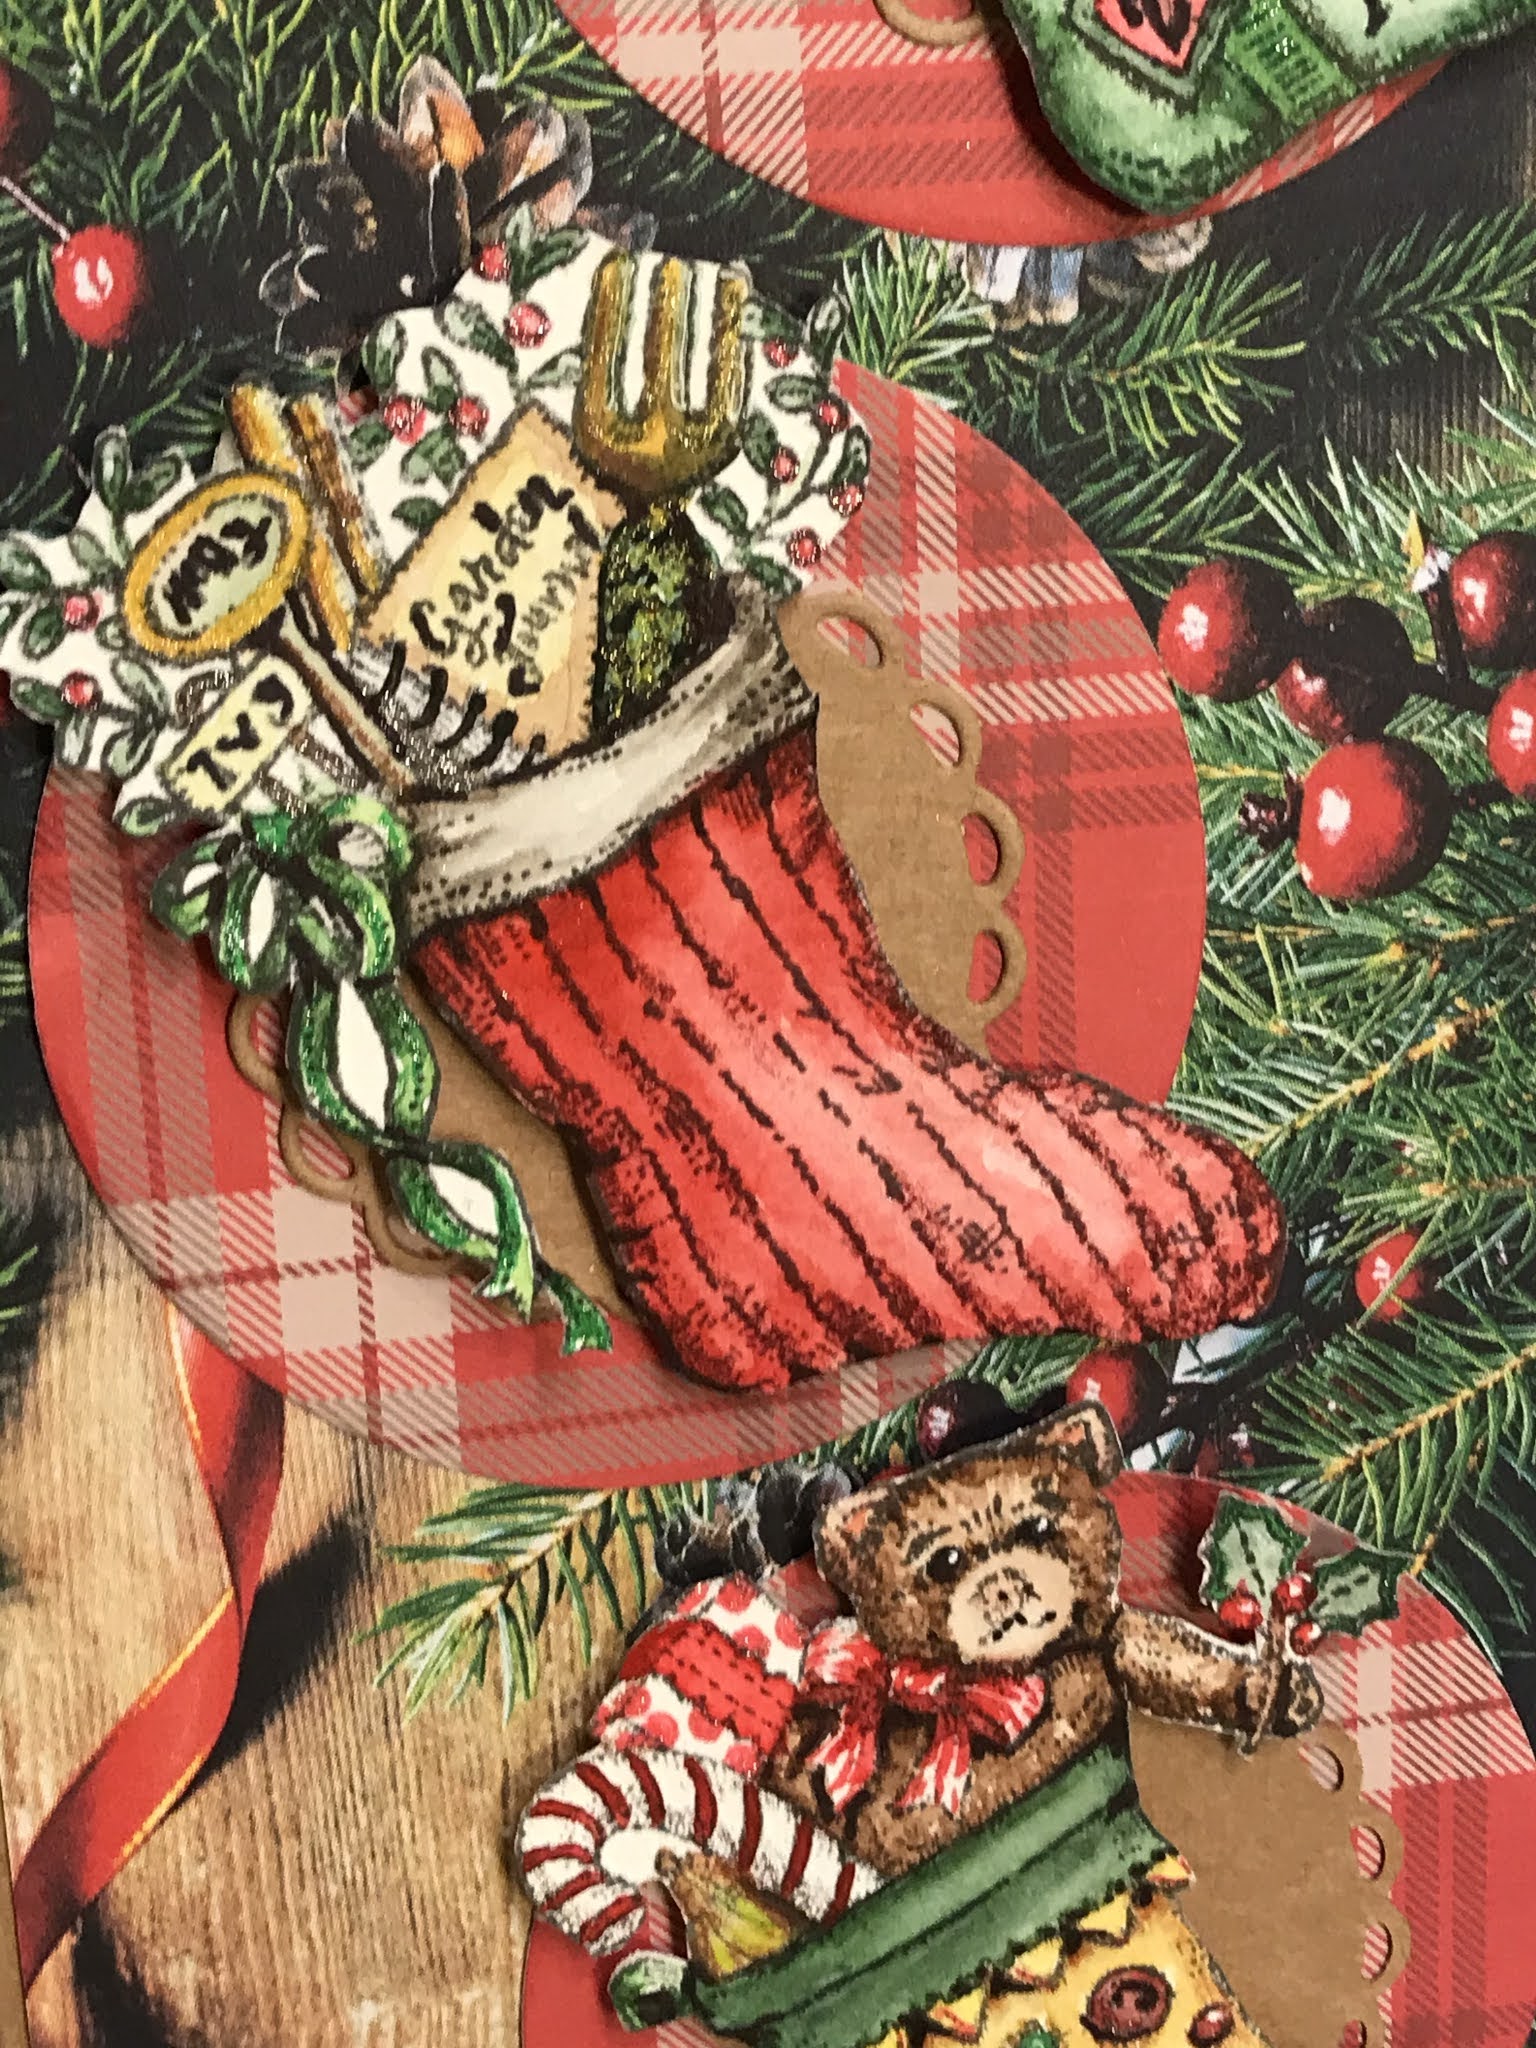
Picked up Power Poppy’s Fully Stocked Clear stamp set last year (only available in these digital forms this year). It is so freaking cute and fun to watercolor. Because I wanted to preserve the image lines, this time I used gray archival ink to stamp the images onto watercolor paper. I used my Schmincke's watercolors and tried to stick to just a gold/green/red palette. When I was done, I used some pens and pencils to differentiate shadows and lines a bit.


I fussy cut out the stockings. Knowing they couldn't all fit on a smaller card size, I decided to try making a slim line card with them. I had cut out an image from a holiday magazine last year. I thought I could use it as background paper or in journaling, but then decided I could use it as a backdrop for this Kraft slim line card. (I had cut down and folded Kraft paper to make the card base/.)


To highlight the images, I used circle dies on Kraft card stock and paper from Moda Scrap, Suditrol. I stamped the sentiment from the kit on white paper. I added color to make it blend into the background with pens and pencils and added some needles from another stamp in the kit. I die cut another circle, backing that with Kraft paper too. 

Busy card, but I had so much fun coloring these cute images.

November Artist Trading Cards

As you know, I’m a member of an ATC swap group. As always, I enjoy playing with this little ATC format every month, and sending out and receiving, in return, very creative ATCs in the mail. More importantly, though, belonging to a group of fellow crafters has been life affirming, as we share life stories, our ups and downs, crafty news and ideas, and generally supporting one another! So, I had a couple messages to send to this wonderful group in November.


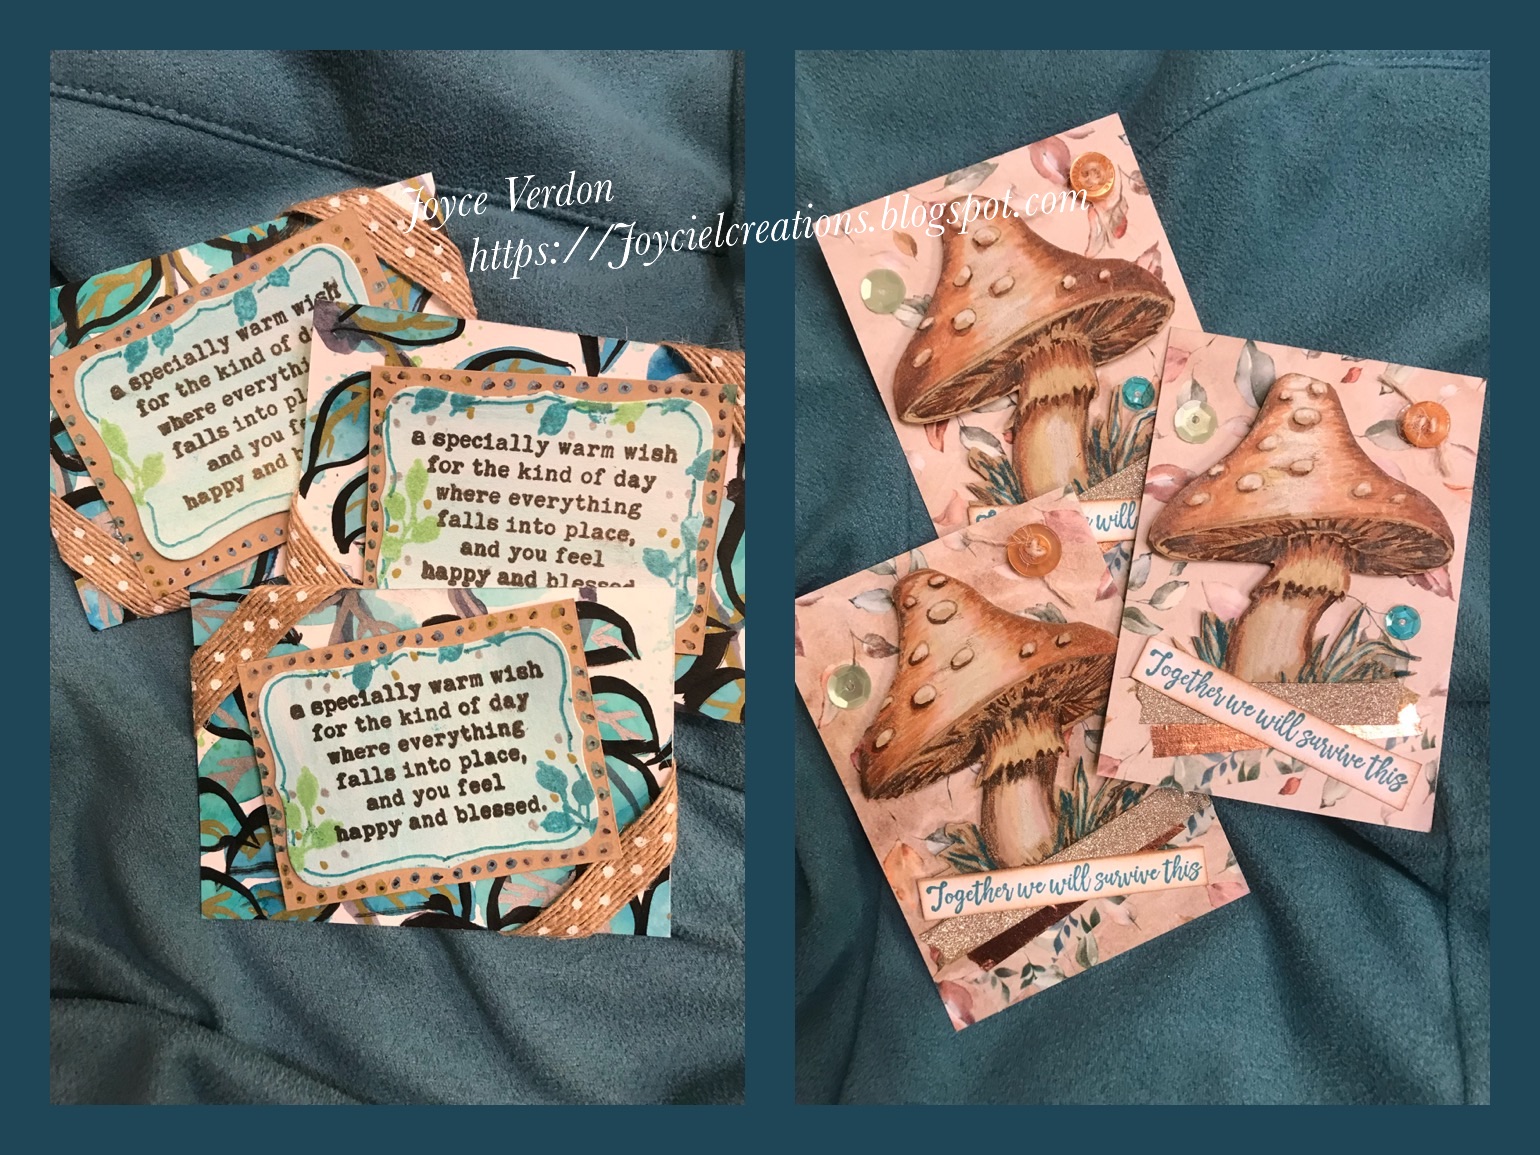
The FB groups have been abuzz about ‘that’ paper and how beautiful it is. I picked up a sheet of it at Hobby Lobby. And I must admit, being a watercolorist, I too have been totally mesmerized by how pretty it is. (And I have an urge to recreate it in my style... on my task list for a later date.) However, feeling a little stressed this month with life events, I decided to recreate a very messy, but somehow totally freeing version of it for the background of this very special sentiment, from the Specially Warm kit. I used a combo of acrylic paints and paint pens and just free handed painting on a sheet of Bristol paper. So, fun... felt like I was back in nursery school! I then used a dotted stamp from A Good Life kit to add a lime green color to bare areas. I cut down the sheet and stamped and die cut the sentiments. Added a little leaves from another kit to the edges of the sentiments and used pens on it. Final touch to the ATCs was to add rustic ribbon. For my ATC friends, I cut down my sheet and included a 4x4 piece along with the ATCs for them to play with. Hope they find and create that special day!

The second ATC was inspired by a few things. I’m really feeling like a mushroom, lately, with the explosion of Covid around me and the shut down my state is experiencing, I’m hunkering down, hiding away, not going out much, not seeing the light - trying to avoid getting sick. Also, my yard gets full of mushrooms this time of year. And third, felt the need to use my pencils and pens on a great stamp! So, I pulled out the Change The World KOTM kit and stamped the mushroom using a gray archival ink. I love the Cozy Evening paper from Mintay, so I used a piece of it for the background and as my color inspiration. I stamped the sentiment from the Trust It Will Be Okay kit and added matching color to it and used Washi tape, a button and sequins to embellish the card.

Well, that’s it for these 2. One more card for today and then I’m done sharing! So, on to the next post! Happy crafting!

Saturday, December 5, 2020

Friends of Unity December Blog Hop

Welcome back to a Friends of Unity Blog Hop, where, this month, we get to choose Our Favorite Things. As usual, comment on each blog for a chance to win some Unity stamps. This month, because it’s our anniversary month, all bloggers are hosting a giveaway, so lots of opportunity to win! Speaking of, I’d like to announce my winner from last month - congratulations....

Linda Abel

Please PM me with your address and I’ll get your stamps out to you!

Now, on to some of my favorite things - girlfriends for one, Angie girl stamps for another, paper piecing, Christmas cards, and, this very sparkly older Cozy Christmas patterned paper pad from My Mind’s Eye! Paper piecing always takes me back to playing paper dolls as a kid and designing my own clothes for my dolls. So, given all that... here’s my cards!

To makes these cards, I stamped the image from Kara and Melissa Girls 4 times on white paper using Antique Linen Oxide ink and on 4 different coordinating papers from the pad using a gray archival ink. I then fussy cut all the patterned paper wardrobe pieces (of course, including the fab shoes). I colored the skin, hair and jewelry of all the girls using colored pencils and pens. I then glued on all the apparel, keeping each girl to 2 patterns. I added shading and filled in any gaps with pencils and pens.

I then selected 4 other background papers I could back the girl papers with and die cut all 8 pieces to fit an A6 card. I used the friend stamp from November’s Whit Kit, Everything in Between, and a sentiment from Warm Wishes for Your Home. I also added different ribbons and ephemera from the Cozy Christmas collection to adorn each card. Because the paper is so sparkly, I felt the cards were embellished enough.

Spent a bit of time on this, but I believe they returned out pretty cute and make lovely friend cards. 


So, hope you enjoyed my take on Favorite Things. Now, on to the next blog (don’t forget to leave a comment before you go):

Bobbie Sue

or, you can start from the top:

Crystal

Wednesday, November 25, 2020

Let Light Shine Card

Well, as I said to my crafty friends, I knew I was jittery, in pain, and anxious Sunday, but I didn’t know I was depressed too, until this image appeared. Your art speaks for you, I guess!

My husband who is currently working for the federal government on the East Coast (I’m 3000 miles away on West Coast) told me Friday that he’d been exposed again, on the job, to Covid-19. Three strikes and you are out, I guess! Luckily, he was wearing an N95 mask... he’s been really good about that. But he felt funny with a headache and congestion. By Saturday, he had eye symptoms and was losing sense of taste. Meanwhile, I had to go off all my pain meds and was feeling poorly, in preparation for a needle injection in my neck Tuesday. I have bulging disks and radiating arm pain all the way to my fingers! Plus, I have friends who are in much distress as well for a variety of reasons. Anyways, this was the result I produced Sunday feeling all of that. Until I saw it Monday morning, I didn’t realize how dark I felt!

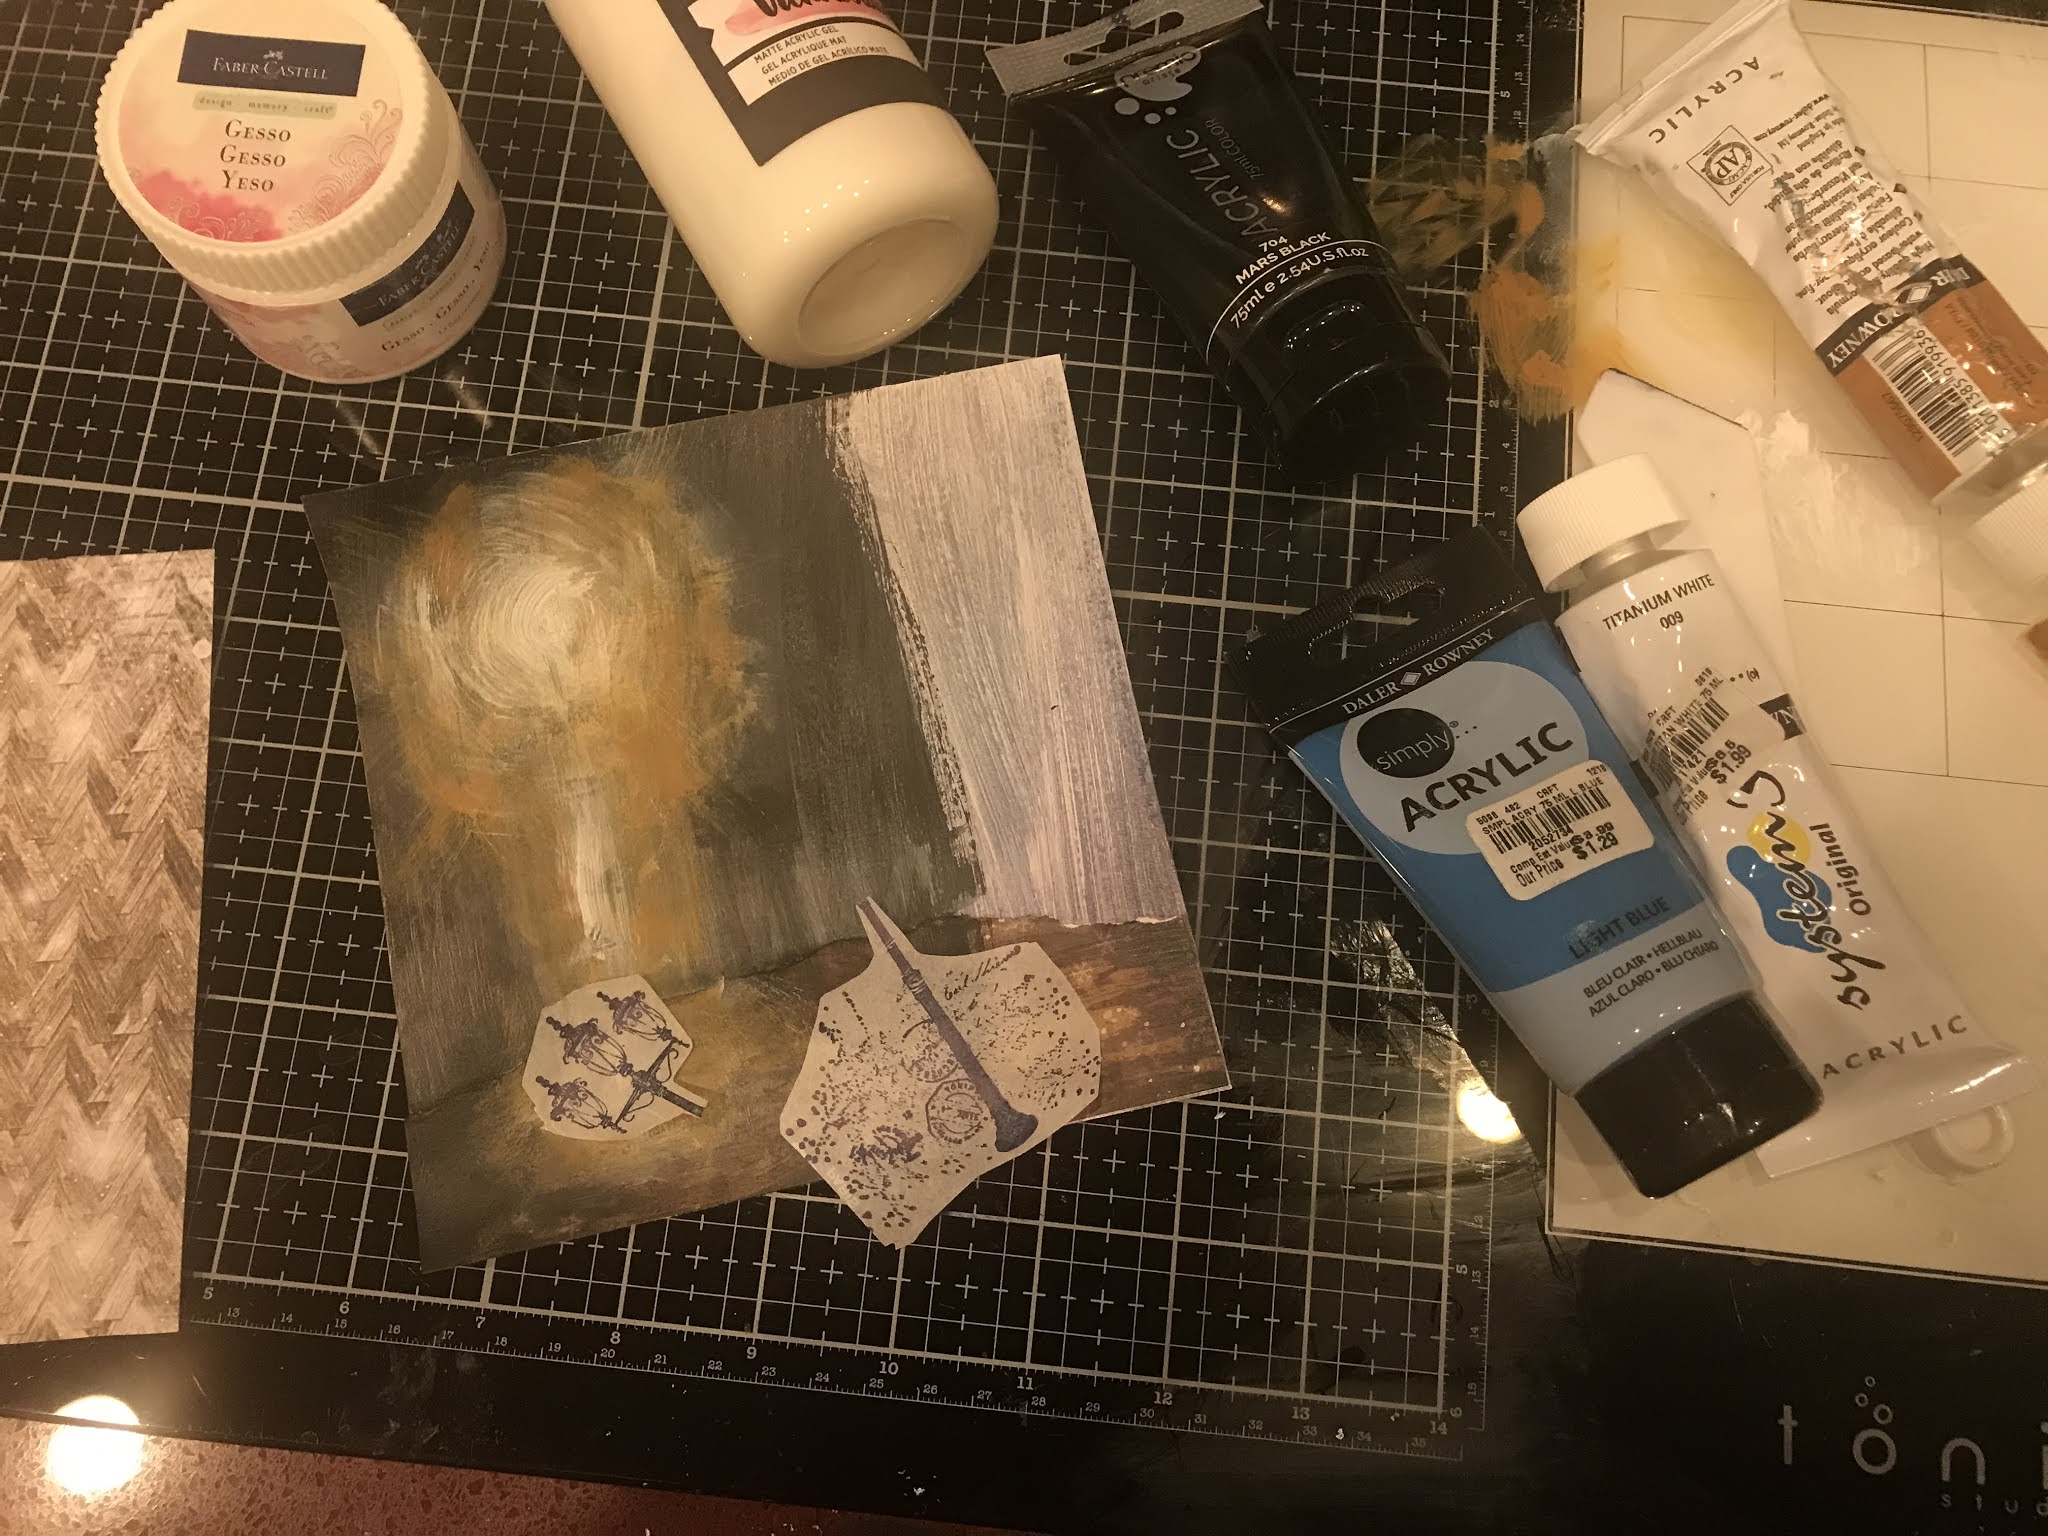
Anyway, I started this project with paper from a very old Love From Lizi kit and Unity’s Shine Out of Darkness kit. I first gessoed the part of the paper I’d be using. I pulled acrylic paints in white, copper, blue and black and proceeded to add color to the paper with both my fingers and a paintbrush. I then decided to tear a strip off another sheet of paper and used gel paste to attach it to the bottom. I then added more color to blend the pieces together. After pulling out the stamp, I realized it was too short for the space I had created for it. So I stamped it on tissue paper, twice, using a navy Stazon ink, allowing me to expand the height.

I cut off the excess paper and carefully added the stamped images using gel paste, aligning the posts to link up. I then added more paint to cover up the edges.

I decided to also add a platform for the lamp to sit on. I used my Gansai Tambi watercolors to add lines simulating a paved platform. Before I did anything else, I thought I’d better figure out how to add the sentiment. The kit included paper which had gold frames. I decided to try using one, and therefore added Gansai Tambi gold watercolor paint to the squares. I stamped the sentiment using black ink and then added gold pen to make the words “ shine”. I then turned back to the image and embellished the light post by darkening some areas and adding lighter colors around the light fixtures. I used both watercolors and pens.

Finally, after recovering from yesterday’s needle ordeal, texting with those same friends and seeing my husband’s symptoms are staying very mild, I’m in a much better state and was able to pull the card together! I used a variety of the papers and added a BoBunny Antique Gold TCW stencil image on one of them. I die cut the papers down and added a ribbon to complete the card.

Hope you were interested in how this one was put together. I guess, this serves as a good reason to keep an art journal as it captured a real life moment. I actually thought about putting this in a journal, but right now I think others can benefit from this card! And, if in need, I hope you do too! Things will get better! Well, till next time, happy crafting!


Saturday, November 21, 2020

Making Spirits Bright Card

Used this month’s Unity SMAK, Peace in Your Soul, to make this elegant fun card! I also used Bright Spirits, the 11/19 SMAK Beauty of Life, and a random scroll from an unknown older Unity kit. The base layer is a paper from Unity’s Rustic Winter Wishes. 

I first started by embossing the bottles into a shimmery white card stock, using Antique Linen, Fired Brick and the new Rustic Wilderness oxides and corresponding embossing glazes. They turned out beautifully! After checking through my whole stack of papers, I couldn’t find anything that would work but I did get inspired by some of them! So, I decided I needed to create my own paper background. I first started by laying down a water wash of Antique Linen oxide on to white card stock. I stamped the pad onto my mat, added water and swiped a large brush through that and across the paper lightly to add the color. I lightly stamped the music background down the entire page, once dried. 

I then used all 3 oxides again to add the holly, pine cones and scroll to the sides. I die cut this sheet, and stamped the sentiment at the top in black Versafine. I then adhered/mounted the bottles. I backed this paper with a gold glitter paper and mounted everything onto an A6 size card.


I love how this one turned out and enjoyed using my new glazes and green color. Was also fun creating that background. I didn’t add any embellishments to the card as it seems complete to me! But if you think I should, comment below! Thanks for stopping by! Till next time, happy crafting!


Thursday, November 19, 2020

Polka Dot Orchard’s Dolly Doily

Started playing with the 2 Dolly Doily sets from Polka Dot Orchard, Dolly Doily (square) and Dolly Doily (mask) using a variety of mediums and techniques. I’ve made cards with a few of them, but have kept the others for future efforts (potentially mixed media projects).

I used the Cosmic Shimmer Holly Green texture paste on green card stock paper for the first card. I die cut a Simon Says Stamp snowflake using gold glitter paper, and embossed a sentiment from Unity’s 9/20 Elements of the Season KOM. I attached a large holiday themed DCWV Washi Tape from a 6x6 paper pad onto white card stock and die cut it for the bottom. I die cut a gold paper tree. I finished off the card with the die cut remnants, red crystals and some gold sticky strips.

I used the Brutus Monroe Raspberry Glitter Glaze on pink card stock for the second card. Here I gold embossed the cute image from Unity’s Uniquely Unity kit, ... All Wrapped Up. I then used a mix of Spectrum Noir Glitter pens on the image and die cut it. I paired it with wintry patterned paper, gold trimmed ribbon and pink and gold crystals.


For the last card, I used the ink blend on shimmer paper creation. I decided to use it as a background for Unity’s Simple Lovely Birdie kit. I picked up on a sale site, a 12 set Caran D’Ache Museum Aquarelle watercolor pencils. Giving the bird texture was important to me, so I thought it a perfect test of the pencils. I’m new at using watercolor pencils, but this set was so easy to work with... my only complaint, I wanted more colors! I had to resort to my Schmincke set to add a redder wash to the bird. I also ended up using pens to add definition. I fussy cut the bird and stenciled paper. I paired them with Simple Vintage Christmas paper from Simple Stories, Simon Says Stamp dies, fussy cut Pinecone, striped red twine and enamel crystals. Pretty busy design, but it’s festive.


Hope you enjoyed these ideas. Had fun combining products and using older stuff! Well, till next time, happy crafting!

Sunday, November 15, 2020

Another November SMAK Card

What a cute SMAK kit this month! Peace in Your Soul has a variety of interesting images that can be used for cards, canvases, journaling, etc.! As I’m still on my quest to build up my holiday card stash, I paired it with, a new to me brand, AB Studio paper. I believe Christmas Cheer was released last year. I was called to the loose cheerful free hand artistic style of this kit. Has a very stamped/gel print look to it. You’ll notice the paper I selected for this card has bits of red throughout.


So, I started this card by cutting out a corner of this green paper, which has the red stripes on the opposite side. I embossed the deer from the kit using the beautiful Pam Bray’s Buttered Pearls embossing powder. I then pulled out the trees from the SMAK kit and embossed those randomly around using Brutus Monroe’s Milky Way embossing powder... it looks black in the jar but turns out almost a thick chrome color with flecks of black in it. I made sure to wipe the powder off the deer before heat setting it. Finally, I pulled out the branch from the SMAK kit and embossed a few of those around the bottom and sides using a brown/gold Stampendous powder. 


Once I was done, I used a spatula and white gesso to create snow drifts around the deer by scraping the gesso over the card. I used a wet wipe to remove the gesso off and around the embossed bits. I also scraped the gesso with a plastic card to ensure a non smooth look. I then used my Kuretake Gansai Tambi watercolors to add green, brown and black colors to enhance the impression of a winter forest. I also added a little red in spots. Finally, I pulled out a Paper Rose stencil and added white gesso “snow” around the whole card. I used pens to add shadows around the trees and white some globs to the sides.


I embossed the sentiment from the kit using a green Zing! Embossing powder on a lighter green paper from the kit. Again, I added black, brown and red colors to the image. I fussy cut it and a striped background out. Once dried I covered the forest card with wax paper and die cut it. I had decided to make an A6 card so as to preserve most of the image. To fill the card, I cut 2 strips of the striped paper for the top and bottom. I distressed all the pieces and constructed the card. To complete it, I added 2 green and 1 red striped threads. 


Oh my, this was fun! I must admit, most people probably wouldn’t enjoy this type of card... but I love this style! I’ve always been obsessed with art and art galleries. My first stop in any new city... the art gallery! From impressionists to Raphaelites to abstract to realism, I enjoy the creativity in artists rendering views of this world in all styles! So, I hope this card gives the receiver, whoever that may be, a calm but festive holiday greeting!

Till next time, happy crafting!

Thursday, November 12, 2020

Simple Joys Holiday Card

My first Slim Line Card...wow! Took awhile, didn’t it? (Little slower to catch on!) I pulled out my Holiday scraps from last year and remembered I had cut up a Daphne’s Diary magazine last Christmas! I had fallen in love with many of the images and saved them for art journaling or whatever. I noticed many of the pieces were long and slender and I immediately thought, well, perhaps I could try the new fad with one of them. I also found a very pretty glitter paper from DCWV that I thought a perfect green for holiday cards. 

So, after pairing the pink scrap from the mag and the glitter paper, I looked for a good size image I could use from Unity. I decided to use an image and sentiment from the Elements of the Holiday KOTM from September of this year.

I began by stamping the image using Ink On 3’s Fadeout NoLine Coloring Detail ink on watercolor paper. I then watercolored the image using my Schmincke watercolors, trying to match colors to the papers. After I completed the watercolor, I turned to my Prismacolor pencils to enhance the colors. I then used a combo of pencils and pens to add a little more detail. Once satisfied it was good enough, I fussy cut out the poinsettia’s vase. Placing dots of glue on the image, I added old Sprinkle and Sparkle matching green glitter to the petals.


I then found a few useful dies I could use to help frame the card, a Wild Rose Studio corner piece and a mitten set with a pine branch from Penny Black. I embossed the sentiment using a very pretty Nuvo green powder. I framed it with a red patterned paper scrap I thought would match using a Memory Box frame die.


I created the card base using a metallic card stock from Neenah, I picked up on sale. Framed the pretty pink paper with the glitter paper. I’ll be pairing this with a pink Simon Says Stamp envelope, I picked up on sale as well! This was a fun change and I think this one will be given to a special family member!


Well, on to the next adventure... till next time, happy crafting!