Saturday, November 4, 2023

Friends of Unity November Blog Hop 2023

 It’s time for another Friends of Unity Blog Hop! Join in this fun challenge, check out the hop and comment for a chance to win sone Unity goodies! This month our challenge is:

Before, I continue on, wanted to remind you that giveaways are happening in this hop… just leave a comment for a chance to win a Unity goodie package! I’ll be giving away another package this month so be sure to comment on your fav card! And one last item, my winner from last month’s hop is 

Joan Howaniec

Just PM me your address, Joan, and I’ll send your package out!

So, this is a card type I rarely use, but I had fun challenging myself to create a few holiday cards! They turned out to be 2 of my favorite holiday cards that I’ve made so far this year! For the first card, I embraced a card style I picked up from watching many creative card makers. I first blended 3 different oxide inks onto a watercolor paper, Stormy Sky, Gathered Twigs and Iced Spruce. I then spattered water all over, let it sit for a minute then used a paper towel to lift off some of the pigment. 

I then pulled out a paper from Unity’s Festive Christmas paper pack and fussy cut out a bunch of pine cones. I stamped the branches from Winter Blessing randomly using Versafine Clair Pinecone. I white embossed berries from Trust in it Wings. I then gold embossed a script stamp from an old retired Unity Kit. Once the image was complete, I then used a die set to cut the panel to size and then cut a smaller panel out. Using the same die set, I cut a slightly larger panel out of a metallic gold paper. 

Knowing I needed some sentiments I found a very old full sheet Christmas set from Unity that had the sentiments I wanted. It is one stamp that I gold embossed onto brown card stock and then fussy cut out each word. To complete the card, I made a Kraft card base, and adhered the bottom panel. I then placed the fussy cut pine cones all over and used foam tape for the smaller panel. After adhering the sentiment strips, I called the card done!

For the next card, I wanted to play with the Jolly Ol Santa kit! First, I decided I wanted to create the illusion of a chimney. Using a Darice embossing folder and Kraft card stock, I started by smooshing oxide inks in red and rust colors over the raised brick side. Once embossed, I then used a watercolor brown pen to create shadows under the bricks. I then cut the chimney section out. I then used an embossing ink to randomly create snow.

I then stamped Santa and used watercolors and metallic pens on face and fur. I stamped him again on blue and red patterned paper and fussy cut out his clothes. I did use pens on his gloves and pocket. I then turned to the background.

I pulled out navy card stock that matched the colors, knowing I wanted to create a snowy night backdrop. I white embossed the pretty snowflakes from Flurry of Flakes twice. I then decided to hand create a sack. I drew it, cut it out, added pen and pencil shading and a little white embossed snow. I then slit an opening in the top to stuff Christmas goodies. I created 2 presents using Oh, Hey There, Winter. White embossed a candy cane chipboard and added a red paper back to it. I put the pieces into the bag and added a gingerbread button I had. Finally, for sentiments, I used the Santa Unity Kit and a Simon Says die. This one will go to a special 5 year old!

As you can see, I had fun playing and creating both of these cards! What a fun theme… try it! Remember to leave your comments for a chance at winning some goodies…and make sure you leave leave your name as well!

Now, check out the rest of the hop and all the wonderful creations! You can start at the top here:

Crystal’s Blog


Wednesday, November 1, 2023

{BYSHC} November Sketch Challenge #39

 It’s that time and getting closer to the holiday season! Time to start your holiday crafting, if you haven’t yet! Here’s the newest sketch challenge:


So, I played again this month with a few different styles! First off, I was inspired by a YouTube video by Dawn at WPlus9 Design. I created 2 backgrounds using Unity winter foliage stamps. Using watercolor paper, I would inked the stamp first (using complementary colored oxide inks), spritz it with water and then stamp it. I did this several times and while the ink was still wet, I added water to the paper with a wet paint brush and let the ink spread. I just love the soft look it creates.


I then gold embossed a Unity music sheet stamp over the design. 


Finally, I cut down the paper to size and added gold sticky metallic ribbons to complete the sketch! I used a gold card base and a Gina Marie die pine cone set and a pretty Spellbinders Stylish Merry Christmas die with vellum to complete the card! I also added a little sparkly glitter and gold crystals. Turned out pretty festive!


For my second card, I turned to a die set I picked up years ago from a craft magazine (never used). I die cut it on watercolor paper and used my watercolors and pens to add color to it. I die cut a few extra flowers from the set as well. I then cut down some random matching papers into the sketch design, added string, liquid drops and called it done! I didn’t have high expectations on this one, but I think it turned out pretty cute!


Let me know what you think! Join in the fun and add your holiday sketch cards in the Facebook group for a chance at winning some goodies! Thanks for stopping by and till next time, happy crafting!

Tuesday, October 24, 2023

Falling for the Holidays - Gina K and Couture Creations

 Wow, the week of Falling for the Holidays Linky Party is going by so fast! Join in the fun if you haven’t already! Enter your cards for a chance to win a giveaway from one of the sponsors of this party!

Created another card using stash I’ve never touched before! I’m on a mission to try out new things… so here goes! I pulled out an old red metallic paper and a discontinued Scrolled Tomentosa Couture Creation's die set. Then I went on the hunt for paper that would match! Found an old metallic striped paper I thought matched well and a cute cardinal design paper. Well… then I had to find a cardinal! And I found an older discontinued Gina K kit called Peace and Joy that I used for the image and sentiment. 

I watercolored the image using a cheap watercolor paper and an online picture of a cardinal. I ended up fussy cutting him out! I stamped the sentiment and added silver embossed leaves from a Unity Kit around the sentiment. After that it was just a matter of die cutting the pieces and adding sequins and red crystals.


Must admit, this is far from my usual style, but I’m having fun trying out new (but really old) stuff! Well, thanks for stopping by! 

Monday, October 23, 2023

Falling for the Holidays Unity Card

Here’s another card for the Falling for the Holidays Linky Party!


Watercolored these poinsettias from the All Kinds of Holiday membership kit. I added white and gold spatters to the image. Decided to back the watercolored image with textured gold paper. I used the same paper to back the gold embossed sentiment from an older Unity Kit. I ended up mounting everything on a square card base. I found an old paper rosette package that I’ve never used. Somehow, adding a few helped jazz up the card, along with a bow and sequins. 

Not my favorite card, but I think it’ll pass muster! Thanks for stopping by… hope you are also taking time out to “fall for the holidays”!

Sunday, October 22, 2023

Stamperia Home for the Holidays + Penny Black

 Day 3 with the Build Your Stash Holiday Cardmakers Falling for the Holidays Linky Party!

Today’s card was made with Stamperia’s Home for the Holidays paper collection and Penny Black’s Berry Branches die set!


I started by figuring out how wide the paper needed to be as juxtaposed with the fence die and cut down the selected paper. I then fussy cut out some ephemera pieces included in the papers. I then die cut out the fence and added shading and white spatters. I also spattered the paper. I then die cut out the brackets and bird with 2 colors of red papers. I added shading and low and highlights around the branches. I then assembled the pieces around the paper. I white embossed a sentiment from a random kit. I added the bird and sentiment with foam tape, backed the image with red paper, added foam strips and mounted that on another paper from the set. Finally, I pulled the card together on white card stock and called it done. Another fun card to assemble!


Having a lot of fun, playing with new dies, papers and stamp sets this week! Join in the fun and add your holiday cards for a chance at great prizes! Thanks for stopping by!

Saturday, October 21, 2023

Mistletoe and Holly, Christmas Cookies + Unity

 It’s time for my second Falling for the Holidays Linky Party entry! Check out all the participating vendors and prizes if you haven’t yet!

As you may know, I’m a patterned paper lover! I spied a beautiful paper in my Blue Fern Studio Mistletoe and Holly collection that I couldn’t resist! (Available on Etsy!) I pulled out my Tim Holtz Christmas Cookies set and one of my coffee stained papers and a white paper. I first created and glued all the cookie layers together and spattered those and the paper with white ink. I then cut out the paper and added a striped Washi tape and then TH velvet ribbon on one side. I created 2 tags, one using another Mintay paper pad and the other a Kraft tag. I stamped and white embossed the Unity sentiment from Unity’s Christmas Cookies. I cut down the tags to equal size, added lace and a white and candy striped bow. I also fussy cut another Mintay ephemera piece to add. I arranged, used foam tape and glued all pieces down and added it to a red card base.


I absolutely love how this card turned out, first, cause I’m a cookie fan and second, I just love how it all came together! Gosh that paper is beautiful… and the cookie dies go so well with it! 

Be sure to check out the Linky Party and all the great cards! Thanks for stopping by!


Friday, October 20, 2023

Falling for the Holidays Linky Party

 How fun, it’s time for another Build Your Stash Holiday Cards Linky party! Check out all the the details, participating vendors, and how to join in the fun here: https://byshcardmakers.blogspot.com/!
For my first card of the hop, I pulled out a pretty paper set, called Mistletoe and Holly from Blue Fern Studio. I then started pulling some dies: TH Sizzix, a SSS die, and various background dies. I also used a sentiment kit from SSS to stamp the Joy using red inks and holographic powder. Created a bit of a hodge podge card and ended up adding glitter and crystals to complete it. Will be playing some more with these papers as they are gorgeous!

Be sure to link up your holiday cards for a chance at one of the daily prizes! Check out all the other ways of winning and all the prizes and discounts being offered on the blog! Thanks for stopping by!

Saturday, October 7, 2023

Friends of Unity October Blog Hop

 Hello, fellow crafty friends - welcome to the spookiest season of the year and another blog hop! This month’s theme is…

As you, maybe, can tell from my intro, I’m a big fan of Halloween! Movies, decorations, crafting… I get into it all! So, I focused this month’s efforts on Halloween cards! But before I start, I wanted to let you know that I’ll be doing another giveaway this month! And, as promised last month, I wanted to congratulate - 

*** Sue D ***

on being last month’s winner of my September giveaway! Yay! Please PM me your address and I’ll be sure to send some Unity goodies your way!

Now, on the first card, I began by stamping the image from RIP onto greyscale sketch paper. I used pencils and white pen to add dimension and a little color to the image. I then cut the image down and stamped the cat from the Toil and Trouble on another sheet and fussy cut it out. I did use a white pen to add some highlights and watercolors for the pumpkin! I added corrugated cardboard for the background and a patterned paper. I made my own bottom layer inspired by Tim Holtz wallpaper paper using an old SMAK kit containing an eerie chandelier and other images and my coffee stained paper. I embossed the sentiment from Halloween Chatter with a grainy Seth Apter powder. Finally, I added a couple ephemera and called my haunted house done!


For the second card, I pulled out Bristol paper, liquid/dry shimmer inks and paints (Colorburst, Primary Elements, Perfect Pearls) and oxide inks to create a spooky background. I added paint spatters as a final touch. I then used a Sizzix Haunted Bare Tree embossing folder and used my Gansai Tambi watercolors and a metallic ink pen to color in the tree. I then embossed the witch from Unity’s August Phases membership kit, fussy cut her out and added silver highlights. I silver embossed and cut down a sentiment from the kit and part of the faces of the moon stamp. I added background papers, twine and Stampin Up puffy ephemera pieces.
 

So, when I was putting the pieces together I noticed the card base I chose was set up to be an easel card! Well, I couldn’t pass up the opportunity to use it, so I pulled another Halloween paper from my stash and stamped sentiments and an image from these kits: Hey booToil and Trouble, and Hallow Eve’s Tree!


I added a Recollections lenticular ephemera piece to create the easel effect!


As you can tell, I had fun this month! Hope you enjoyed these card ideas! Before you leave, a reminder to add a comment if you wish to be eligible for this month’s giveaway! Be sure to leave your name, as otherwise you show up as anonymous! I’ll announce winners in next month’s post! Now on to the rest of the hop… 

Next stop is:


And if you wish to start from the beginning, go here:

Sunday, October 1, 2023

{BYSHC} October Sketch Challenge 38 - A Super Holiday Sketch!

 Love, love, love this sketch so much that I couldn’t wait to create cards for it!


For the first card, I decided to use a Penny Black stamp called, Snow Trails. I started by stamping and clear embossing the image onto Bristol Paper. I had already pulled out to use as a background a pretty paper I picked up in a magazine. I ended up blending, over the image, 3 different oxide inks to mirror the colors in the paper. I splattered a white opaque ink to create the appearance of snow.

I cut the paper down into four pieces and glued the onto white paper. I cut that down and used foam tape to adhere to the background paper. I then stamped with purple and embossed a sentiment from Frantic Stampers Christmas Greeting Lines using a sparkly powder. A perfect complement to the image, I thought! I added a circle with a snowflake metal embellishment and white enamel dots to complete the card! Love how this one turned out!

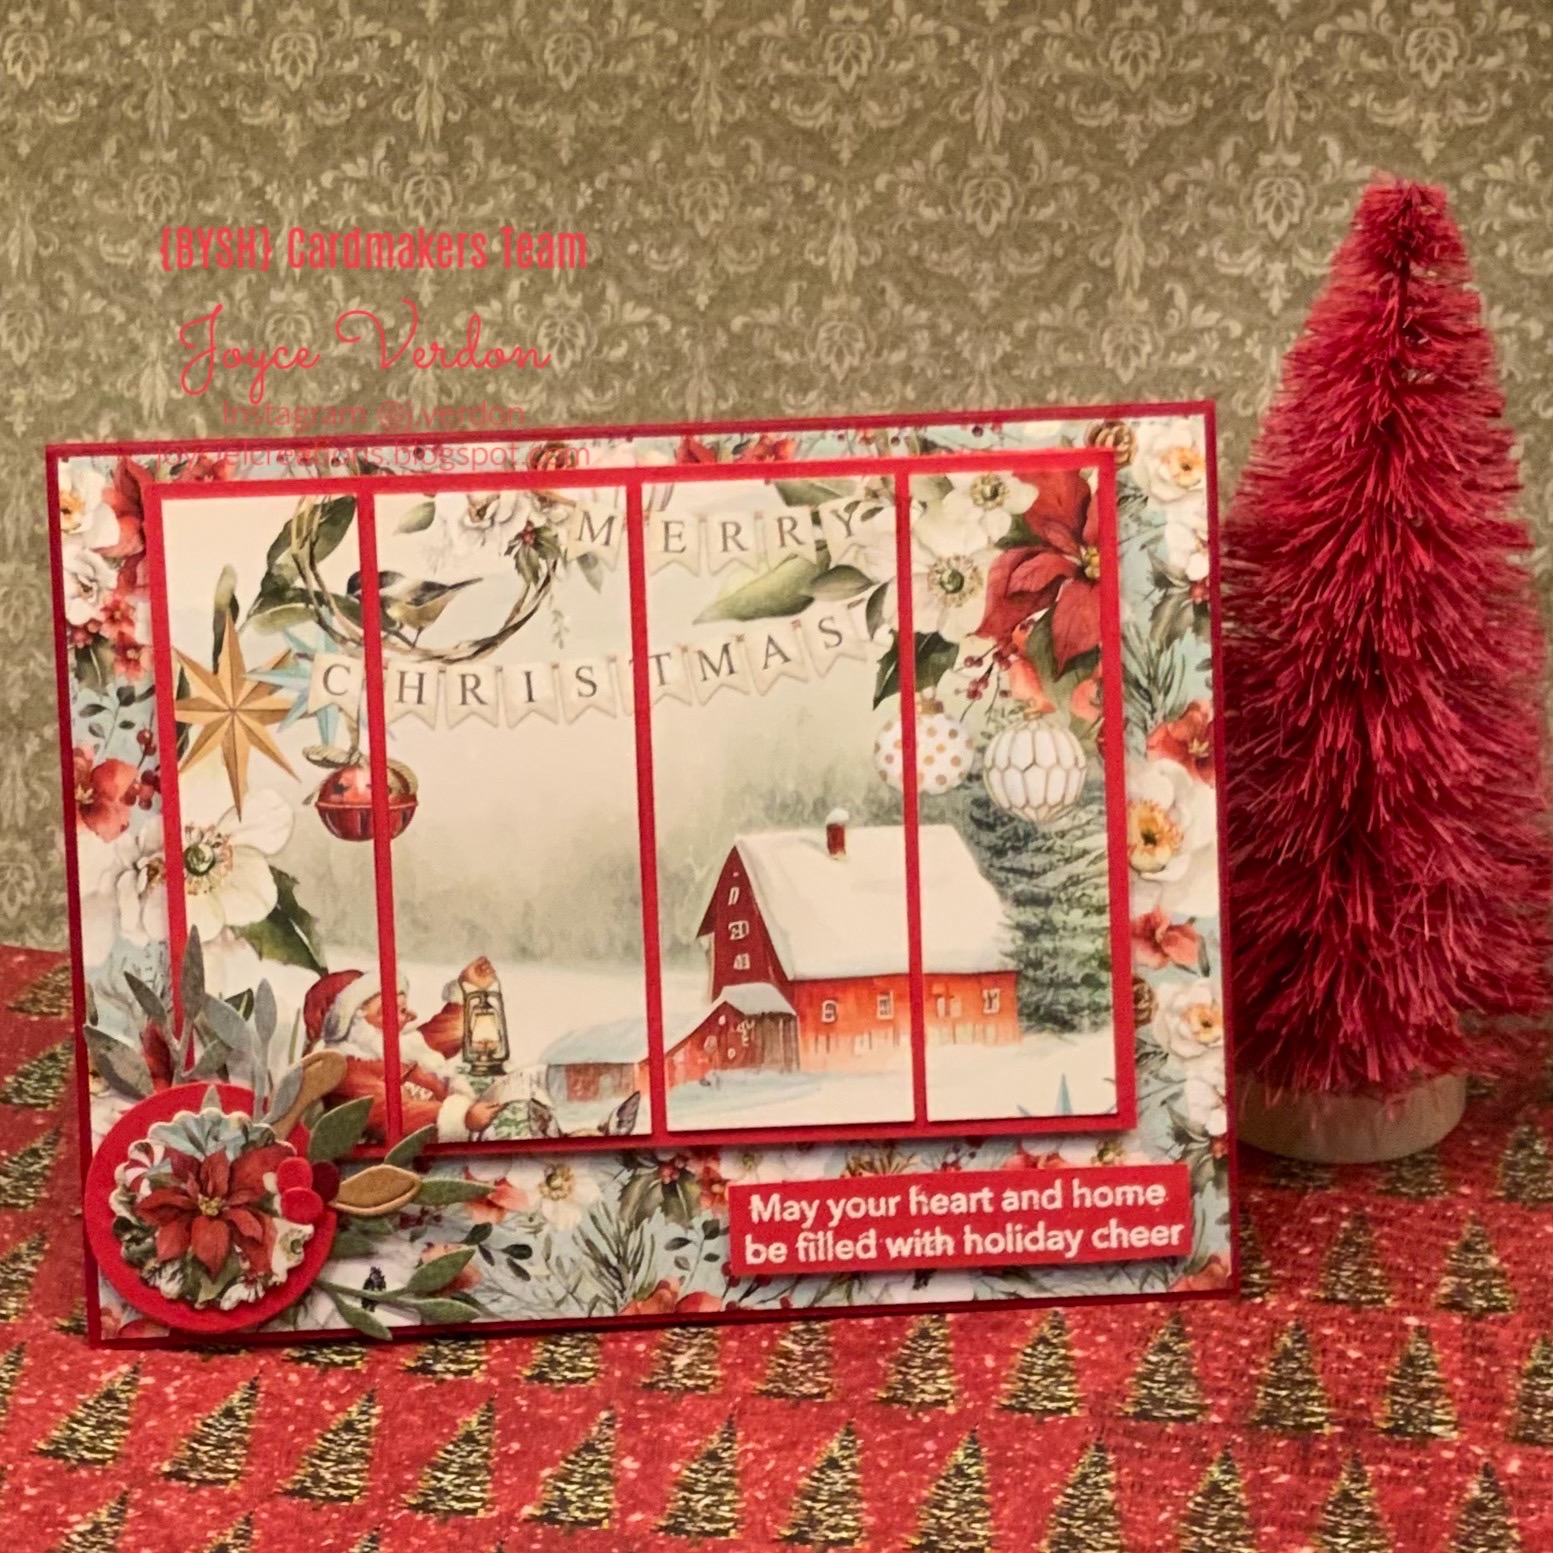
For the second card, I relied on beautiful Mintay papers from the White Christmas collection. This was so easy to pull together. I cut the paper down and mounted it on red paper. I used another sheet from the collection and mounted that on deeper red cardstock. I cut another circle from the collection to use as a circle embellishment and added color coordination sprigs and berries using a Sizzix die set. I added a white embossed sentiment from a SSS Holiday Cheer kit. Love how the paper’s Merry Christmas sentiment plainly appears. Because the papers are so beautiful, I felt no more embellishments were needed!

Note, there’s another Linky Party coming up October 20 - 27 with giveaways from a variety of vendors! Sketch or no sketch, all holiday cards and cardmakers are welcome!


Hope you have as much fun as I did using this cute sketch! Thanks for stopping by and happy crafting till next time!

Sunday, September 24, 2023

Picket Fence Halloween!

 Well, I decided I wanted to pair Picket Fence’s Triple Trouble stamp with a hauntingly beautiful Whimsy Stamps paper (their Halloween papers are the bomb)! After deciding on the perfect paper, I chose the pencils and pens I needed to color these large pumpkins. I first stamped the image using a distress oxide ink on a piece of sketch paper. I then started the coloring process, augmenting with pens as needed! 

Once finished coloring, I fussy cut the pumpkins out! I decided to use a Tim Holtz paper as the bottom layer cut down to fit a 5x7 card base. I then cut the Whimsy paper a little shorter so the pumpkins would hang over the bottom slightly and used Rick rack ribbon for the bottom edge. I embossed the sentiment on the paper before pulling it all together. To finish off the card, I added black enamel dots. 

So, full disclaimer…I didn’t notice till I was posting it that spelling was an issue… as usual when I read…I think I read every other word (speed reading mechanism, I guess)! So, please ignore that slight problem!

Thanks for stopping by…happy crafting till next time!


Wednesday, September 13, 2023

Unity Pumpkin Still Life Watercolor

 I had a hankering to watercolor these last 2 days! So I pulled out the image from Unity’s Change & Direction kit and stamped it on watercolor paper using Antique Linen ink. I then watercolored it with my Schminke’s paints over the last 2 days. Must say, I’m a bit rusty. After the first day’s effort…here’s the result.

I added a bit of pen to make edges crisper. Then, I used Unity’s Hope is Stronger  kit for the sentiment, splitting it up between the watercolored image and gold embossing the other half using brown paper. I die cut the paper and distilled the edges with vintage photo ink. I ended up backing it with patterned paper and mounting it on a brown card base. I added gold string and crystals to complete the card.


Beautiful image… I need to try it again some time! Thanks for stopping by… till next time, happy crafting!


Saturday, September 2, 2023

Friends of Unity September Blog Hop

 Hello… finally, I’m back for another Friends of Unity Blog Hop! It’s been a minute! I’ve been reenergized lately trying out some, new to me, techniques, I thought I’d share, given this month’s cue is:

First technique I used was inspired by Denise Love’s Abstract Art YouTube videos. She’s so engaging, informative and inspiring with her free style use of water based art supplies. Her no judgement - just fun approach is so freeing from my more own personal perfectionist traits, that I find it a perfect way to balance myself. I also think her art work style makes for great card backgrounds! So, with that introduction, here’s the 2 free hand sheets I produced using graphite pencils, Gansai Tambi watercolors, acrylic inks, palette knife, end of paint brush and Posca pens.

I ended up adding more marks using gold paint, metallic paste and stencils. I then cut down both sheets for card bases and looked for stamps. I decided I wanted to add some images but wanted to match colors in the abstract art pieces. So, I pulled out some oxide inks, watercolors and Primary Elements and Magicals shimmery pigments and created this coordinating paper.

I used these Unity stamps to create the following 2 cards: She and HeRemember to Breathe and Donna Downey’s She. I also used Gold embossing powder, watercolors, enamel dots, Washi tape, sequins, freebie ephemera, a brad and twine in the creation of these!


Recently, I’ve been playing with coffee staining papers after being inspired by others’ attempts at eco dying. I decided to try a new colorful leaf impression technique with marginally interesting results. Check out Cory’s Art Cafe cool video here demonstrating what I tried to emulate: https://youtu.be/QlL1fqJEfxg?si=6Ufuxaxp2_SAWYpH

I pulled together more leftover coffee, a modge podge of Lindy and Ranger sprays, alum water, 2 metal grids, some twine, copy and watercolor papers, and a bunch of leaf snippets. Here’s the somewhat interesting unveiling results (after a couple days of outside drying time). Tap on YouTube to see larger view of video!


Clearly, I have more studying to do - on best plants to use, best sprays (oxides not as useful, some colors not as pretty) and technique.

However, here’s the resulting cards I made inspired by a couple of the sheets I produced! I used Unity’s Fa La La La La kit and their Never Be Afraid kits for images, and Pumpkin Season for sentiments! I used leaf stencils on both of these, first with oxide inks, second with hand colored paste. I used a yellow cardstock for pumpkins and leaf in first card with enamel dots.


On this second card, I used another of the papers I created for the leaves, and combined with sequins and a tag.


Well, that’s it for techniques… now I’m tuckered out and time to try watercoloring again ;-)! Thanks for stopping by! Let me know if you’ve tried any of these techniques!

Be sure to leave a comment for a chance at winning some Unity goodies from my own personal stash! I’ll be announcing the winner next month in my October post! Now, on to the rest of the hop!

Next up in the hop is:


Or, you can start from the beginning here:

Friday, September 1, 2023

{BYSHC} Sketch Challenge 37 - Simon Says Stamps, Unity, Sizzix and Couture Creations

Had fun creating a couple cards the September’s {BYSHC} Sketch Challenge 37! Used a couple different techniques on this one! 

First card, I used the simple technique of letting Couture Creations’s Spirit Melodie pretty papers do the work! I combined them with sparkly embossing a Unity’s Cheerful Prancing sentiment! Also used a random star stamp on sentiment, ribbon and sequins. 

Next, I returned to my favorite technique, watercoloring. I used SSS’s Holiday Cheer stamp set to stamp the wreath image using Antique Linen. I wanted to match the colors in an old Recollections Holiday Spice paper that I wanted for the background. After watercoloring the image, I added metallic gold paint to the berries, some background spatter and copper embossed sentiment. I cut all the papers down and added a green embossed sentiment from the kit, sparkly copper paper and sequins, and distressed foliage using a Tim Holtz holiday thinlits die.

Really like the rustic feel of this one and as usual, I loved the watercoloring process!

Hope you like these 2 card samples using Sketch 37! Thanks for stopping by and till next time, happy crafting!