Today, I wanted to try my new Nuvo Mica Mist Spray, in Beryl Swirl, that I picked up recently. And I also wanted to try out Brutus Monroe’s Falling Snow Glitter Glaze. So, I grabbed a piece of watercolor paper and saturated it with the spray. It’s a very light color so to get good coverage I had to spray multiple times, drying in between. I grabbed a new Simon Says Stamp stencil, Mod Trees and the paste, taped down the paper and went to town. I was perplexed what to do with it after it was done. So, I turned to some of my crafty friends for suggestions and that spurred me on to pull out Unity’s Joy! Joy! Stamp.
I grabbed a cheap watercolor paper and stamped the images using InkOn 3 FadeOut Noline Coloring Detail ink. I watercolored the images loosely and used light and dark gray pens to provide a little definition. I also added Art C Clear Glitter ink to the white areas. I fussy cut the ornaments out and stamped and fussy cut the sentiment using black Versamark ink.
I found the perfect paper to back everything in the My Mind’s Eye Comfort and Joy pad. I pulled the card together with black paper backing and white ribbon.
I ended up loving this monochromatic look! What do you think? Thanks for stopping by and till next time, happy crafting!
Thursday, December 19, 2019
Altenew Starry Night Card
Created another Christmas card using Altenew’s Starry Night Kit and a retired Wild Rose Studio Painted Poinsettias paper (I do know where to get a pack if interested). This stamp was a little brain challenge for me, and being stubborn, I refused to look at how others and Altenew recommend it’s use.
I started by placing watercolor paper in the corner of my Misti to make sure I could reposition the paper back into the Misti. I clear embossed the stars and dots of the tree. I used a Picket Fence Studios blender brush to add Lucky Clover, Pine Needle and Mowed Lawn oxides to the paper. After gently wiping a baby wipe over the embossed areas, I dried the paper. Being uncertain about how dry the paper was, I clear embossed again. Finally, I embossed the dots and stars using a white crystal powder. I then die cut out the tree.
I picked a paper I thought would complement the image and die cut it. I found a scrap colored paper to match and die cut that. I stamped the sentiments in Festive Berries and Pine Needle inks and embossed them with a clear sparkly powder. I fussy cut them out and added a little complementary color to the edges. I white embossed a star using the same colored paper and die cut that.
To pull the A6 card together, I used foam tape on the tree and star. I added flexible glossy red stars to the tree, Stickles dots to the patterned paper, a ribbon, and, finally, sparkly Washi tape to the top and bottom of the card.
So, all in all, it’s a sparkly, non-traditional (in many ways - colors, style, sentiment) and, I think, fun card. Now, I’ll have to go see what I really should have done and what the experts did!
Thanks for stopping by! Merry Christmas to you and yours!
Wednesday, December 18, 2019
SSS Snowflake Background New Year’s Card
What do you do when you missed the Christmas deadline? New Year’s cards! So, I recently picked up this lovely SSS stamp from a couple years ago after seeing some beautiful designs with it! Outline Snowflakes is such a gorgeous stamp! I paired it with Primary Elements Pigment, Stargazer and Derwent Inktense pencils.
To start, I embossed the image on watercolor paper using Brutus Monroe’s White Alabaster powder. I then taped the paper down and spritzed it with water. I then sprinkled the primary elements powder all over and spritzed it again. I then dried the paper still taped down. I sprinkled more powder in areas lacking color and then spritzed it again. After drying, I spritzed over areas with a heavy pigment buildup again just to give a little more movement to the color and to break down the clusters. Once dried completely... front and back (having removed the tape), I brought out my watercolor pencils. I found 2 pencils matching the colors in the pigment and proceeded to add color to areas to bring definition to the edges of the snowflakes. I did this by wetting my brush, picking up color off the pencil tip and then brushing it on the paper. I was careful not to go overboard on this because I still wanted the white to show through.
I stamped and embossed sentiments from SSS Holiday Cheer and Inside Christmas Greetings using the Alabaster powder and a navy powder onto colored card stock. I die-cut and backed the image with one of the blue colored papers. Because I really wanted to show off this beautiful design, I used an A6 card from ParkLane. Finally, I added white string and assorted crystals in clear, light blue and silver.
Hope you enjoyed and liked this card! It was very fun to make and I’m pretty pleased with how it turned out! Till next time, happy crafting!
PS if you have not already provided your email address or clicked follow, I encourage you to do so! And a special thank you to those already following me! ❤️
Monday, December 16, 2019
Garden Party Challenge - Lesia Zgharda and Unity
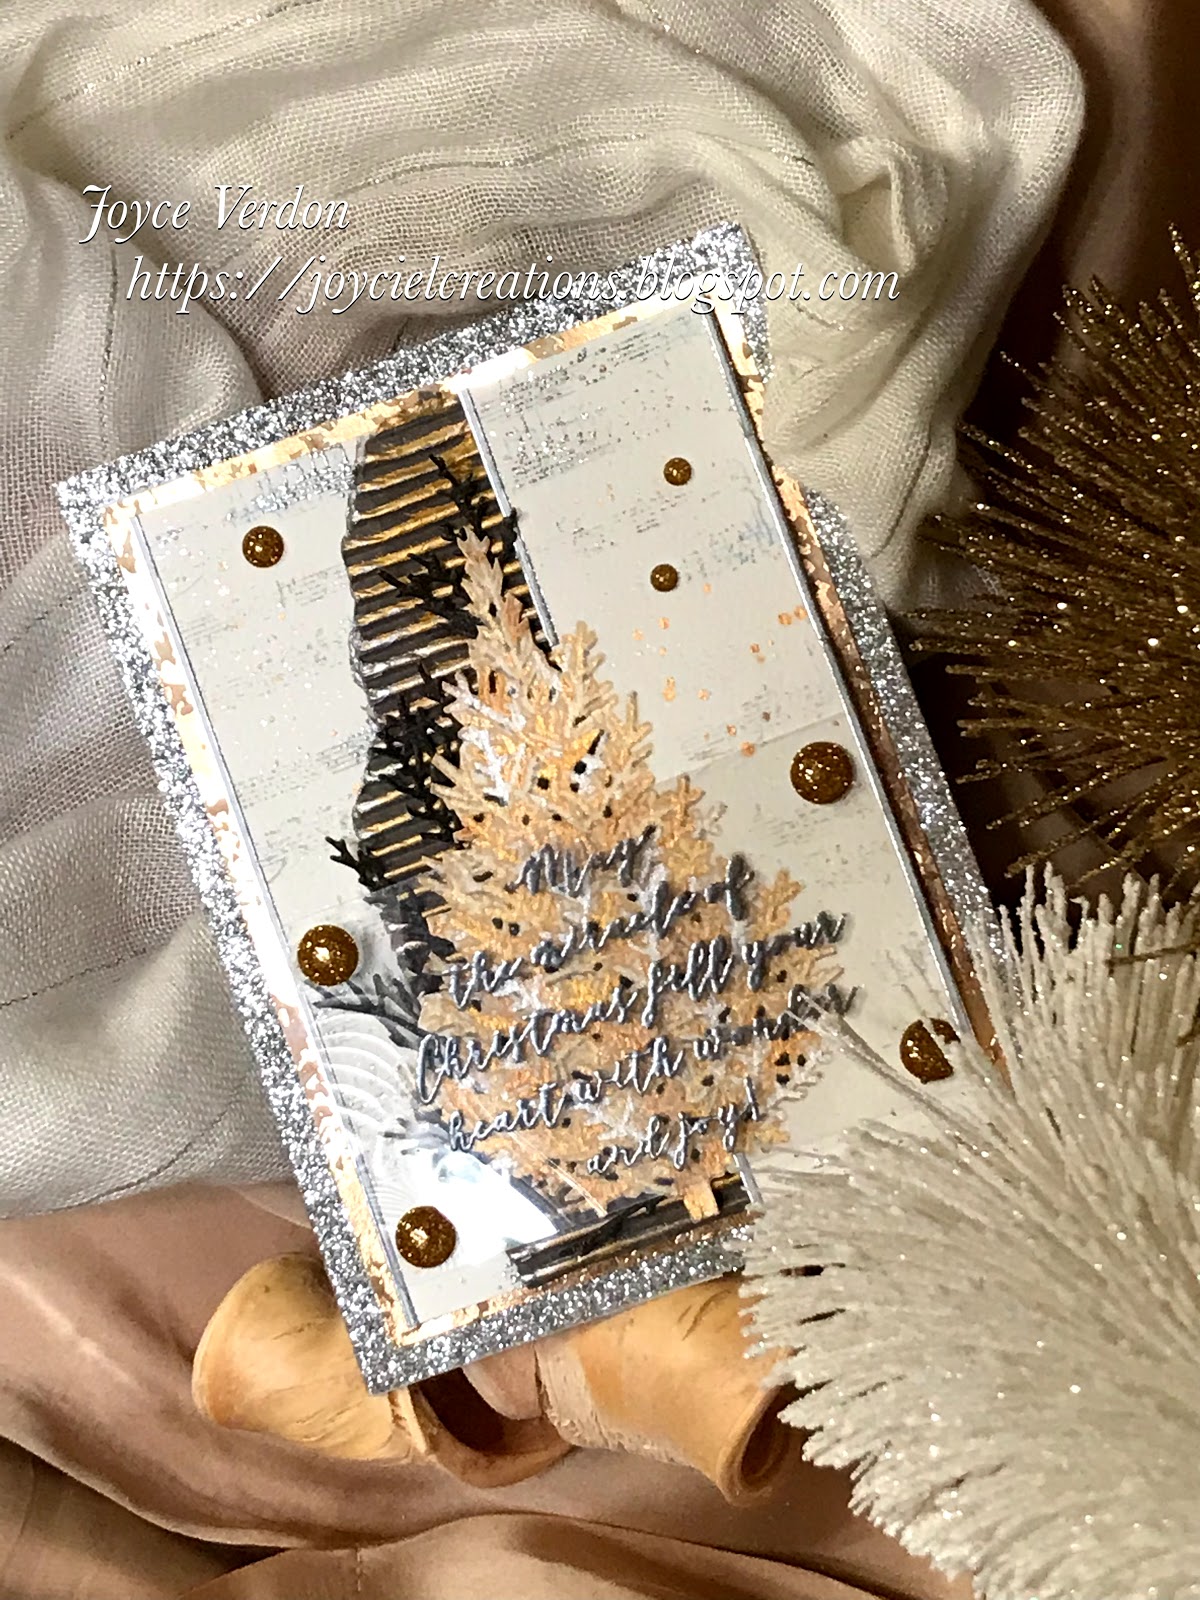
Been itching to try my hand at the latest Instagram Garden Party Challenge #12. I also wanted to try stamping my new Lesia Zgharda Tree Stamp, again, that I actually had shipped from Ukraine. Just love her unique coloring skills and stamps! The sentiments I used on both these cards were from this same line. Here’s my 1st attempt with this stamp!
I like it but it’s kinda wonky! I stamped the image in green archival ink and watercolored the branches using Gansai Tambi watercolors. I used an embossing pen and a Stampendous Shabby Pink powder that has gold, white and pink flecks in it and a retired patterned paper set.
For the Garden Party Challenge, I began by stamping the tree in Antique Linen Oxide ink. I then watercolored the branches this time using all the paints in the Kuretake Starry Colors set. I then spattered the darkest and lightest paints all over. Next, I masked off the tree and pulled out Unity’s Worn Music Kit, which matched perfectly in delicacy of stamp. I embossed parts of the stamp with a Sara Signature Glistening silver embossing powder and other parts just I just stamped with plain Pumice Stone Oxide ink. Next I added a little definition to the tree with light and dark gray pens.
I pulled out a corrugated paper pad and tore up a gray piece. I smeared TCW Champagne Gold paste over the top and added Brea Rease Metallic Silver paste on the sides. I then decided I wanted to fussy cut one side of the tree paper and layer the corrugated paper behind it. I added Love from Lizi silver strips on each vertical edge.
To put this together I first selected glittery card stock and cut a base layer using DCWV Mercury Glass paper. I made sure both pieces of the tree card were cut to size. I then glued on the left side, then the corrugated paper, and then used glue and foam strips to add the tree part. I used a Tim Holtz Holiday Greens die on a dark gray DCWV Twinkle Glints paper (sparkly) and fussy cut strips to put behind the tree. Finally, I embossed the sentiment on acetate using Gunmetal embossing powder and added gold sparkly dots.
I like how this one turned out better! Well, enough playing for today... happy crafting till next time!
PS I think at least 8 products I used here were from Tuesday Morning! What a deal!
Sunday, December 15, 2019
Growing in Unity Blog Hop
To wrap up my Growing In Unity (GIU) week, I’m joining in with the talented September and October Growing in Unity crafters to showcase one final card! And, of course, for me, it just had to be a Christmas card! Be sure to leave a comment before you go!
This time, I used the 9/19 KOTM, All Kinds of Holiday Love Kit. Inspired by the paper in the background (from a Love from Lizi Kit), I decided to try stamping the image on a dark blue coordinating paper. I used Gina K Designs white embossing powder. I then added a little white and gold watercolor using my Gansai Tambi watercolor set. I die cut the image, and backed it with another die cut of a paler shade of blue. I cut another strip of patterned paper for interest. I stamped the sentiment from the World of Christmas kit on more blue paper and embossed it with a Zinc gold embossing powder. To complete the card, I added a paper strip, a bow, gold crystals, and a Jen Hadfield wood chip that I had added colored chalk marker to and called the card done.
This is my version of a more masculine card. Thanks for stopping by! Don’t forget to leave a comment for a chance at one of 2 prize packs! Now on to the hop:
Tammy Huber Murphy
You are here >>> Joyce Verdon
Shanna Slater
Edelmira Rivera
Sharon Duff
Tried Julie Berg
Annie Sterner
Renee Moran
Saturday, December 7, 2019
Power Poppy Amaryllis
I love this beautiful bulb flower, if only I could grow it. A coworker of mine used to grow a dozen of these beauties on her office window ledge. I’d just stare in envy! Have tried in the past to give my husband one, to no avail (I finally had to put it down). So, instead I’m giving him a watercolored one!
Found this stamp, Amaryllis Bliss, by Power Poppy on their website on sale and had to have it. Loved painting it so much, I just picked up a few more of their cute sets on sale! They also have digital versions of their stamps!
I stamped the large image on Arches watercolor paper with Distress Antique Linen ink. I then stamped the branches 3 times around the image. I used my Schmincke watercolors to paint it. I also used a brown and a green pen to add definition to the edges. I used a gold pen and gold Perfect Pearls on the stamens. I spattered some paint around, added a little gold Perfect Pearls spatter and some gold pen dots.
I found a paper, from Craft Smith’s Say Freeze pad, I thought would complement the colors and a DCWV distressed gold paper I found in Tuesday Morning to dress up the card along with black Gina K paper. I embossed the sentiment from the kit using a Wow gold powder. I used a dark red 5x7 card base for this one. I finally added some dark red pearl dots and a black ribbon to complete the card.
Well, he finally gets his flower and I can check that one off the list. Till next time, happy crafting!
PS if you haven’t hopped along with the Friends of Unity, click back to my last post for a chance to win a member giveaway, or a big prize package from Unity!
Friends of Unity December Blog Hop
Wow, it’s been two years, since the Friends of Unity group was formed! To celebrate our anniversary, we have some very special guests blog hopping with us and one of the original members is joining in on the fun! Our theme this month is so fittingly, All is Calm!
This month, besides our usual member giveaways (PS I will be doing a giveaway this month), Angela Ryan-Magnuson/Unity Stamp Company have generously donated two grand prizes to be randomly awarded! As always, to be eligible for any of these, please leave comments on every post in the hop!
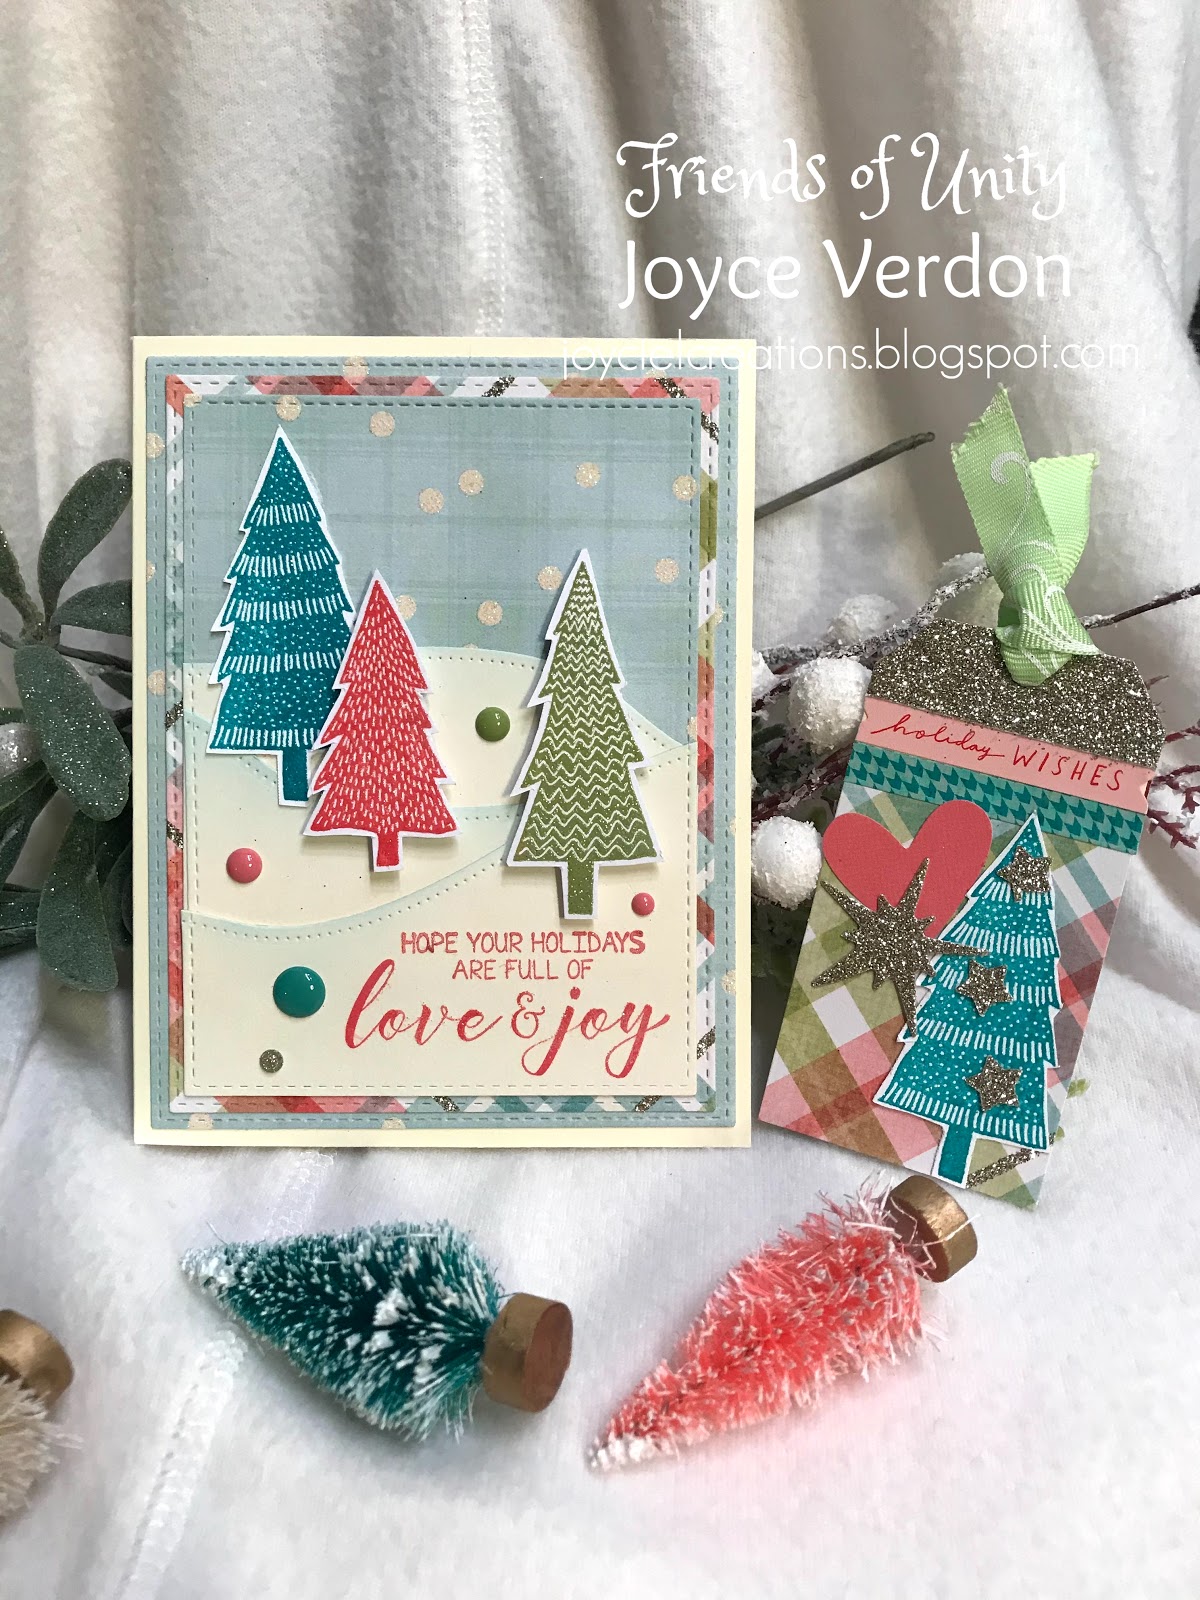
This month, besides using some specific Unity stamps, I also dug out beautiful paper I had picked up in an after Christmas sale from My Mind’s Eye, called Sugar Plum. In some cases, their images were complemented by stamps, and, in others, their pretty soft colors were inspiration. The Unity stamps used were: A Joyous Season, Your Season, November 2019 SMAK and Warmth of Christmas. Another common element I used and became very attached to is Brutus Monroe’s Vintage Sparkle Embossing Powder. It softens the colors it is used on so beautifully, which often was Distress Oxides.
So, yes, I had a field day/week creating these very different cards and quick tags! Hope you enjoy the variety and be sure to let me know your favorite! Enjoy browsing!
Reminder, be sure to leave a comment before moving on for a chance at a giveaway! Again, we are not formally sponsored by Unity, but, we love the company and variety and quality of stamps they offer so much, we love showcasing them monthly. Member giveaways come from our own stash.
On to the hop:
Crystal
Eileen
You are here... Joyce
Dawn B
Alaine
Kim
Amber
Jeanie
Dawn F
Robyn
Donna
Shannon
Jessica
Saturday, November 30, 2019
Unity’s Winter Apple Blossom Card
Decided I wanted to paint apples today... my favorite fruit to try to paint! So, I pulled out Unity’s Winter Apple Blossom kit designed by Gracielle.
I started by stamping the image using Antique Linen distress ink on Arches watercolor paper. I then colored the image using my Schmincke paints. I lightly used a pen to clean up edges and darken small areas. I clear embossed a sentiment from the kit and die cut the image. Finally, I spattered red, white and gold shimmer Gansai Tambi paints over the top.
I decided to use a yellow gold shimmer paper, a paper from Unity’s Holiday Tradition pack (another Graciellie Design), and a Gina K black paper to frame the image. I added gold sparkly crystals and red /gold Prima dots to complete the card.
Had fun painting this one. Reminder, if you enjoy my art adventures and haven’t signed up your email address or clicked follow, I encourage you to do so! And thanks again, for those of you that already have. Have a great rest of the weekend!
Friday, November 29, 2019
Gina K Peace and Joy Card
Was inspired by the paper behind this card to paint the cardinal in the Gina K Peace and Joy Kit. The paper is part of LDRS Creative Christmas Cottage collection. After trying a few things, I decided to paint the background by itself on cheap watercolor paper and add, after drying, Brea Reese Metallic White paste with the Snowfall stencil. I used my Schminke watercolors to color the background adding green paint in spots to hint of foliage.
I stamped the large image and then, back to back, the smaller foliage image twice on Arches Cold pressed paper. After watercoloring the image, I used pen and pencils to enhance the bird’s image. I fussy cut everything... although I ended up leaving white areas, not wanting to tear the soft watercolor paper. To fix that, I just watercolored the white areas and added some white Posca dots to make everything blend together. I cut the snowy background image down and backed it with a Gina K blue paper. I then mounted with foam dots the cardinal after cutting off one of the added images. I mounted the cut off foliage beside the cardinal.
To complete the card, I stamped the Joy sentiment from the kit on white scrap paper, die cut it and backed it with blue paper. I die cut the patterned paper, attached everything to a Gina K card and finished the card off with some enamel dots.
Well, that’s it for today! Hope you enjoy this card! Till next time, happy crafting!
Wednesday, November 27, 2019
Simon Say Stamp December Card Kit Card 1
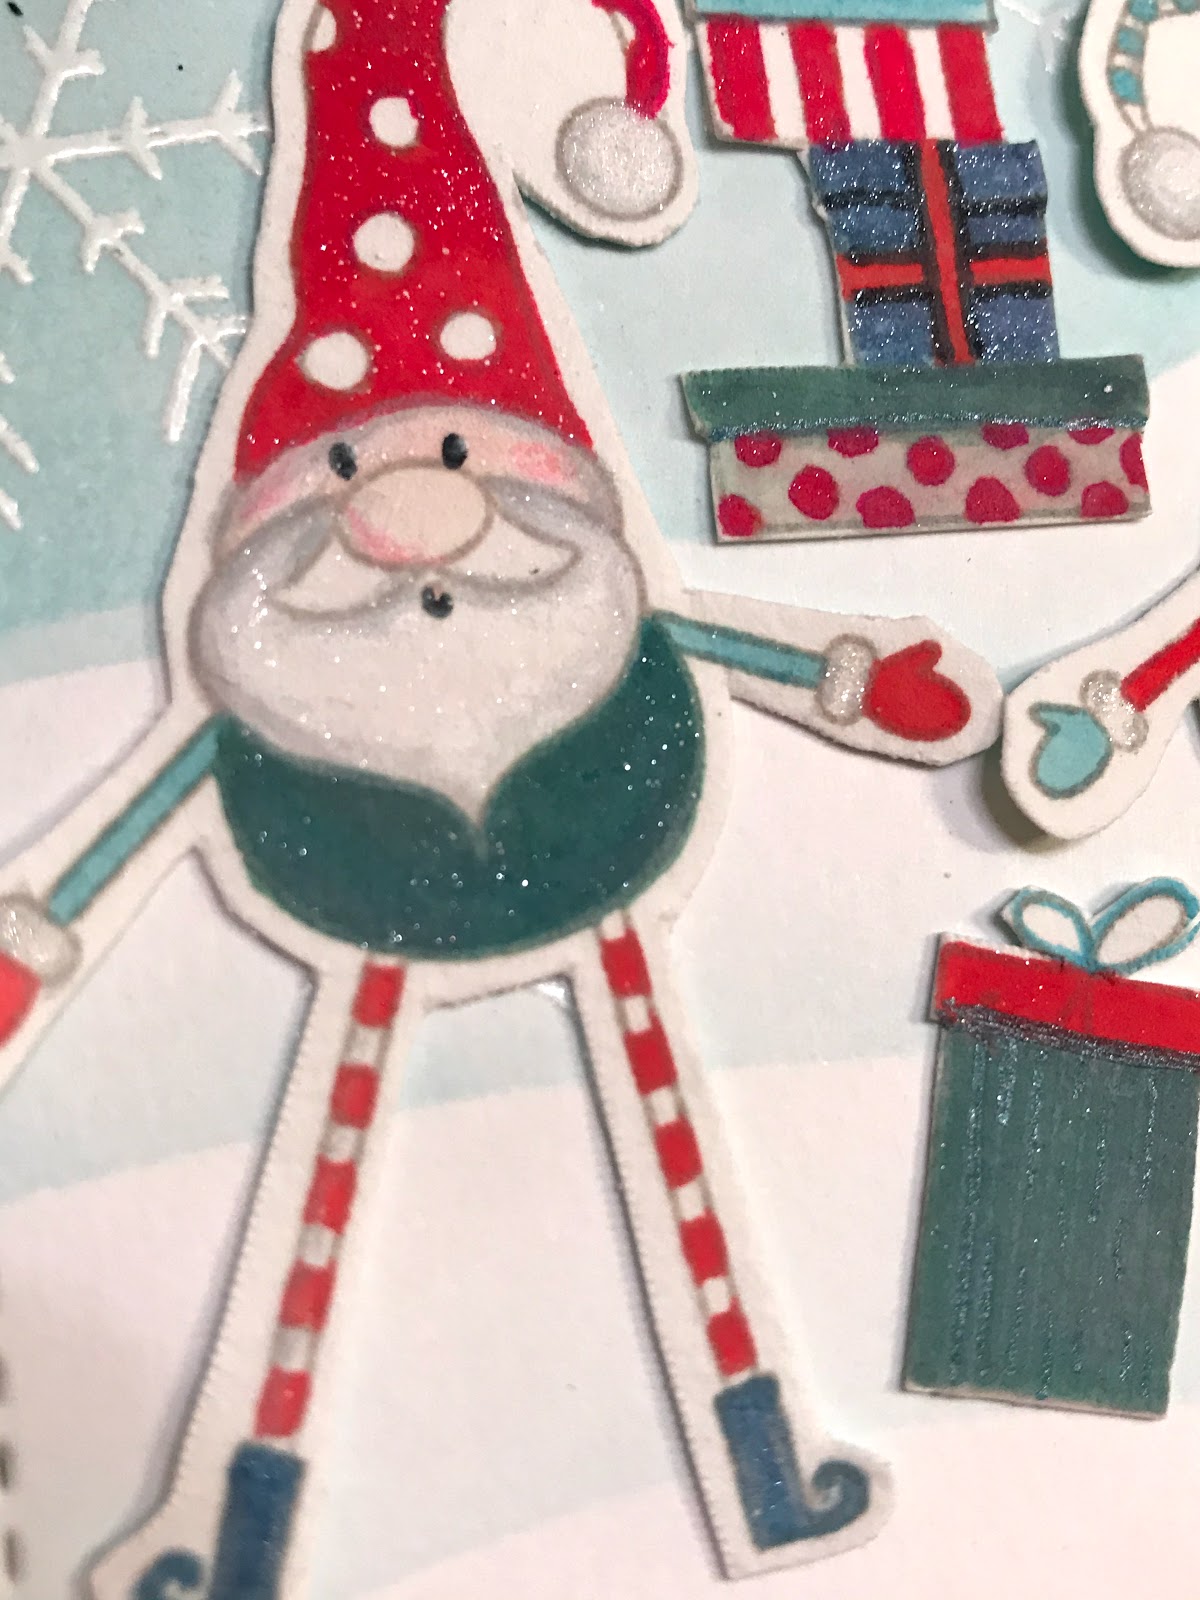
So, went a little wild with Simon Says Stamp! this year; just loved both Christmas kits. Here’s my first gnomie card using the December 2019 Kit - certainly not my style, but I fell in love with these cuties. I combined it with another new favorite of mine... Polkadoodles Ho Ho Gnome paper pad.
To begin, I pulled out a piece of Bristol paper and stamped and white embossed snowflakes across the top. I then cut up paper to create snow mounds and grabbed Tumbled Glass Distress ink and a Picket Fence brush and added ink to the top and layered snow mounds on the bottom. I then stamped the images on watercolor paper and painted them using distress inks to match the paper colors. I used a colored pencil for light shadows. I also added a layer of various Spectrum Noir Glitter inks in spots to make some parts sparkle. Finally, I used pens to create definition and fussy cut all the images.
To create the card, I used 2 papers from the pad and stamped the sentiment on white paper. Using a Gina K ink, I embossed the sentiment with Brutus Monroe’s Vintage Sparkle powder. Must admit, these were fun to color. Still learning how to place little images around a card, but this was a fun card to create. I can see why scenes are so popular! I decided to leave the card as is, as the embossed snowflakes are shiny, and the sparkly bits shine and that paper... GAH... I love it and done want to distract from it!
Well, enough for now... here’s hoping you have a great Thanksgiving and have fun Black Friday shopping (must admit, I’ve already begun!)! Till next time, happy crafting!
To create the card, I used 2 papers from the pad and stamped the sentiment on white paper. Using a Gina K ink, I embossed the sentiment with Brutus Monroe’s Vintage Sparkle powder. Must admit, these were fun to color. Still learning how to place little images around a card, but this was a fun card to create. I can see why scenes are so popular! I decided to leave the card as is, as the embossed snowflakes are shiny, and the sparkly bits shine and that paper... GAH... I love it and done want to distract from it!
Tuesday, November 26, 2019
Limited Edition Simon Says Stamp Kit Card 1
So, I stamped out a flower arrangement with Antique Linen Distress Ink on watercolor paper last night using the Magic of Christmas 2019 Card Kit stamp set. After stamping it, I masked the poinsettia off to create the arrangement. This morning, after pondering papers, I picked the colors to paint with based on one of the papers included in the kit. Once almost complete, and looking at the paper again, I decided to match some of the stylistic elements on the paper using white pen. I then fussy cut the arrangement out. I added some dots using embossed Snowflake Tinsel powder using stamps from the kit to give some silver sparkle to the arrangement.
I cut down the patterned paper and added more dots using an embossing pen. I attached the watercolored arrangement and silver ribbon. I then embossed a sentiment from the kit using a navy Simon Says Stamp embossing powder. I backed the sentiment and patterned paper with a silver glitter paper, added sequins and called this one done.
As usual with my cards, it’s unusual, but festive! (Maybe next card, I can shoot for something more professional and traditional.). Till next time, happy crafting!
Saturday, November 23, 2019
Picket Fence Christmas Poinsettia Star
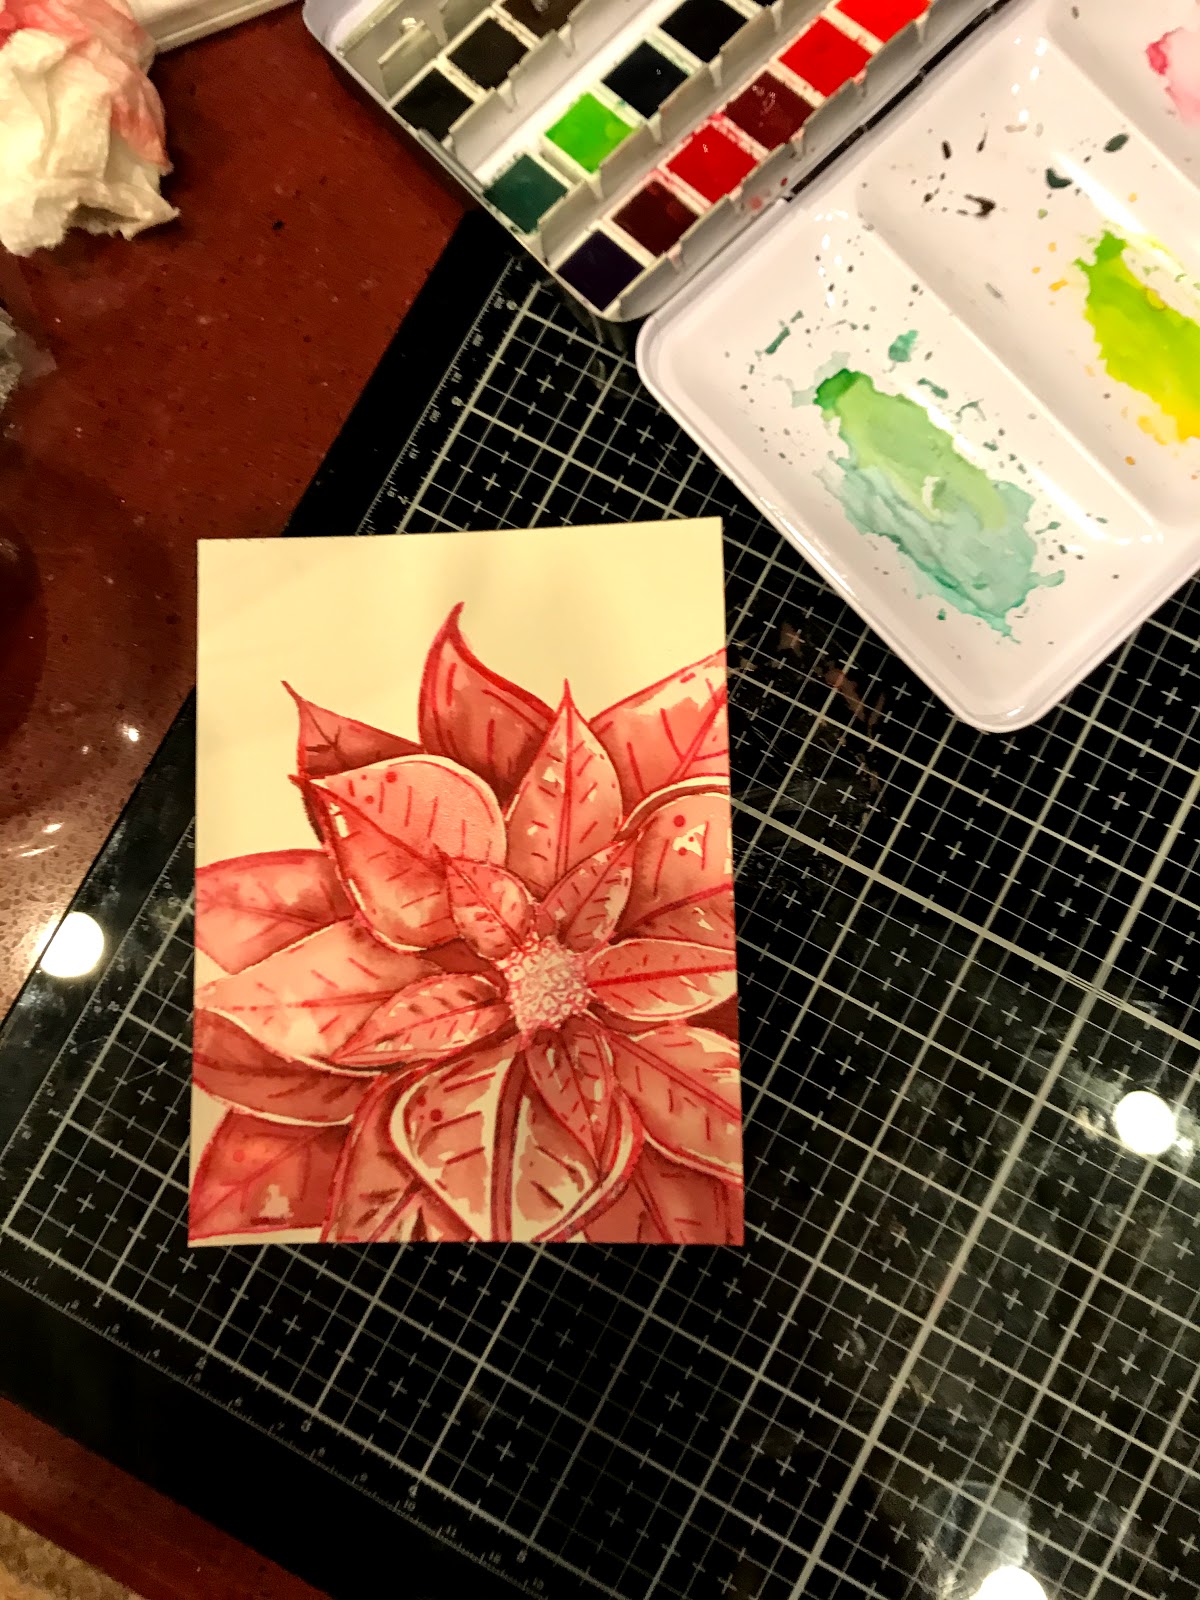
Been admiring this stamp and the beautiful work I’ve seen done with it by the pros... so, I finally broke down and bought the Picket Fence Studio Christmas Poinsettia Star stamp. It came today and after eyeing it all afternoon I finally couldn’t resist playing, creating a more impressionist painting was a real challenge for me!
I started by cutting down a piece of Arches Cold Pressed Watercolor paper. I stamped the poinsettia using a combo of Distress Tattered Rose, and some pink and red archival inks. I then used a large paint brush to create broad strokes and varied my technique between laying down a wet wash and just painting directly on the petals, always skipping petals to avoid bleed between. I used a combo of reds from my Schmincke paint set. As I worked around the petals, I ended up circling back several times on each petal. After I was finished, I turned to my Prismacolor pencils to add a little more color and a black pen for more definition. I then went back and added several layers of green paint, adding a darker color around the edges. I then pulled out the products in the pic below to add spatters all over, drying in between. Finally, I used Posca pens to add more dots and add gold and white dots to the flower center.
For a sentiment, I pulled out Gina K Designs lovely Christmas Script set as I believe this card is staying close to home! I stamped and white embossed the sentiment on black card stock and cut it down. I used an A6 sized white card base for this one and backed the image with black paper. To compete the card I just added black Prima crystals.
Hard to tell right now, as it’s late and I’ve been looking at it for several hours, but I think I did alright by this stamp. It was certainly a lot of fun to paint!
Thanks for stopping by, and, a reminder, if haven’t already and you’re interested in following my art journey, leave your email on the right or click follow. As always, I’m interested in feedback, especially critical advice. Feel free to comment.
Till next time, happy crafting!
Thursday, November 21, 2019
Last Gina K Ornament Card
Okay... I just HAD to fix my 3rd attempt with this ornament stamp from yesterday! Wasn’t going to post this, but I’m on a journey - still learning, and, hopefully, you don’t mind the ride along! So, here’s the Gina K Design kits I used on this one:
Merry and Bright
Christmas Script
Folk Art Snowflakes
Again, I had embossed the ornament, this time with a Ranger Aqua Tinsel powder. You can blame the colors of this eye opening (put your sunglasses on) card on the aqua colored card stock included in the Warm Winter Wishes Card Kit! I just had to pair the color with bright pink and to really lay it on thick... silver! So, how this came about was that, yesterday, I was distracted by the Folk Art Snowflake Kit... just gorgeous snowflakes, and had the bright idea to make my own background for the ornament. It became a hot mess after I used a few too many techniques. By that time, I had already added pink to the inside of the ornament using, again, a Fuchsia colored Spectrum Noir Glitter Pen.
So, today, I ripped everything apart and was left with the aqua card base and a fussy cut fuchsia/aqua ornament. Starting over, I pulled Bristol paper out and 2 inks, Turquoise Sea from Gina K and Picked Raspberry Distress Ink. I used Picket Fence Blending Brushes to add both colors to the paper. I then stamped the ornaments on the paper using both inks. Finally, I added water to my hands, clapped them over the paper, let the water beads sit a minute and then dropped a paper towel over the paper to absorb the residual water. This left lightened areas on the paper. I then took the stencil included in the card kit and taped it down over the paper. I pulled out a Brutus Monroe Silver Glitter Glaze and smeared it over the top of the stencil with a palette knife. Gave a perfect sparkle to the paper!
I decided to make a coordinating backing paper for the ornament and the sentiment. I ended up adding the Picked Raspberry ink to the shadier areas of the ornament to ensure the pink color in the ornament was in sync with the background. So, again, using the brushes, I blended the pink ink on to another paper. Wanting a little pattern to peak thru, I ended up stamping the sentiment on to the paper with the very pale gray Pumice Stone Distress Oxide ink and then darkening the edges of the paper. After stamping and embossing the sentiment with Ranger Silver powder, I decided to back that with a paper blended out with Turquoise Sea ink. But, first I blended some Turquoise Sea on to the white strip.
To pull this card together, I used a light white/silver glitter paper to back the components. For embellishments, I found my annoying Target iridescent snowflakes (they get everywhere), clear crystals, and silver ribbon and string from a Tim Holtz set. (Luckily, I have plenty of women to give cards to that may enjoy some bling!)
Okay, no more ornaments for awhile! The bee has left my bonnet and I can go on to other projects I have lined up! Yeah! So, till next time... happy crafting!
Subscribe to:
Posts (Atom)